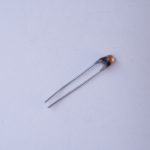
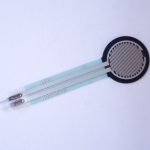
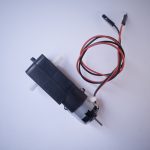
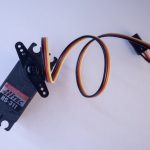
You’ll use various tools, electronic components, and construction materials in Intro to Physical Computing. This guide will to how to shop for them.
Parts Available At ITP
Students in Intro to Physical Computing and IMA Creative Computing will receive a kit of parts the following parts in class from their instructors:
- Arduino Nano 33 IoT
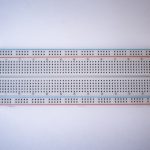
- 830-point solderless breadboard
- Jumper wire kit
- USB micro cable
- Force sensing resistors (FSRs), Qty. 3
- 4-paks of multicolor buttons (tactile switches), Qty. 2
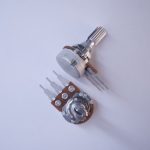
- 10 -kilohm potentiometers, Qty. 3
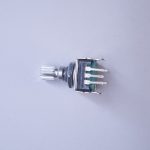
- Rotary encoders, Qty. 2
- phototransistors, Qty. 6
- RC servo motor and mounting components
- right angle gear motor
- TB6612FNG motor driver board
- 3″ diameter speaker, 4 ohm, 3W
- VL53L0X time of flight distance sensor
The parts in the kit are your major components for the lab exercises in class. You will also need some components which you can find in the shop’s component stock, including resistors, LEDs, transistors, voltage regulators, capacitors, wire, and more. You can also find tools in the shop which you can use on the floor.
When you begin to work on your larger projects, such as the midterm and final, you will likely need to buy parts for yourself, depending on what you decide to build.
Shop Component Stock
The ITP/IMA shop stocks a number of consumable electronics components. This includes potentiometers, pushbuttons, phototransistors, resistors, capacitors, voltage regulators. These are kept in the bin racks in the shop, and are available for students to take as needed. Please take only what you need for a given class exercise, as stock re-supply is not fast, and we want to make sure everyone has the parts they need. Please inform shop staff if a given part is out of stock. It is possible to do all of the lab exercises in the intro classes with parts we have in in your kit, in shop stock, or in checkout.
Beyond this, students are expected to supply electronics parts for their projects. It’s not possible to anticipate every possible component that every project might need. However, we try to stock items to help you try things before you buy. Always consult with your instructors, shop staff, and research residents on how to choose the most appropriate and economical parts for your projects.
Check-out Components
The shop also has parts available for check-out with an NYU ID, just like the equipment room. These include microcontrollers, advanced sensors, and items which may be specific to various advanced classes. These must be returned after use, just like equipment room stock. You can check out components for up to two weeks at a time.
For other parts, talk to your instructors and the resident researchers. If you’re considering a part for your project, they can advise whether it’s the right part for the job, and if there’s one available for loan on the floor, they can procure it.
When You’re Done with Components
Many students at ITP/IMA don’t continue with electronics beyond the intro classes. If you have components in good condition that you’re no longer going to use, feel free to give them to shop staff or your instructors. We’ll do our best to keep components in use and out of landfills.
Shopping for Electronic Components
The intro kits and shop component stock can supply what you will need to complete the assigned lab exercises. For your project assignments, however, you may need a wider range of sensors and/or actuators.
Learning to shop for parts is a useful electronics skill, so we’ve assembled a number of Bills of Materials on Octopart to get you started. Octopart is a site that collects part data from multiple distributors around the world. They list several vendors from our suppliers list for each part. You may find this video about online electronics vendors and this video on how to use Octopart helpful as well.
We realize students will be shopping in many different regions of the world, and Octopart lists alternative vendors that supply as many regions as possible. Mouser, Digikey, and Arrow, all on Octopart, all have outlets in China, for example; Newark, Farnell all cover Europe and the Americas well; RS Components covers the Americas, Europe, and multiple countries in Africa. We have also put together a list of similar parts on Taobao as well. With these lists, you should be able to assemble the parts you need for the labs at the best price possible. Check each vendor to see what they charge to ship to where they are. If you know of a local vendor, feel free to use them instead.
There are a few lists on Octopart that you should pay attention to. The basic parts list and the tool list will get you through most of the labs in the class. For the last two labs in the semester, and probably for your last two project assignments, you’ll need to pick from the Sensor list and the Motor or Lighting lists.
- ITP Pcomp Basic Parts – includes the parts you’ll need for the labs in most of the semester, including the breadboard and processor and components available in the shop component stock. This list is generally 100% in stock on Digikey, one of our most used vendors, as well.
- ITP Tool List 2020 – The shop has hand tools available for students’ use, but if you want your own tools, this list includes basic hand tools you’ll need if you don’t already have them. Lists several options for each.
Advanced lists for later in the semester:
- ITP Pcomp Sensor List – includes more advanced sensors. These are the kinds of sensors covered in the synchronous serial labs. This list will also be handy in later project assignments, when you’re looking for sensors specific to your project’s needs.
- ITP Pcomp Motor List – includes parts for motor and mechanical projects, used in the motors and high current lab later in the semester. May be useful in some of your project assignments as well.
- ITP Pcomp Lighting List – includes parts for LED lighting control, used in the motors and high current lab later in the semester. May be useful in some of your project assignments as well.
Can I Get a Starter Kit?
There are many Arduino starter kits on the market, but at the moment, none of them contain all the parts we recommend for this class. In particular, there is no kit for the Nano 33 IoT microcontroller yet. You can get a kit if you prefer, but you will likely have to shop for additional parts as well.
Components in Detail
The various types of parts you’ll find in the lists, and that you’ll need for the class, are detailed below.
Microcontroller
Used in most every week’s lab.
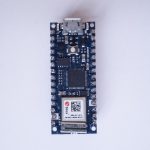
We’ll be working with the Arduino microcontroller platform. Recently we have switched to the Nano 33 IoT as our standard model. Most of the lab exercises are also compatible with the Arduino Uno, but the Nano 33 IoT offers some useful features that the Uno lacks, such as:
- 32-bit processor
- WiFi and Bluetooth LE
- USB-native, so ability to use Keyboard, Mouse, and MIDIUSB libraries
- Real-Time Clock
- Onboard accelerometer/gyrometer
- Ability to use Scheduler library for multiple loops
We have a guide to picking a microcontroller that may be helpful for more information. You can use any Arduino-compatible variant that you choose, and we’ll do our best to support you, but we can’t promise to know every variant on the market, there are several of dubious quality.
USB Cable
Used in most every week’s lab.
You’ll need a USB cable to connect your computer to your microcontroller as well. You can probably use one that you already have. The Nano 33 IoT has a USB Micro-B connector.
Resistors
Used in most every week’s lab.
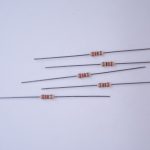
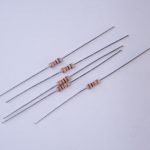
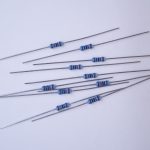
You’ll use resistors for many projects. The most common type you’ll need are 1/4 watt through-hole resistors in the values 220 ohm, 1 kilohm, and 10 kilohm. Occasionally, you might need other values as well, but most projects in this class can be done with combinations of those values. Resistors are usually bought in bulk, but there are also some handy resistor kits that contain samples of many different resistance values. A kit like this one from Sparkfun can last for a couple years of projects for the average electronics hobbyist.
Breadboards
Used in most every week’s lab.
Most of your projects will be built on a solderless breadboard. There’s a lab to get you familiar with how they work. There are a few different models of these. The most common for this class are 16 x 54mm with 830 tie points and two vertical bus rows on either side. The smaller 84 x 54mm version with 400 tie points is also popular.
There are well-made breadboards, and there are cheap ones. Cheap ones seem like a good deal, but they can be difficult to use and easy to break components on. This chart compares different models of breadboards. Our favorites are from Jameco ValuePro, Twin Industries, and Bud Industries.
Breadboards can be reused for each lab, but sometimes it’s handy to have a spare.
For more permanent projects, you can use a printed circuit board to hold your components together. This requires you to solder each wire and component to the board, and cannot be disassembled, so it’s really only used for finished devices. There are some perma-proto boards with the same layout as a standard solderless breadboard that make transferring your circuit easy.
Wires
Used in most every week’s lab.
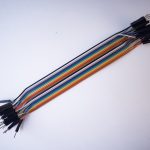
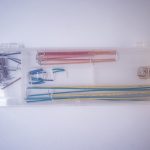
You’ll use a lot of wires to connect components on your breadboards. The breadboards support 22 AWG thickness wires. Some people prefer pre-cut solid core jumper wires, because they can lay flat on the breadboard and they insert into the board firmly. Others prefer flexible jumper wires because they’re easier to add and remove, so you can be spontaneous, but they make for a messier project, and are easy to accidentally pull out.
Another option is to order rolls of 22AWG solid core wire and custom cut your own jumper wires for each project. This is more time-consuming, but makes for a tidy and manageable board. Sometimes you can find multi-pack rolls of this wire in different colors like this one or this one. Here’s a wire options comparison list.
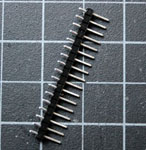
You might need some header pins as well, to solder on to wires and components. These are metal pins, spaced 0.1″ (2.54mm) apart, held together with plastic spacers.
Basic Input And Output Components
Used in most every week’s lab.
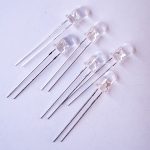
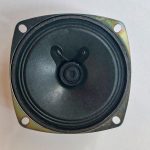
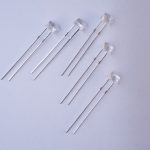
For most of the labs and many projects, you’ll use pushbuttons, switches, variable resistors called potentiometers, light emitting diodes (LEDs), speakers and/or piezo buzzers, and perhaps some variable resistors like force-sensing resistors (FSRs) or force-sensing potentiometers (FSPs). These are common and inexpensive components available from most electronic vendors. Make sure that the parts you get can be inserted into a solderless breadboard, or you will have to solder wires onto them.
Advanced Sensors
Used in labs around mid-semester; probably in later projects as well. Check shop check-out components for a variety of sensors.
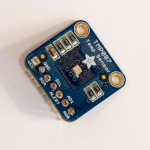
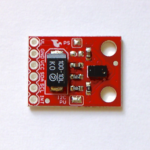

There are many advanced sensors that are very useful in this class. The Nano 33 IoT has one built-in, an inertial measurement unit (IMU) that can measure tilt and rotation. There are light sensors, distance sensors, rotation sensors, environmental sensors, air pressure sensors, and many more. Most of these are sold on breakout boards that have holes for pins that can be fitted to a solderless breadboard. You’ll need to solder on header pins for most of them, and you’ll need to learn their communications protocols. You’ll learn about these in labs in the middle of the semester. There’s an Octopart Bill of Materials that lists several of these. You’ll need to pick one for the synchronous serial lab and by then you’ll have an idea which one might also work well for you in a project. Hold off on getting these until mid-semester.
Motors and Motor Accessories
Used in labs later in semester; possibly in later projects as well.
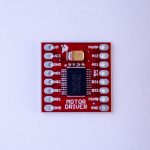
There are labs on controlling servomotors, DC motors, and stepper motors in this class, and the parts BOM lists a few we recommend. However, there is not a mechanics module to this class and the motor lab is later in the semester, so if you’re not interested in mechanical motion, you may not need motor parts. Hold off on getting these until mid-semester.
Power Supply and Regulation
Used in many projects. Regulators and jacks available in the shop component stock.
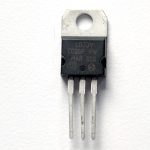
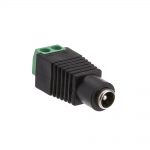
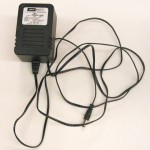
Though you can power most Arduino sensor projects from the USB port of your computer, you may want to make a project that doesn’t attach to your computer. For this you’ll need a power supply. You may have one at home already. If you don’t have one, you can wait until you are working on a project that needs it. You probably won’t need one in the first couple of weeks of the semester.
If your device can run on less than 500 milliamps and 5 or 3.3 volts, you can power it from a USB cable via your Arduino, and a USB AC to DC power adapter like the ones that you use to charge your phone can run the project .
For some projects, you may need more than a v-volt supply. A 12-Volt AC to DC converter that can supply 1000 or more milliamps is a good general supply. Many will already have a 2.1mm x 5.5mm DC barrel jack connector. There are DC barrel jack and plug adapters in the parts BOM that can connect to this type of connector.
Electronics Tool Kit
Used every week.
The shop stocks a full set of electronics tools which you can use. If you plan to do more electronics on your own, there are a few tools you should pick up for yourself, so you’ve always got a reliable set handy. These are common tools, and you can find them at any electronics retailer or hardware store. The ITP Tool List 2020 includes basic hand tools you’ll need if you don’t already have them. It lists several options for each, for comparison.
The electrical tools and hand tools below are ones you’ll use most every week and every project. You probably won’t need a soldering iron and soldering hardware right away, but you’ll use it frequently, from about week 2 or 3. The rest of the tools are less critical, or optional.
Electrical Tools
Used every week. Available for use in the shop.
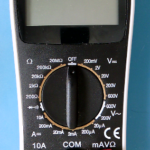
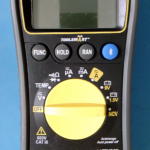
- Digital Multimeter – You don’t need a fancy multimeter. One that measures voltage, current, continuity, and resistance will do the job.
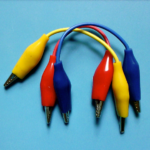
- Alligator Test Leads – these are wires with clips on the end, handy for when you’ve got components to test that can’t fit in a breadboard and that you don’t want to solder yet.
Hand Tools
Used every week. Available for use in the shop.
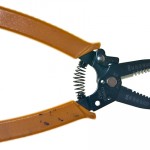
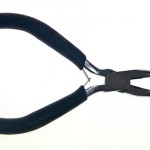
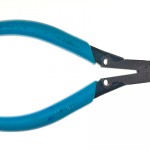
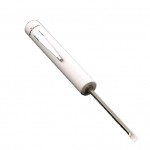

You’ll use hand tools frequently in this class. You may have some of these already.
- Wire Strippers, 20-30AWG – These allow you to strip the insulation from wires. The most common wire you’ll use is 22AWG thickness, so use a stripper that can strip wires in that range.
- Needle Nose Pliers – These are essential, you’ll use them a lot for pulling wires, bending wires, and picking up components.
- Diagonal cutters – These are used for cutting wires and small bits of metal.
- Mini Screwdriver – Get a mini screwdriver that has both flat and Philips heads. Many devices have small screws that you need to take out.
- Hobby knife -Many people have something like this at home already, but if not, consider getting one. They are effective for cutting cardboard, mat board, and other soft materials.
Personal Protective Equipment (PPE)
Used occasionally. Available for use in the shop.
- Safety Glasses – You should wear safety glasses when soldering or working with power tools.
- Fume Extractor – for soldering, it’s a good idea to get a fume extractor, which is a fan and a charcoal filter that pulls the solder smoke away so you don’t breathe it in. They can be expensive, however. The one in the BOM is less expensive and aimed at hobbyists.
Soldering Hardware
Used occasionally. Available for use in the shop.
If you don’t have access to the shop, you might need a set of soldering tools., mostly for soldering header pins on breakout boards.
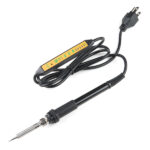
- Soldering Iron – The most common soldering you’ll do is breakout boards and some connectors. You don’t need a fancy iron, but a relatively fine tip is useful.
- Extra soldering tip – make sure you get one that matches your iron
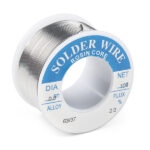
- Solder – 18-22 AWG lead-free is the recommended choice for this class.
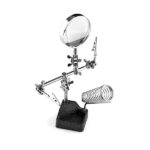
- Third Hand – You’ll need something to hold the parts that you want to solder while you’re soldering, and this is the most basic tool for the job.
- Solder Wick. – braided copper that you can use to wick solder away when you make a mistake. Solder and solder wick are expendable, you can only use them once, so you may need more if you solder frequently.
- Solder Vacuum or Desoldering tool – A desoldering tool is another way to remove solder. You probably don’t need both this and solder wick as a beginner. Nice to have, but not essential.
- Insulated Silicone Soldering Mat – This keeps your tabletop clean, and it’s also a good insulation so you avoid static discharge on the parts you’re working with. Nice to have, but not essential.
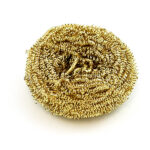
- Brass Sponge – A tool for cleaning the tip of the iron. Don’t use a wet sponge, as it can rust your tip. Nice to have, but not essential.
Expendables
Optional
These are some materials you might find convenient in some projects.
- Heat shrink tube – Shrinks down on a wire to make an insulator. Useful to tidy up projects.
- Electrical tape – a quick insulating material
- Copper tape – can be handy for making your own switches
Construction Materials
You’ll go through a lot of construction materials in this class. To save money and save the environment, consider reusing materials. Cardboard boxes and used plastic food containers can make great housings for electronic prototypes. Paper mat board and cardboard can make great housings and control surfaces as well. You will save yourself some money in the process if you do this. You’re not expected to make polished, production-ready devices in this class, so don’t waste time and money on high-end plastics and metals when you don’t have to.
For more information on parts, see the Suppliers page.
