Always On, Always Connected Week 1 - Introduction to PhoneGap
WebKit
Apple, when developing a browser for iOS decided to leverage an open source project, KHTML the HTML layout engine for Konqueror and KDE (a Linux GUI and suite of software) to create WebKit, the core of the iOS browser. Additionally, WebKit is exposed as a library and GUI widget to allow other applications on the OS to incorporate it's functionality within.
This means that iOS applications can render web pages and render them just as well as Safari, the built-in browser.
Since Apple based this all on an open source project, they were compelled to make their code open source as well; available online at http://www.webkit.org
This enabled Google to incorporate it in Chrome and Android and many others to do the same: http://trac.webkit.org/wiki/Applications%20using%20WebKit
Intro to PhoneGap
Nitobi, a small company located in Vancouver developed the open source PhoneGap platform as a means to create cross platform applications based on rendering HTML and executing JavaScript inside of a WebKit component.
Nitobi was purchased by Adobe in 2011 and the PhoneGap project split into two, first the product that is continuing to be developed by and within Adobe which integrates into Adobe's other products; PhoneGap and a second version; also open source being hosted by the Apache Foundation called Cordova. Cordova can be thought of as the core open source project with PhoneGap adding additional capabilities and integrations. More about that here
Essentially, PhoneGap bridges the gap between web applications and native applications by allowing developers to use web technologies to create full mobile applications with access to native capabilities (sensors, camera, storage, bluetooth, and so on).
Supported Platforms: http://en.wikipedia.org/wiki/PhoneGap#Supported_platforms
Other PhoneGap like Frameworks: http://en.wikipedia.org/wiki/Multiple_phone_web_based_application_framework
Apps made with PhoneGap: http://www.phonegap.com/app
Getting Started with PhoneGap
Installing
The current version of PhoneGap uses Node.js (a JavaScript runtime that works outside of the browser) to execute it's commands so it needs to be installed first. (An application that is created with PhoneGap has no dependencies on Node.js.)
Next, to install PhoneGap, we'll use the command line to both install and run the PhoneGap commands. These are detailed on the Install PhoneGap page. (For a refresher on using the command line, check this out: Learn Enough Unix for Your Resume as well as Lynda.com's Unix for Mac OS X Users.)
As long as you have Node.js installed, the below command will trigger the download and install of phonegap on your computer:
sudo npm install -g phonegap
once that is complete, you can verify that it works by running this command which should print out some helpful usage information
phonegap
Alternatively, some brave folks might want to try out PhoneGap's new desktop app which was just released in beta
Hello World
To get started building an application, we issue the following command to download a starter project
phonegap create hello-phonegap
We can run the starter project by going into the project directory and asking it to build and run for Android (assuming you have the Android SDK already installed and configured)
cd hello-phonegap
Getting Setup for Android Development
If you don't already have the Android SDK installed and configured and want to build for Android devices, go through the following steps:
Download the Android SDK (You don't need Android Studio, look for "SDK Tools Only" under "Other Download Options")
Once that is downloaded, extract it and move it to a folder that you won't delete it. Perhaps in Applications or another safe place.
Then, you'll need to it to your path. In terminal, type the following, adding return after each line:
cd ~
touch .bash_profile
open .bash_profile
In that file, add the following line, make sure you update the paths to the location you put the Android SDK. Please note, there are two entries separated by a colon.
export PATH=${PATH}:/Applications/adt-bundle/sdk/platform-tools:/Applications/adt-bundle/sdk/tools
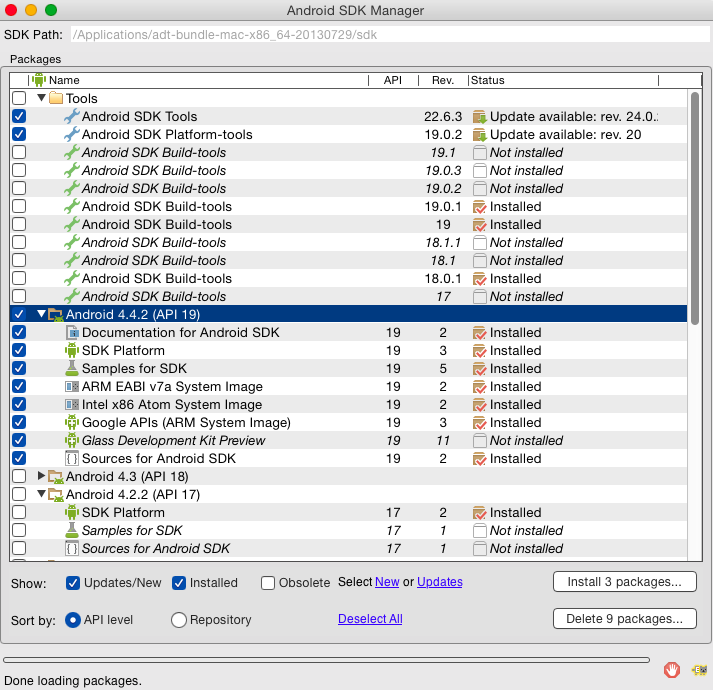
It is likely that if you are just installing the Android SDK now, you will need to download the Android API level 19. To do this run the "android" command in terminal
android
which will launch the "Android SDK Manager". In this select Android 4.4.2 (API 19) and install it.
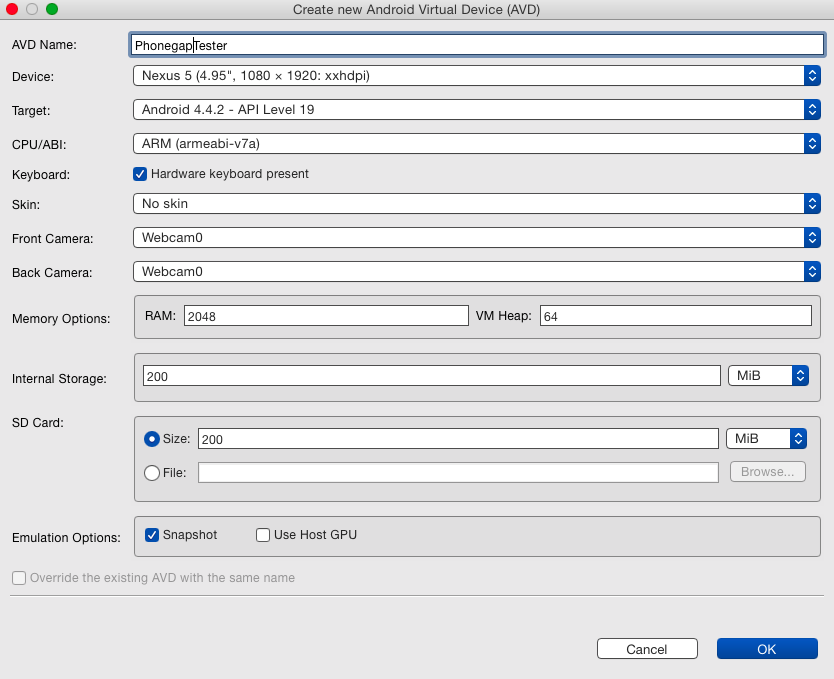
You'll also need create an Android Virtual Device or emulator (AVD) in order to run the application locally. In order to do this, you run the "android" command with the "avd" option in terminal.
android avd
This will bring up the Android Virtual Device Manager. To create an emulator, you'll click the "New" button and fill out the form.
Once you do this you should be able to execute the following command on the command line to build and run the application
phonegap -d run android
If you get the following error "To view this web content, you need to install the Java Runtime Environment" visit this URL http://www.oracle.com/technetwork/java/javase/downloads/jdk8-downloads-2133151.html to download and install the JDK for your platform.
Following that, try the above command "phonegap -d run android" again.
If you get another error, in the terminal, related to missing "ant", visit this site: http://ant.apache.org/bindownload.cgi and grab the latest ".zip archive" version, likely "apache-ant-1.9.4-bin.zip". Once you have it downloaded and extracted, copy it into a standard directory on your machine via Terminal. It is a command-line application so you should move it to "/usr/local/".
sudo cp -r ~/Downloads/apache-ant-1.9.4 /usr/bin/.
sudo ln -s /usr/bin/apache-ant-1.9.4/bin/ant /usr/local/bin/.
These two commands are run using "sudo" as they require more than normal user permissions. The first one copies (recursively) the files in your Downloads/apache-ant-1.9.4 folder. You should adjust the name if you downloaded a newer version or placed it elsewhere. The second command creates a symbolic link to the actual "ant" executable in /usr/bin so that it is in your path.
If you would like to test on an Android device, you need to plug it in via USB and enable USB debugging on your device. On Android 3.2 or older, under "Settings", "Applications", "Development" on Android 4.0 or later under "Settings", "Developer". On Android 4.2 and later, the Developer options are hidden. To reveal them, go to "Settings", "About phone", and tap on "Build number" seven times.
More:
Installing the Android development environment for OS X from Building Mobile Apps with the PhoneGap Command-Line Interface with Chris Griffith on Lynda.com
http://docs.phonegap.com/en/4.0.0/guide_platforms_android_index.md.html#Android%20Platform%20Guide
Getting Setup for iOS Development
If you don't already have Xcode installed, that is the first step.
Download and install Xcode from https://developer.apple.com/xcode/.
Following that, select "More Developer Tools" from "Open Developer Tool" in the Xcode menu. This should take you to Apple's developer site with more downloads. From this page, download and install the "Command Line Tools" for your platform.
Once you do this you should be able to execute the following command on the command line to build and run the application
phonegap -d run ios
If that doesn't work you may need to install ios-deploy and ios-sim:
sudo npm install -g ios-deploy
sudo npm install -g ios-sim
Once the build succeeds, try opening the "xcodeproj" file from the project's folder, "platforms", "ios". Then you can click the run button in Xcode. After you do this once, the command line method of running may work.
Running on an iOS Device (hardware)
To setup an iOS device for development, you'll need to join ITP's iOS developer Team (unless you already have paid your $99.00 yearly fee). Do do this, send itp-helpdesk@nyu.edu the email address that you use for your Apple ID. You should also send your device UDID. The easiest way to find your UDID is to copy it from iTunes when your device is connected.
After your request is received, you'll receive an invite to ITP's iOS developer team and you should be able to log into Apple's iOS Dev Center.
Apple requires that applications that will be run on a hardware device be cryptographically signed. In order to do this, you need to generate a signing certificate via the "Certificates, Identifiers & Profiles" page. Click on the "+" symbol on the top right of the page and follow the instructions. Choose "iOS App Development" for the certificate type, and create a CSR file via Keychain Access on your computer and upload it. Once that is complete, we'll approve your certificate and you'll be notified by email.
Once it is approved, you can go back to the iOS Certificates page, select your name and download it. After it is downloaded, open it (double click) and it will be added to your keychain in the "Keychain Access" application.
You'll also want to download the "Anyone" provisioning profile from the iOS Provisioning Profiles page. Once it is downloaded, open up Xcode and drag the downloaded profile onto the Xcode icon in your dock. The Provisioning profile marries your certificate with your device and your app id and is required to do development on your actual device. We setup the "Anyone" provisioning profile to include all of the devices, certificates, and any app id on the ITP team.
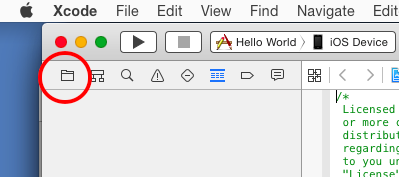
To actually run the application on your device, make sure it is plugged into your computer and open the project in Xcode. To do this, go to your PhoneGap project in the Finder and open the "Project Name.xcodeproj" file inside the platforms/ios folder. Once that is open in Xcode, you may need to click on the "Project Navigator" icon to display the project files.
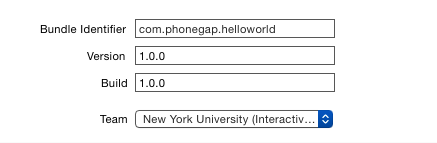
After that, click on the project file itself which will reveal a configuration panel
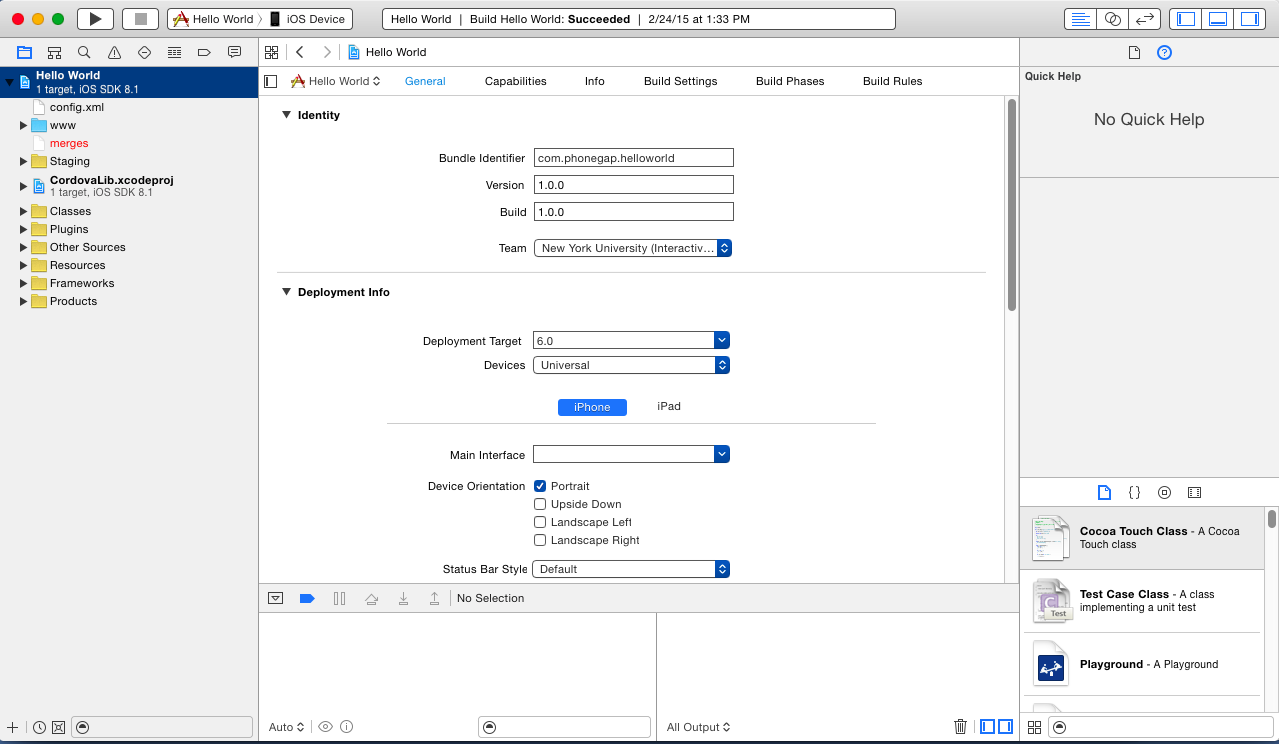
In this panel under "Identity" you will likely have to select "Add an Account" under "Team". Enter your Apple ID and password on the prompt that appears and click "Add". This should bring up a panel which displays your Apple ID and the team "New York University (Interactive Telec...". You can close this window and back in Xcode select the "New York University..." team.
Finally, you should now be able to select your device to run the application on. To do so, click the device list next to the project name to the right of the run/play button at the top of your Xcode window and select your device.

Then you can click the run/play button to compile and run it!
Following a successful launch via Xcode, you should be able to run your application directly via the PhoneGap command-line command:
phonegap -d run ios
Modify the Application
To change the application, we open up the "www" folder and edit the contents. Try changing the index.html file and re-running the application.