Mobile Media
Shawn Van Every Shawn.Van.Every@nyu.edu
Week 7 - Getting Started with Android Development
Android Introduction
Android, despite being a baby has an interesting history. A group of companies including Google setup an organization called the Open Handset Alliance whose mission is to:
"to accelerate innovation in mobile and offer consumers a richer, less expensive, and better mobile experience. Together we have developed Android&tm;, the first complete, open, and free mobile platform."
As of August 2005, The Android platform was being developed by a company called Android outside of Google. In August 2005, Google purchased the company and we are now seeing the fruits of that acquisition.
Android is only an operating system, the G1, manufactured by HTC, a member of the Open Handset Alliance is merely the first phone that supports Android out in the market. It is sold as a locked device through T-Mobile (although you can unlock it for free after 90 days of service or if you pay for it from companies offering the codes online). (There is also a developer version of the phone available through Google that is unlocked already.)
The Android OS is built on top of Linux and is (almost) completely open source meaning that it can be modified and distributed freely.
The Android OS itself is written using Java but not Sun's Java, a different implementation so that Google or whomever does not have to pay Sun royalties. The same goes for the development of Android applications.
More Information:
Dalvik: how Google routed around Sun's IP-based licensing restrictions on Java ME
Android Source Code
Main Android Site
Installing the SDK
First you need to download the SDK from developer.android.org.
Unzip and put somewhere handy on your hard drive (probably don't leave it in "Downloads").
Next you need to launch "Terminal" and "cd" to the location you put the folder and go into the "tools" folder:
cd /Developer/android-sdk-mac/tools/
and launch the "android" application:
./android
Alternatively, you may just be able to double click the "android" application from the "tools" folder.
Once that is running, you should select "Available Packages", select everything available and finally "Install Selected".
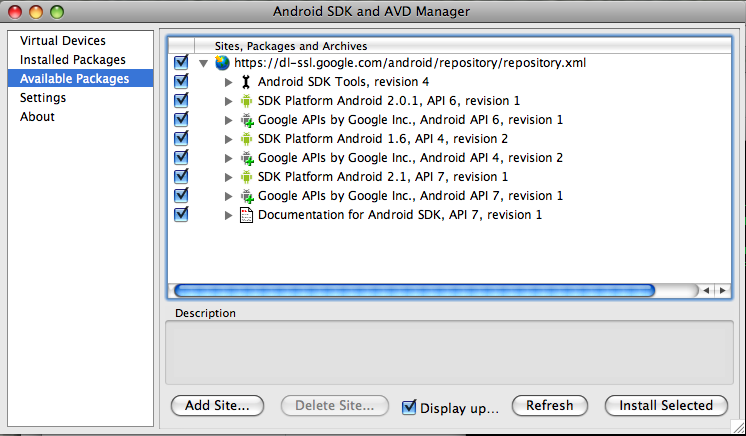
If you get an error regarding "https://", you should go into the "Settings" and check the box that says "Force https:// sources to be fetched using http://".
Installing Eclipse
Eclipse is an IDE (integrated development environment that has nice integration with the Android SDK. We will be using that in class.
First download Eclipse from www.eclipse.org/downloads/. Make sure you get the second one on the list "Eclipse for Java Developers".
After you have it downloaded, extract it and put it somewhere sensible. I would probably choose to put it in your "Applications" folder on a Mac or in your "Program Files" on a PC.
Once you have Eclipse downloaded and installed, go ahead and Launch it by double clicking on the "Eclipse" (Eclipse.app) file inside the folder.
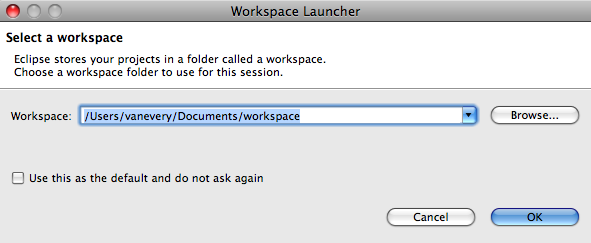
Yow will get prompted to "Select a workspace". The default value is generally fine but if you want your files saved elsewhere, you can click "Browse" and select a different location.
Next you will be displayed a welcome screen that will look something like this:
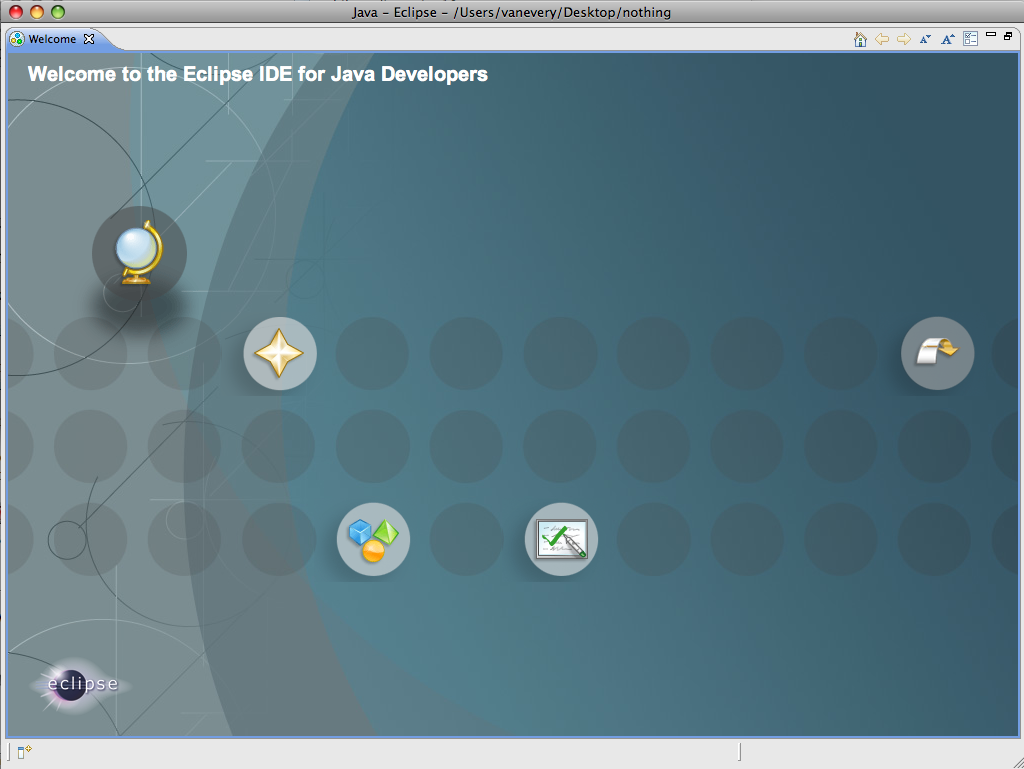
To get to the normal working environment in Eclipse, click the icon on the far right with the arrow that is pointing inwards and labelled "Workbench".
Installing the Android Developer Tools Eclipse Plugin
Our final step is to get the plugin which enables Eclipse and the Android SDK to work well together.
First go to the "Help" menu and select "Install New Software".
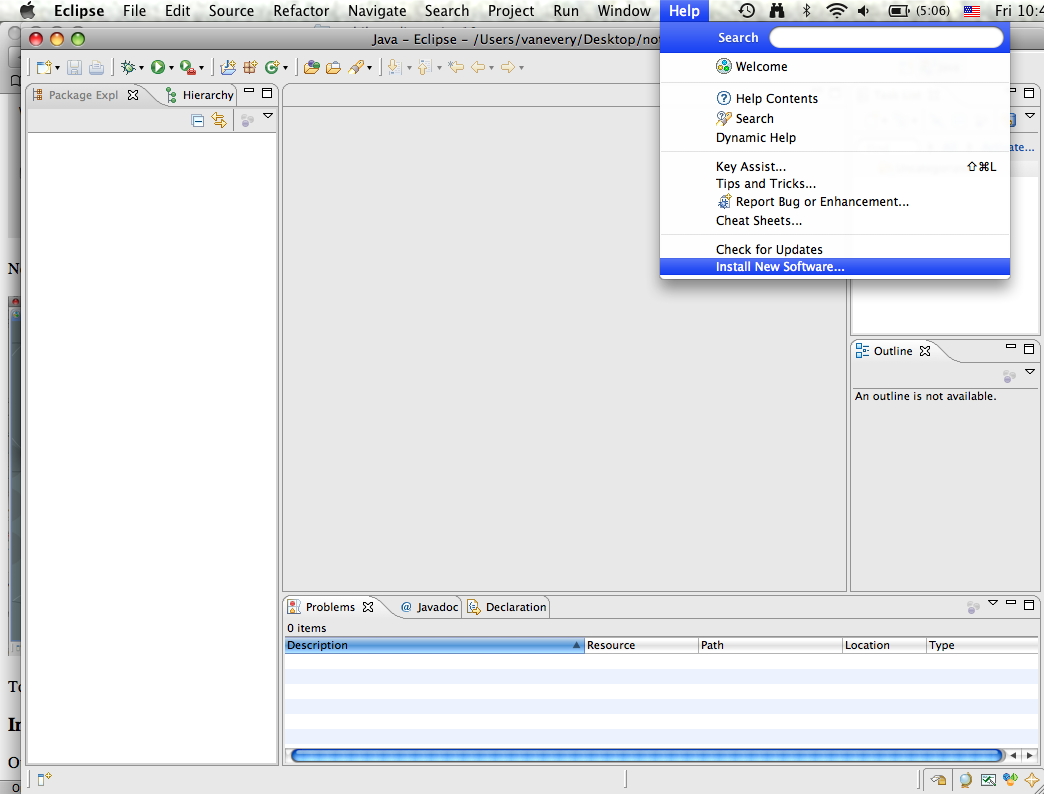
That should bring up an "Install" window.
Click the "Add" button next to the "Work with" field and enter the following:
Name: Android Developer Tools (or something like that)
Location: https://dl-ssl.google.com/android/eclipse/
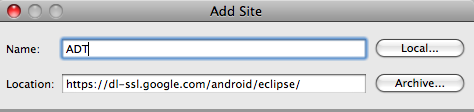
Finally Click "OK".
You should be presented with a list of software that can be installed. You should select both "Android DDMS" and "Android Development Tools" and click "Next".
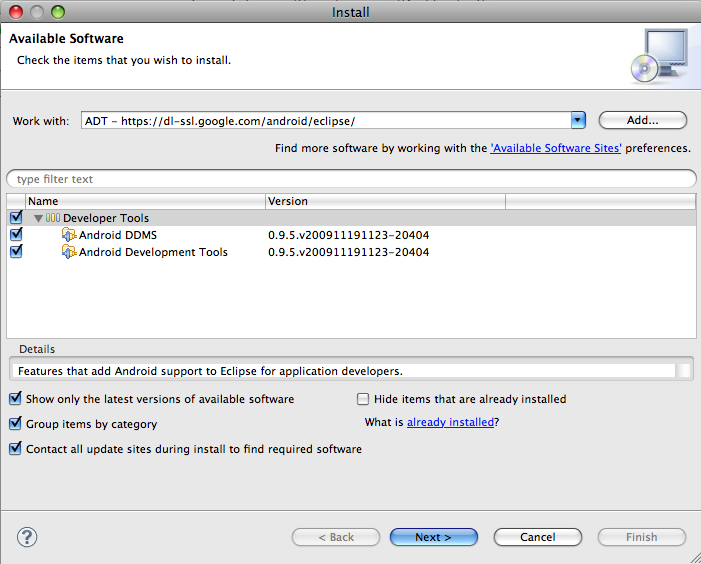
Following through the wizards and accepting the license agreements will be required.
Once it is done intalling, you should restart Eclipse.
PhoneGap
PhoneGap is a cross-platform framework for developing mobile applications. As we discussed a couple of weeks ago, many of the modern operating systems are utilizing WebKit for browsing capabilities. This also affords the possibilities to use WebKit as the foundation for the development of mobile applications on those devices.
Since PhoneGap wraps the WebKit libraries available on these devices, an application can be developed simply using HTML, JavaScript and CSS.
Getting Started
Unfortunately (or fortunately, depending on your perspective), PhoneGap is often in a state of flux. It is somewhat hard to find a version that works completely right across all of the versions of Android that are out there. Instead of working with the official versions on the PhoneGap site, I have put together a version that generally works across Android devices.
You can download the Eclipse project (As bugs are identified and fixed, I'll try to keep this up to date.
Once you download and extract that file, you can import it into Eclipse:
Choose File: New: Android Project

Choose a name, select "Create project from existing source" and "Browse" to the extracted PhoneGapTest folder.
The rest of the fields should fill in automatically. You can click "Finish".

The next step is to modify the project.
The main HTML, JavaScript and CSS for the project are located in the "assets" folder under the project in the "Package Explorer".
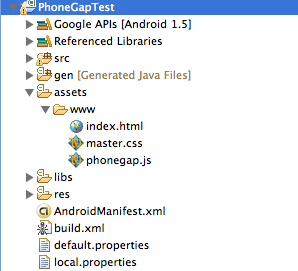
You probably don't want to use Eclipse as the code editor for these files, rather edit them directly from the PhoneGapTest folder using your favorite HTML code editor.
Before starting, it is probably a good idea to make a copy of the original files that you are going to make changes to. I keep a backup copy of all three of the original files around so I don't have to redownload should I break something.
Next, if you simply edit the existing content in the "index.html" file, you can get started building your application.
Here is what is in my current "index.html" file:
<!DOCTYPE HTML>
<html>
<head>
<meta name="viewport" content="width=320; user-scalable=no" />
<meta http-equiv="Content-type" content="text/html; charset=utf-8">
<title>Shawn's PhoneGap Test HTML File</title>
<link rel="stylesheet" href="master.css" type="text/css" media="screen" title="no title" charset="utf-8">
<script type="text/javascript" charset="utf-8" src="phonegap.js"></script>
</head>
<body>
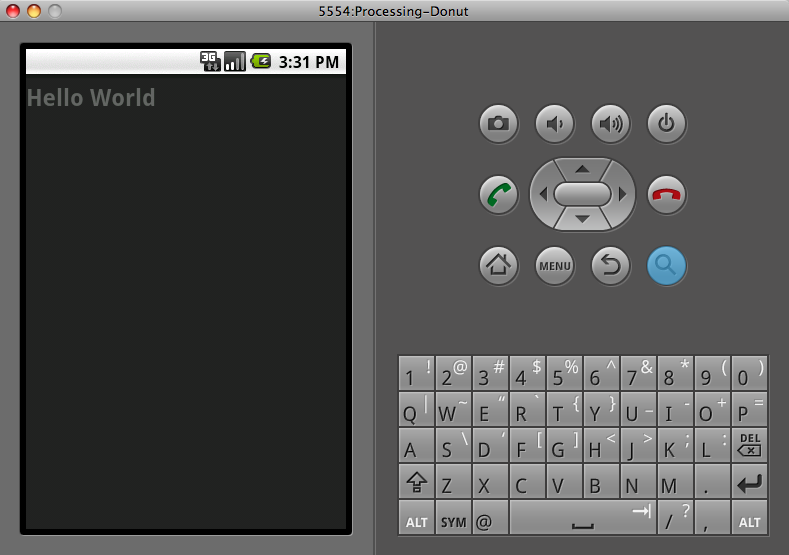
<h1>Hello World</h1>
</body>
</html>
The next step is to test it on the Android Emulator.
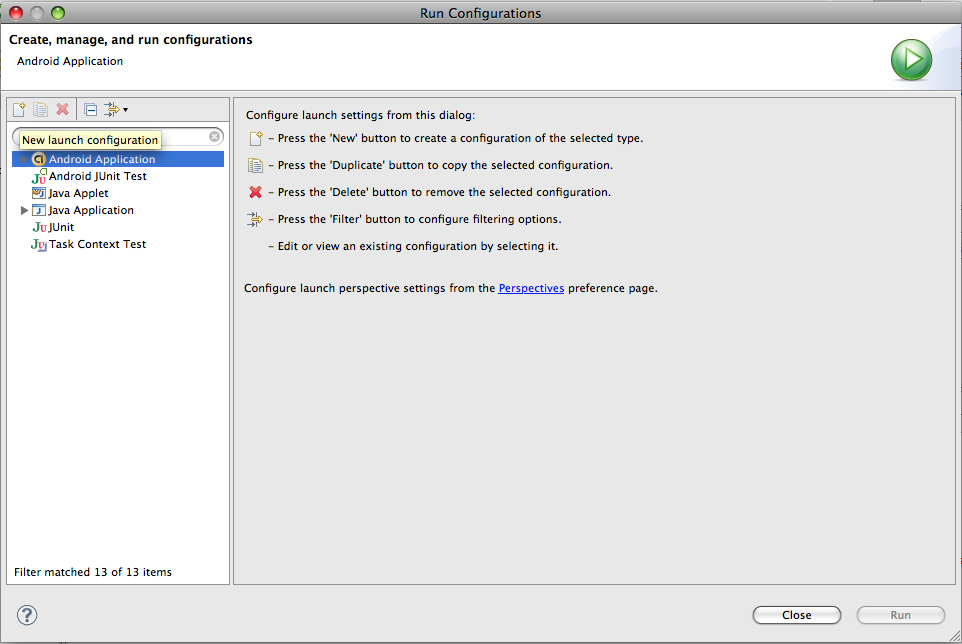
To do so, click on the disclosure triangle next to the green circle with the play symbol and select "Run Configurations".

That will bring up the "Run Configurations" dialog. Inside of which you should highlight "Android Application" and click the "New Launch Configuration" button (looks like a piece of paper with a + in the upper right hand corner).
You should fill in the fields with the appropriate information and hit apply. The "Name" can be anything you want and the "Project" should be your new project (select Browse to choose it).
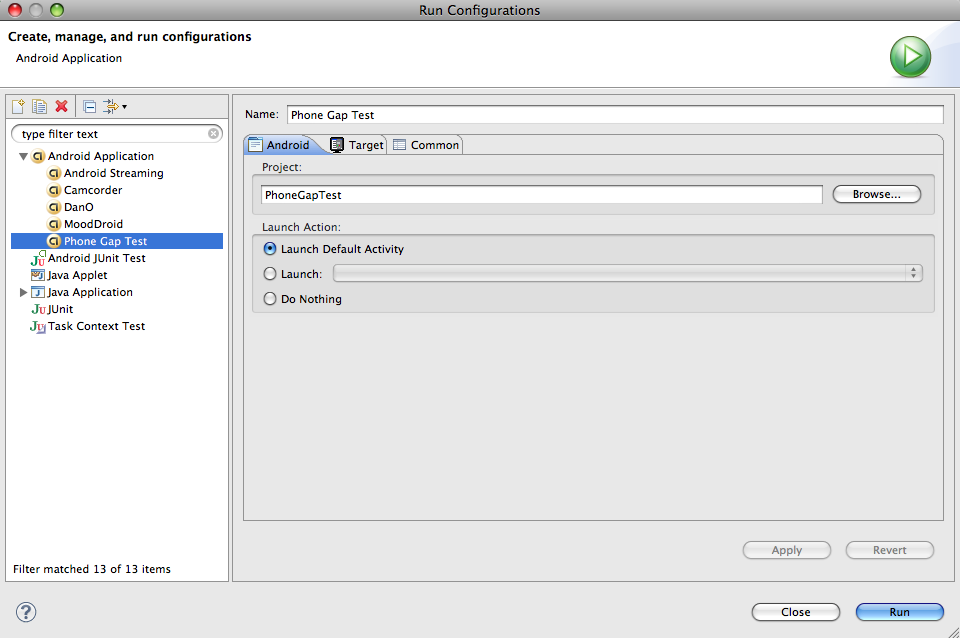
If you like, you can go to the "Target" section and change it from "Automatic" to "Manual" which will allow you to test it on the phone once it is connected.
If you then choose "Run", it should launch the Android Emulator and display your application
If you make a change to the HTML or related files, Eclipse doesn't nessecarily know that you have made a change and may not put the latest files on the device. If this happens to you, you should right (cntrl) click on the project and choose "Refresh" before attempting to run in the emulator.
Doing More
The interface between your HTML and the native code behind the scenes is JavaScript. You can use JavaScript in PhoneGap to add a lot of features to your application that would normally only be natively accessible. Unfortunately many of these features are only available on the device itself and don't work on the emulator.
Take Picture
Here is an HTML and JavaScript example for taking a picture using PhoneGap.
<!DOCTYPE HTML>
<html>
  <head>
    <meta name="viewport" content="width=320; user-scalable=no" />
    <meta http-equiv="Content-type" content="text/html; charset=utf-8">
    <title>Shawn's PhoneGap Test HTML File</title>
	  <link rel="stylesheet" href="master.css" type="text/css" media="screen" title="no title" charset="utf-8">
	  <!-- Always include the phonegap.js library -->
	  <script type="text/javascript" charset="utf-8" src="phonegap.js"></script>

	  <script type="text/javascript">

	  	// JavaScript function for pulling up camera
	  	function getPicture()
	  	{
	  		var nooptions = "";
	  		// Specify what function to run on success and on failure
	  		navigator.camera.getPicture(gotit,nogotit,nooptions);
	  	}

	  	// Success function
	  	function gotit(picture)
	  	{
	  		alert("Yay");
	  	}

	  	// Failure function
	  	function nogotit()
	  	{
	  		alert("boo" + error);
	  	}

	  </script>
  </head>
  <body>

  	<h1>Hello World</h1>

  	<br /><br />


  	<a href="#" onclick="getPicture();">Get Picture</a>
  </body>
</html>
Upload
We could take an additional step and use some additional JavaScript to send this picture data to a server.
<!DOCTYPE HTML>
<html>
  <head>
    <meta name="viewport" content="width=320; user-scalable=no" />
    <meta http-equiv="Content-type" content="text/html; charset=utf-8">
    <title>Shawn's PhoneGap Test HTML File</title>
	  <link rel="stylesheet" href="master.css" type="text/css" media="screen" title="no title" charset="utf-8">
	  <script type="text/javascript" charset="utf-8" src="phonegap.js"></script>

	  <script type="text/javascript">

	  	function getPicture()
	  	{
	  		var nooptions = "";
	  		navigator.camera.getPicture(gotit,nogotit,nooptions);
	  	}

	  	function gotit(picture)
	  	{
	  		alert("Yay");

	  		// Additionally fill in the form with the picture data
			var input = document.getElementById("picture_data").value = picture;
			// And submit the form
			var form = document.getElementById("theform");
			form.submit();
	  	}

	  	function nogotit()
	  	{
	  		alert("boo" + error);
	  	}

	  </script>
  </head>
  <body>

  	<h1>Hello World</h1>

  	<a href="index_original.html">Original PhoneGap Test Page</a>

  	<br /><br />

  	<a href="#" onclick="getPicture();">Get Picture</a>
  	<!-- Hidden form for posting picture -->
  	<form action="http://itp.nyu.edu/~sve204/mobilemedia_spring10/phonegap_picture_post.php" method="POST" id="theform">
  		<input type="hidden" id="picture_data" name="picture_data" value="" />
  	</form>

  </body>
</html>
And on the server to save the picture:
phonegap_picture_post.php
<?

        $picture = base64_decode($_POST['picture_data']);
        file_put_contents("latest.jpg",$picture);

?>
<html>
<body>
		<!-- Show the image to the user -->
        <img src="latest.jpg" />
</body>
</html>
More Information:
PhoneGap main site
Chapter from O'Reilly iPhone Apps book that deals with PhoneGap (but for iPhone).
Apps that use PhoneGap
PhoneGap Mailing List - Great for getting help
PhoneGap for Android Developer's Blog
PhoneGap JavaScript API - This is a copy of what comes with PhoneGap for our use. As you know, we are living on the EDGE so not all of this will work.