Introduction
Bluetooth has been a popular method for wireless communication between devices for many years now. It’s a good way to communicate between two devices directly over a distance of 10 meters or less. Version 4.0 of the Bluetooth specification, also known as Bluetooth LE, introduced some changes to Bluetooth, and made it more power-efficient. There are many Bluetooth LE-equipped microcontroller modules on the market, and they all follow the same general patterns of communication. This exercise introduces you to how to communicate between a Bluetooth LE-equipped microcontroller and p5.js using the p5.ble library.
What You’ll Need to Know
To get the most out of this tutorial, you should know what a microcontroller is and how to program them. You should also understand asynchronous serial communication between microcontrollers and personal computers. You should also understand the basics of P5.js. For greater background on Bluetooth LE, see the BLEDocs repository, or the book Make: Bluetooth by Alasdair Allan, Don Coleman, and Sandeep Mistry.
Here are a few additional usedul Bluetooth LE references:
- Bluetooth LE code samples
- The ArduinoBLE library, which was written for the MKR 1010 and the Nano 33 IoT
- Instructions on upgrading the MKR 1010 firmware. Versions prior to 1.2 don’t support Bluetooth LE.
- p5.js, a JavaScript environment designed in the spirit of Processing
- the p5.js web editor
- The p5.ble library by Yining Shi and Jingwen Zhu. Works only on Chrome browser
- noble, a BLE framework for node.js
Things You’ll Need
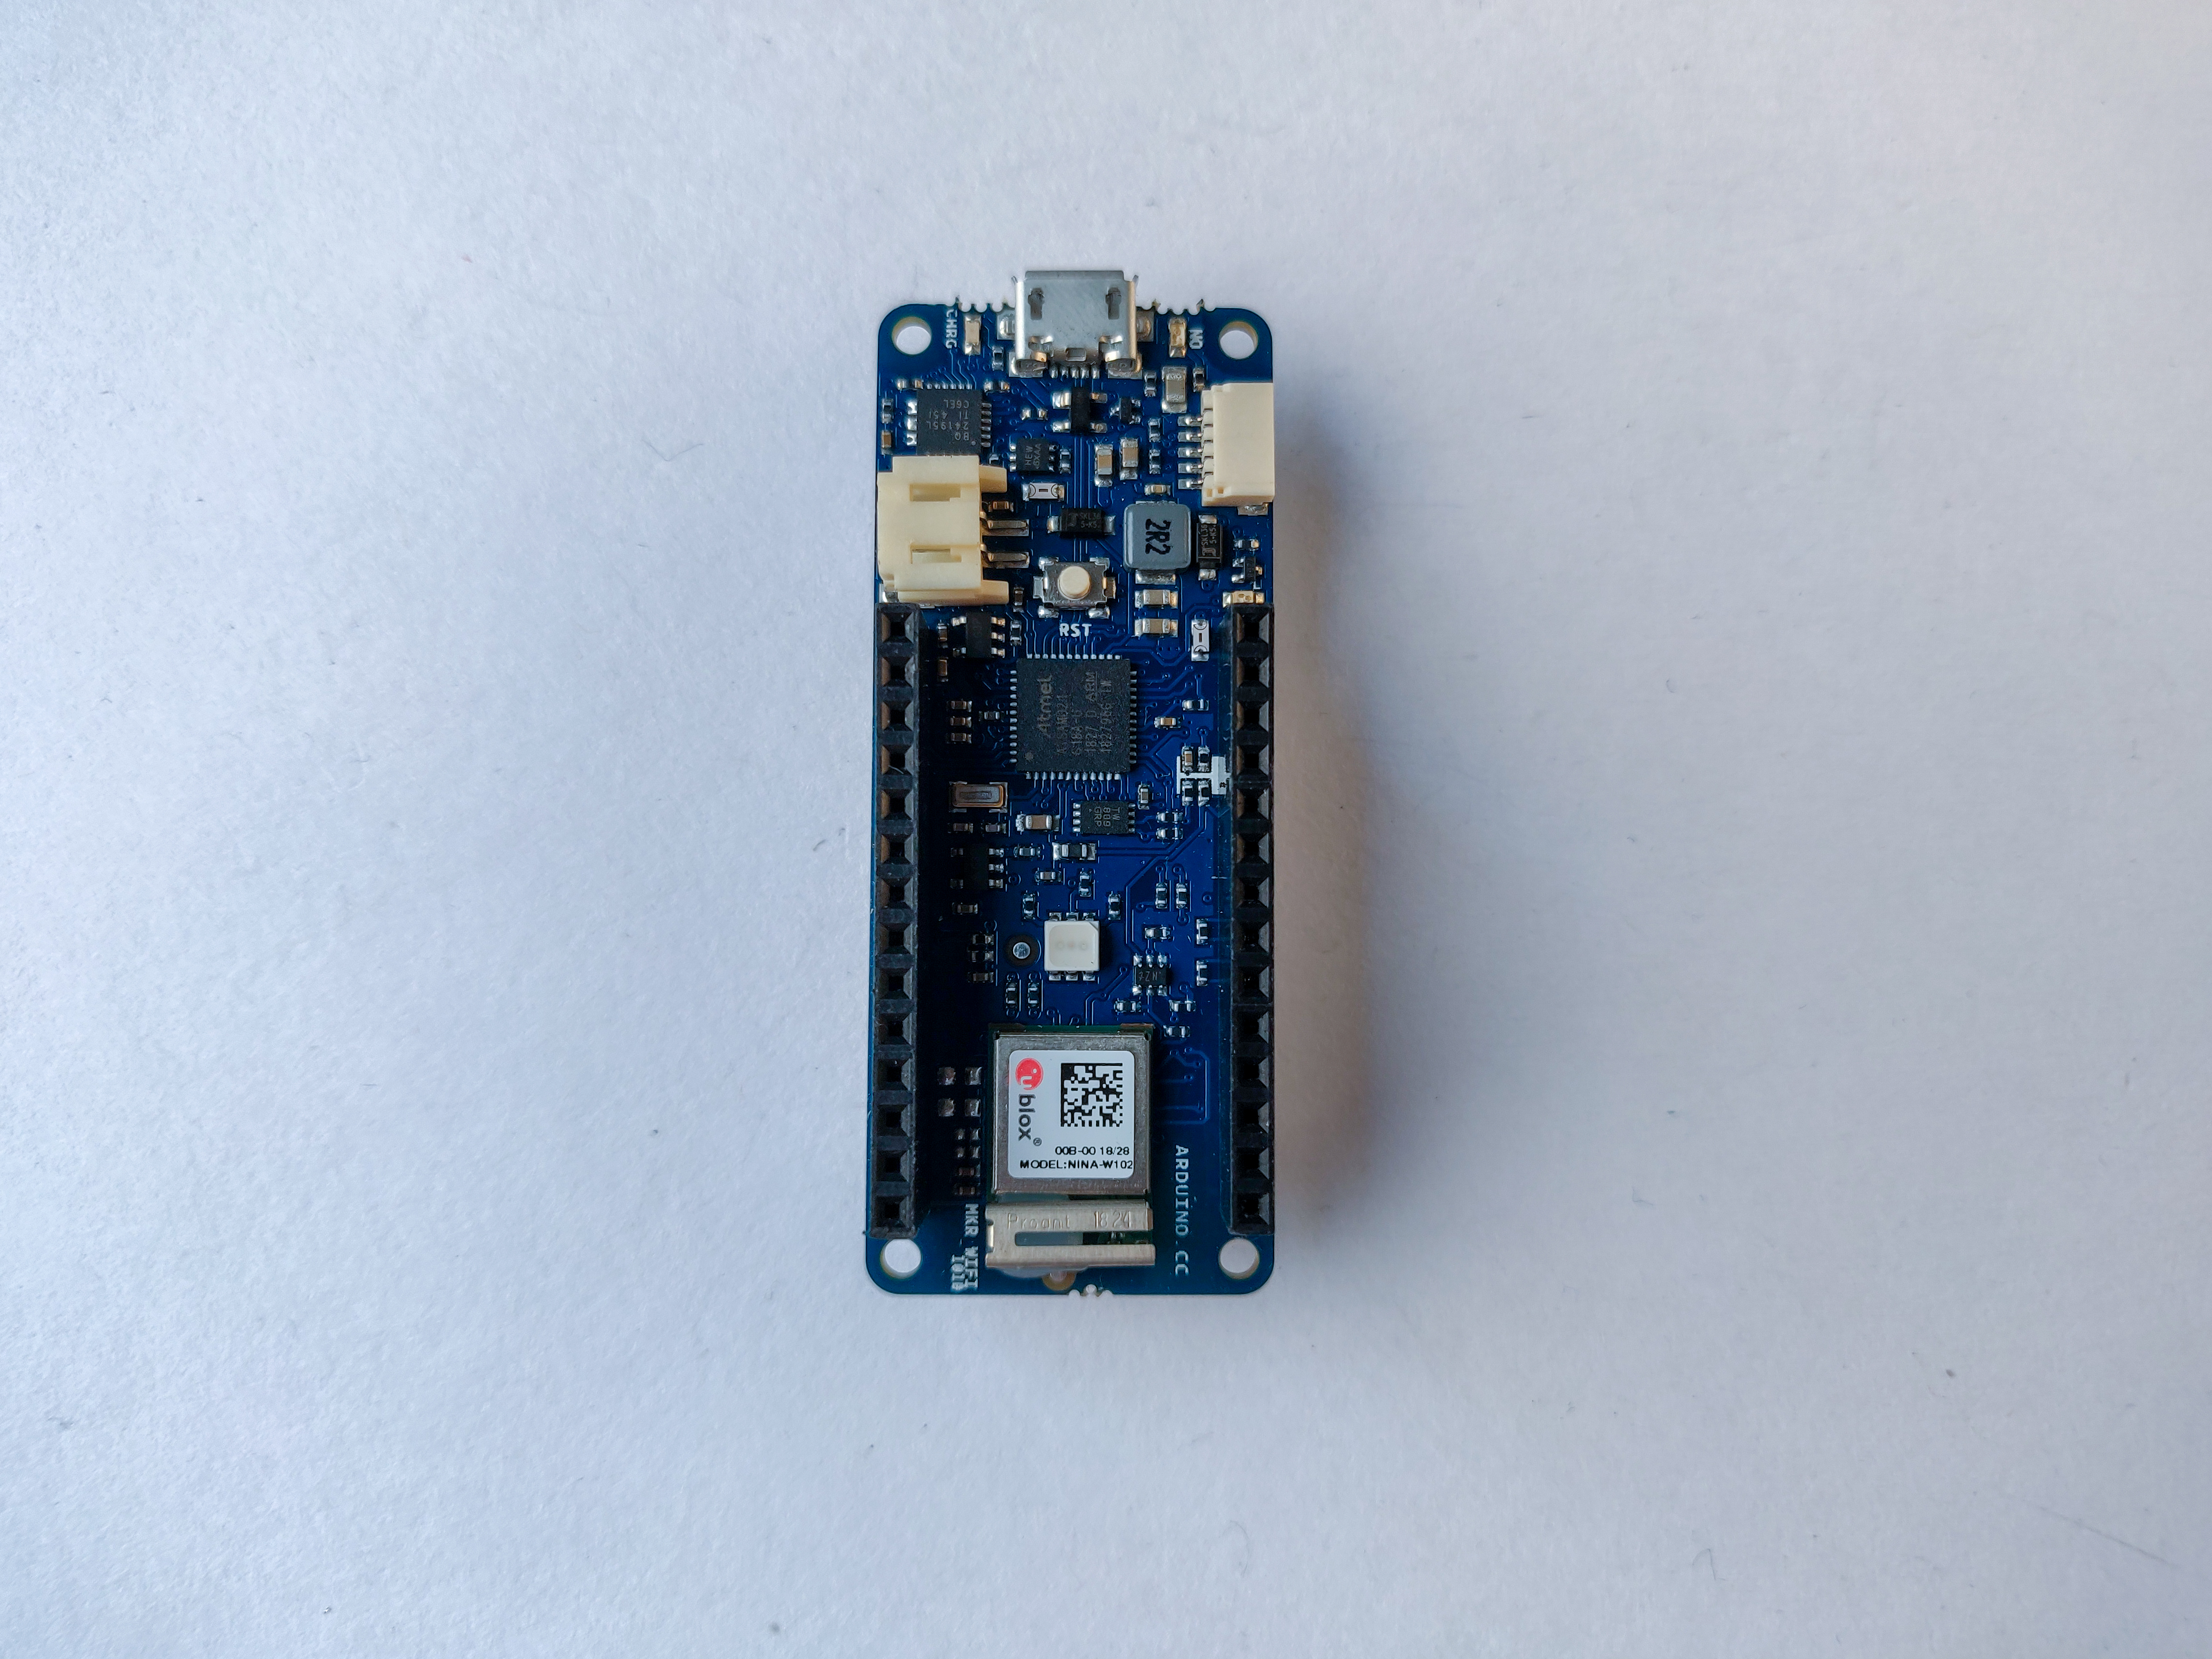
In order to use the ArduinoBLE library, as shown in Figure 1-2, both Arduino MKR 1010 and the Arduino Nano 33 IoT boards, among others, work for this tutorial. You could also do this on the Nano 33 BLE.
You might need external components for your own Bluetooth LE project, but for this introduction, you won’t need any external components.

Bluetooth LE Concepts
Bluetooth LE devices can be either central devices, or peripherals. Peripheral devices offer Bluetooth services that central devices can receive. For example, your fitness device is a peripheral device and the mobile phone or laptop that connects to it is a central device.
Peripherals offer services, which consist of characteristics. For example, a light controller might offer a light service, with four characteristics: red, green, blue, and white channels. Characteristics have values, and central devices can connect to a peripheral and read, write, or subscribe to those changing values. Characteristics can be assigned any of these three capabilities.
Bluetooth LE devices, services, and characteristics are described using Universally Unique Identifiers, or UUIDs. UUIDs are 128-bit numbers, and are generally formatted like this: cc3e5f6f-9d50-43fb-86e3-1f69e3916064. You can generate UUIDs using uuidgenerator.net. You can also do it on a MacOS or Posix command line by typing uuidgen.
There are certain short UUIDs defined by the Bluetooth LE specification for well-known services and characteristics, such as battery level, Human Interface Device, and so forth. A list of the more well-known UUIDs can be found on the Bluetooth SIG Assigned Numbers page. When you’re making your own services and characteristics, you should generate long UUIDs.
All good Bluetooth LE libraries follow the device, service, characteristic model. The general process from the peripheral side is as follows:
- Set peripheral name
- Establish advertised services
- Add characteristics to services
- Start advertising
From the central side, the process is:
- Scan for peripherals
- Connect to a given peripheral
- Query for services
- Query for characteristics
- Read, write, or subscribe to characteristics
Bluetooth LE Central Apps
There are a number of good Bluetooth LE Central apps that let you scan for peripherals and interact with their services and characteristics. When you’re developing Bluetooth LE applications, it’s essential to have one on hand. Here are several:
- LightBlue for Android or iOS
- BlueSee for macOS or iOS
- Bluetility for macOS
- BLE Scanner for Android
- nRF Connect for Android, iOS, and Desktop OSes
- Bluetooth LE Explorer for Windows
Figure 3 below shows the initial scan for peripherals using BlueSee on macOS. You can see a variety of devices listed by UUID in the first column (note: this is not your service UUID, it’s an ID that MacOS assigns to the BLE device); the received signal strength (RSSI) in the second column; peripheral’s local name in the third column; and manufacturer name and info in the remaining columns. Most central scanning apps will list at least the device UUID and name, and let you connect to one device at a time.
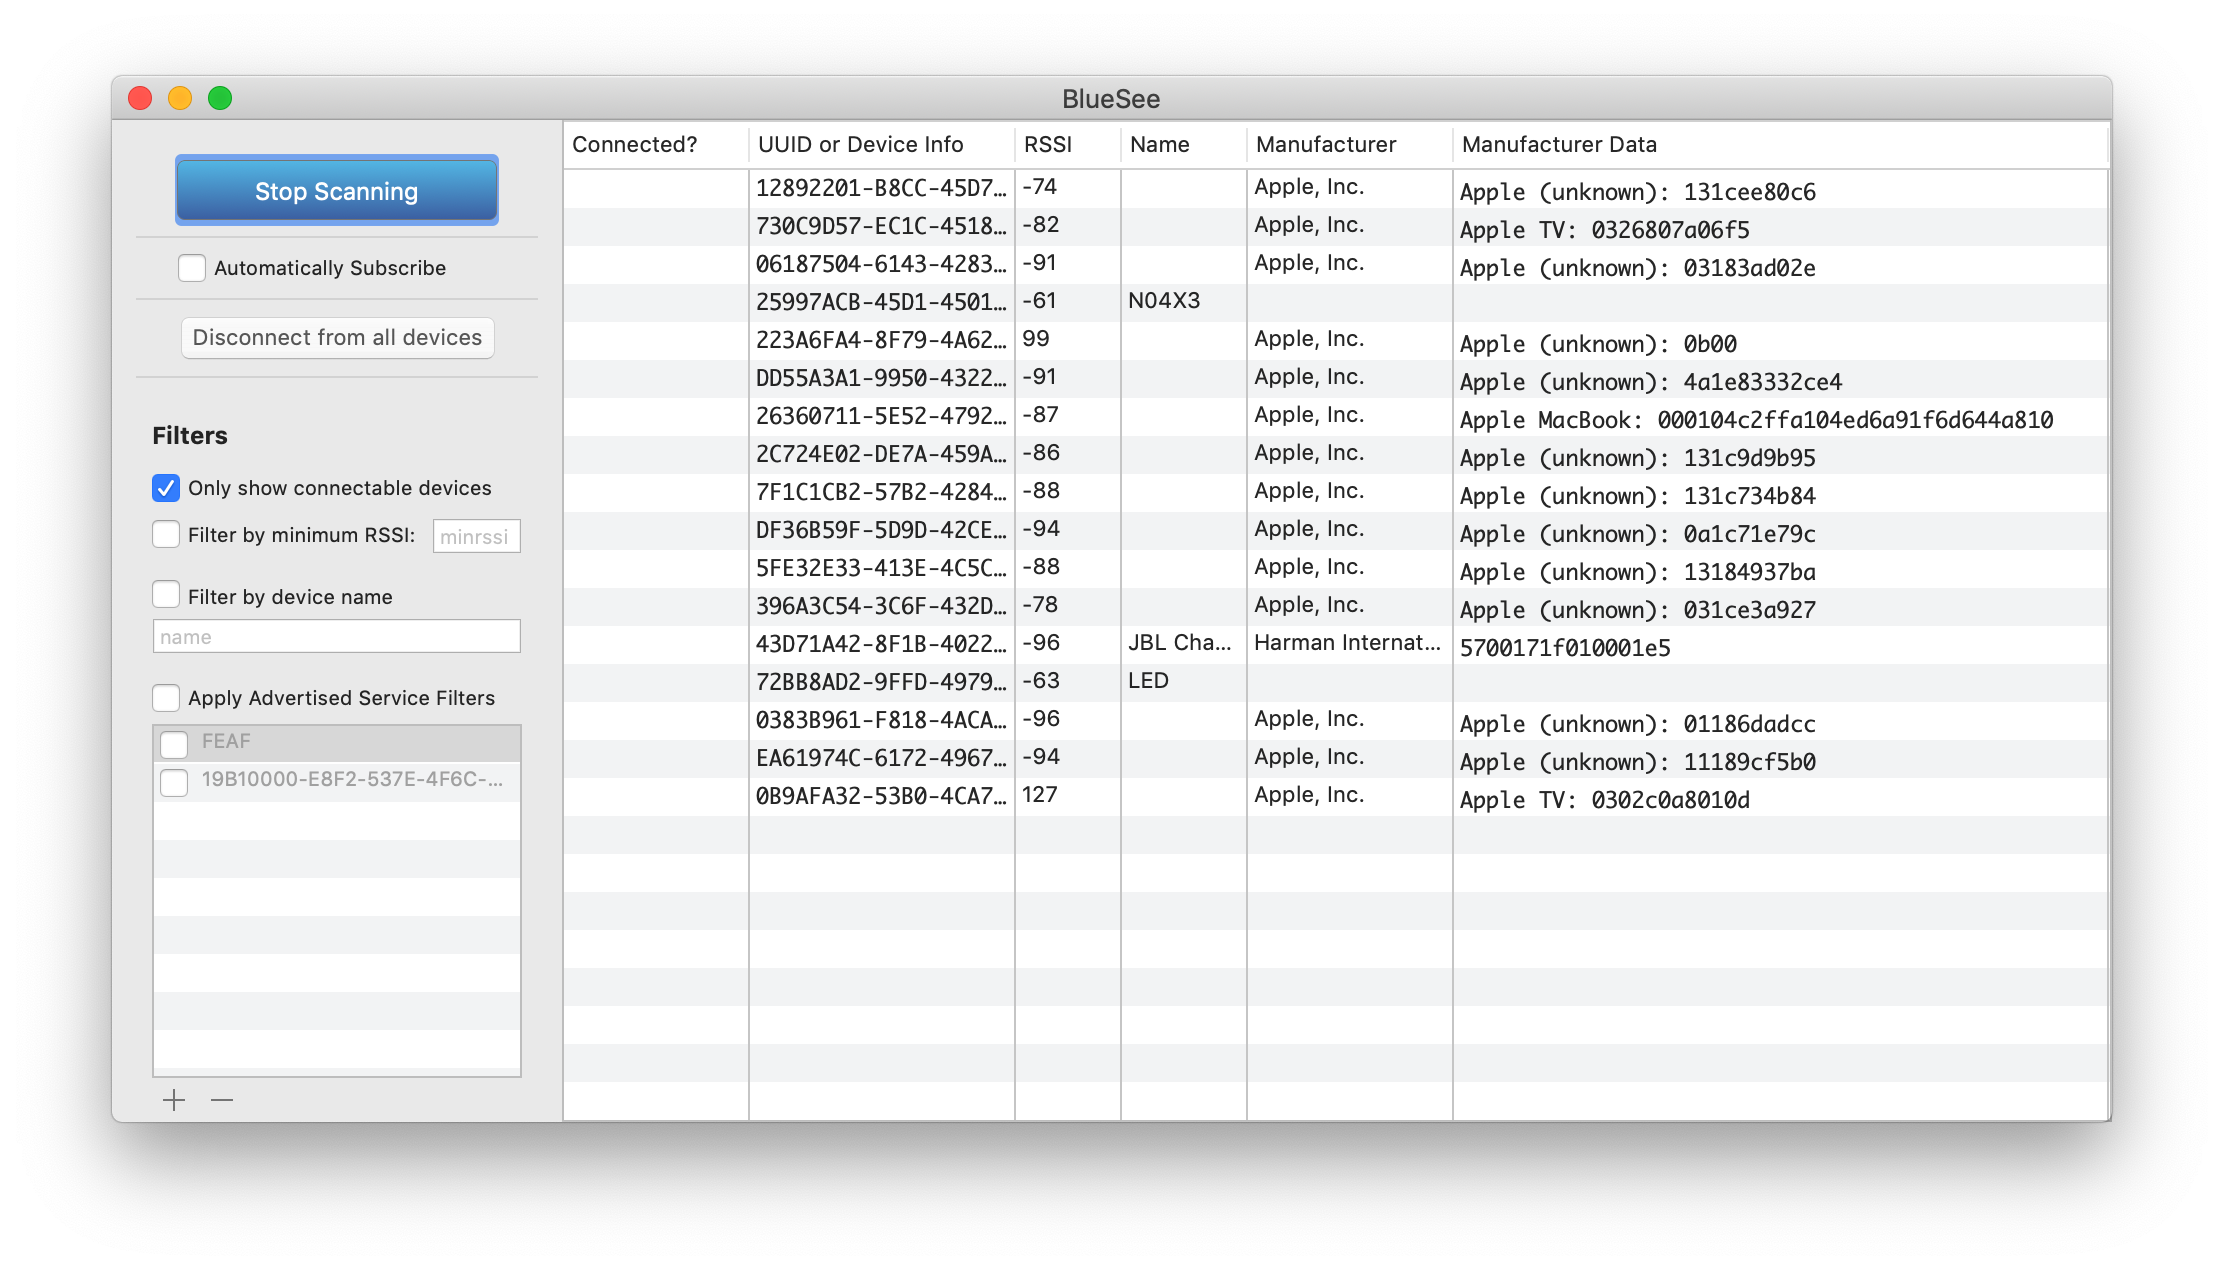
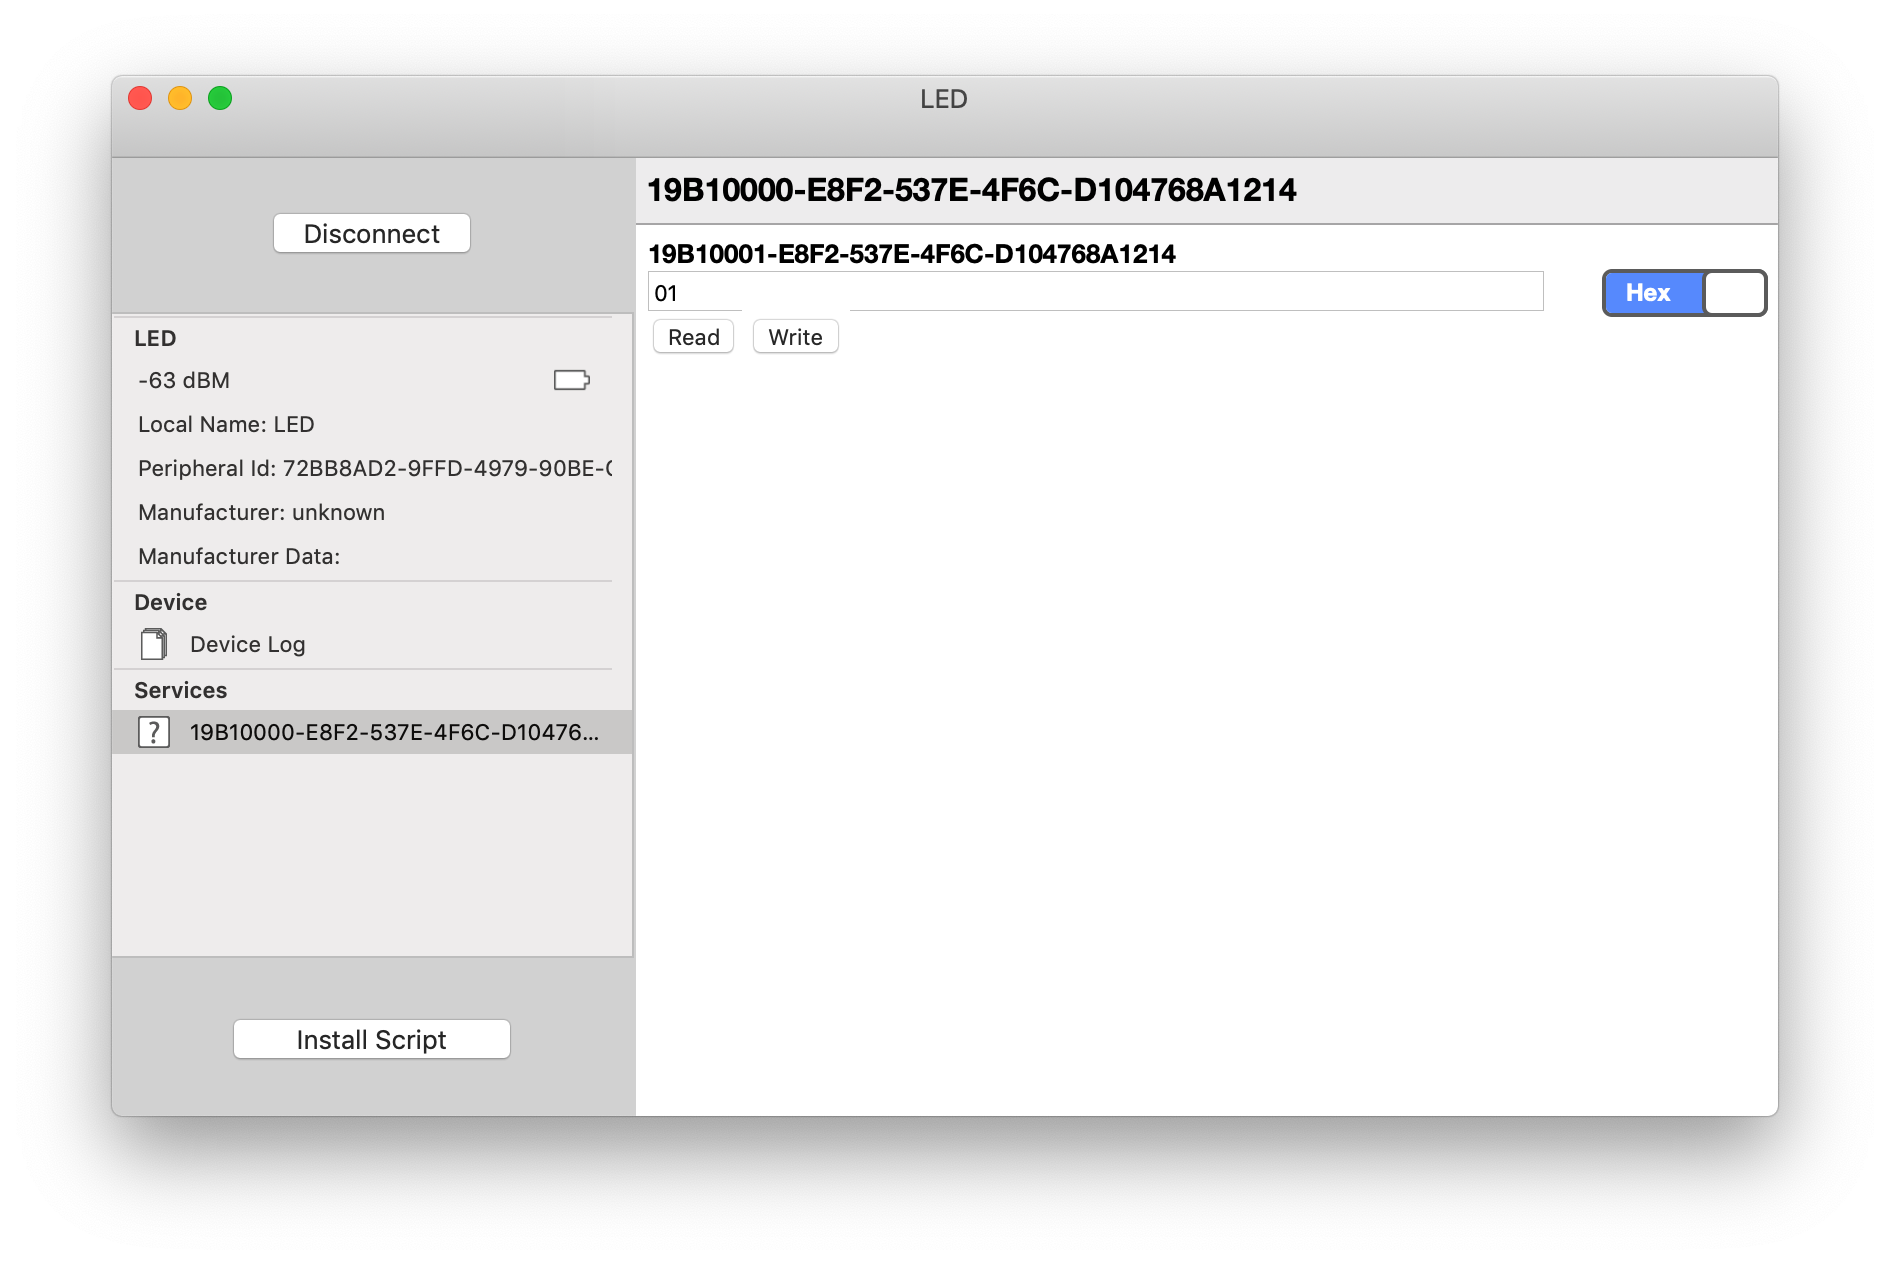
Figure 4 shows the characteristic detail from BlueSee when it’s connected to a particular peripheral’s characteristic. In most apps, like in this one, if a characteristic is writable, you can write to it in either hexadecimal or text.
Program the Arduino
Make sure you’re using the Arduino IDE version 1.8.10 or later. If you’ve never used the type of Arduino module that you’re using here (for example, a Nano 33 IoT), you may need to install the board definitions. Go to the Tools Menu –> Board –> Board Manager. A new window will pop up. Search for your board’s name (for example, Nano 33 IoT), and the Boards manager will filter for the correct board. Click install and it will install the board definition.
You’ll need to install the ArduinoBLE library too. Go to the Sketch menu –> Include Library… –> Manage Libraries. A new window will pop up. Search for your the name of the library (ArduinoBLE) and click the Install button. The Library manager will install the library.
Once you’ve installed the library, look in the File –> Examples submenu for the ArduinoBLE submenu. In there, look for the Peripherals submenu and open the sketch labeled LED. This sketch turns your board into a peripheral with one service called LED. That service has one characteristic, called switchCharacteristic, that is readable and writable by connected central devices. When you write the value 1 to this characteristic, the on-board LED turns on. When you write 0 to the characteristic, the LED turns off.
The beginning of the sketch establishes the service and characteristic as global variables:
#include "ArduinoBLE.h"

BLEService ledService("19B10000-E8F2-537E-4F6C-D104768A1214"); // BLE LED Service

// BLE LED Switch Characteristic - custom 128-bit UUID, read and writable by central
BLEByteCharacteristic switchCharacteristic("19B10001-E8F2-537E-4F6C-D104768A1214", BLERead | BLEWrite);

const int ledPin = LED_BUILTIN; // pin to use for the LED
In the setup(), you’ll follow the steps outlined above: set the name and the services, add characteristics, and advertise:
void setup() {
  // initialize serial and wait for serial monitor to be opened:
  Serial.begin(9600);
  while (!Serial);

  // set LED pin to output mode:
  pinMode(ledPin, OUTPUT);

  // begin initialization:
  if (!BLE.begin()) {
    Serial.println("starting BLE failed!");
    while (true);
  }

  // set advertised local name and service UUID:
  BLE.setLocalName("LED");
  BLE.setAdvertisedService(ledService);

  // add the characteristic to the service
  ledService.addCharacteristic(switchCharacteristic);

  // add service:
  BLE.addService(ledService);

  // set the initial value for the characteristic:
  switchCharacteristic.writeValue(0);

  // start advertising
  BLE.advertise();

  Serial.println("BLE LED Peripheral");
}
In the loop(), you wait for a central device to connect, and only take action if it does:
void loop() {
  // listen for BLE peripherals to connect:
  BLEDevice central = BLE.central();

  // if a central is connected:
  if (central) {
    Serial.print("Connected to central: ");
    // print the central's MAC address:
    Serial.println(central.address());

    // while the central is still connected to peripheral:
    while (central.connected()) {
      // if the central device wrote to the characteristic,
      // use the value to control the LED:
      if (switchCharacteristic.written()) {
        if (switchCharacteristic.value()) {   // any value other than 0
          Serial.println("LED on");
          digitalWrite(ledPin, HIGH);         // will turn the LED on
        } else {                              // a 0 value
          Serial.println("LED off");
          digitalWrite(ledPin, LOW);          // will turn the LED off
        }
      }
    }

    // when the central disconnects, print it out:
    Serial.print("Disconnected from central: ");
    Serial.println(central.address());
  }
}
Upload this to your board, then scan for it with a BLE central scanner like BlueSee or LightBlue. When you find it, connect and try to open the characteristic. Then try writing 1 and 0 to it. You should see the LED going on and off.
The general pattern of this sketch is similar for other Bluetooth LE sketches with this library; check out the other examples and you’ll see. Generally, you wait for a central to connect, then all action takes place after that. If the central is driving the action, then your Arduino sketch waits for characteristics to be written to. If your central app is waiting for action from the Arduino, then you’ll write to characteristics in your Arduino sketch, and the central app will see those changes and take action.
A Central App in p5.ble
The Chrome browser has a web bluetooth extension that enables web pages in Chrome to act as Bluetooth LE central devices. The p5.ble library is based on web-bluetooth, and compatible with p5.js. To get started quickly, disconnect your central app from your board if you’re still connected from the section above, and go to the p5.ble write one characteristic example. Click the connect button in that example, and you’ll get a popup scanner. When you see the LED peripheral, connect to it. Once you’re connected, try writing 0 or 1 to the LED. You should be able to control the LED. The source code for this example is embedded in the example page. You can borrow from it to write your own custom BLE central p5.js sketch. You’ll need to include the p5.ble library in your index.html page as shown on the quickstart page.
In the write one characteristic sketch, you can see the pattern of activity for a central device described above:
Scan for peripherals is handled when you click the Connect button. The scan is filtered to look only for devices with the desired service UUID.
Connect to a given peripheral is handled by the connectToBle function. It connects to a device and the desired service, then runs the gotCharacteristics function as a callback to query for characteristics.
When you click the write button, the writeToBLE function writes to the characteristic to which it’s connected.
Reading and Writing Sensors in p5.ble
The Read From One Characteristic example shows how to read from a peripheral device that’s outputting a changing sensor value. Similarly, the Start and Stop Notifications example shows how to subscribe to a peripheral’s characteristic so as to get notification when it changes. Try these out along with their associated Arduino sketches to get an understanding of how to get sensor data via Bluetooth LE.
You can set up multiple characteristics in a given service, and often this is the best way to handle things. For example, if you were using the built-in accelerometer on the Nano 33 IoT, you might have three characteristics for x, y, and z acceleration all in a single accelerometer service.
Characteristic Data Types
When you initialize your peripheral’s characteristics in your Arduino sketch, you set the data type for the characteristic. Just as there are byte, bool, int, char, String and float data types, there are BLEByteCharacteristic, BLEBoolCharacteristic, BLEIntCharacteristic, BLECharCharacteristic, BLEStringCharacteristic, and BLEFloatCharacteristic data types in the ArduinoBLE library. You should pick the type appropriate for what you’re using it to do. An analog sensor might want an int, for example. A sensor value that you’ve converted to a floating point value like voltage or acceleration might want a float.
Similarly, you can read the characteristics in p5.ble differently when you know what type they might be. You’ve got unit8, uint16 or uint32, int8, int16, int32, float32, float64, and string. When you read, you choose the type like so:
myBLE.read(myCharacteristic, 'string', gotValue);
You need to match the type you read with on the central side to the type you sent with on the peripheral side. If you’re not sure what type is correct, set up your Arduino sketch to send a constant value using a type you know. Then read it in p5.ble using the different types until the value you receive matches the value you’re sending. Make sure to test the limits of your data type. For example, in Arduino, an int can store a 16-bit value from -32,768 to 32,767 on an Uno, or a 32-bit value on a Nano 33 IoT or MKR board, from -2,147,483,648 to 2,147,483,647. A 16-bit int would be int16 in p5.ble, and a 32-bit int would be an int32. If you’re using unsigned ints on the Arduino side, then your ranges are different. A 16-bit unsigned int ranges from 0 to 65,535, and a 32-bit unsigned int goes from 0 to 4,294,967,295.
Further Reading
The ArduinoBLE reference is useful if you want to know all the commands that the library can offer. Likewise, the p5.ble reference is a valuable read as well.
The ArduinoBLE library supports both peripheral and central modes on the Nano33’s and the MKR1010. Here’s a pair of sketches that shows how to connect from a central to a peripheral.