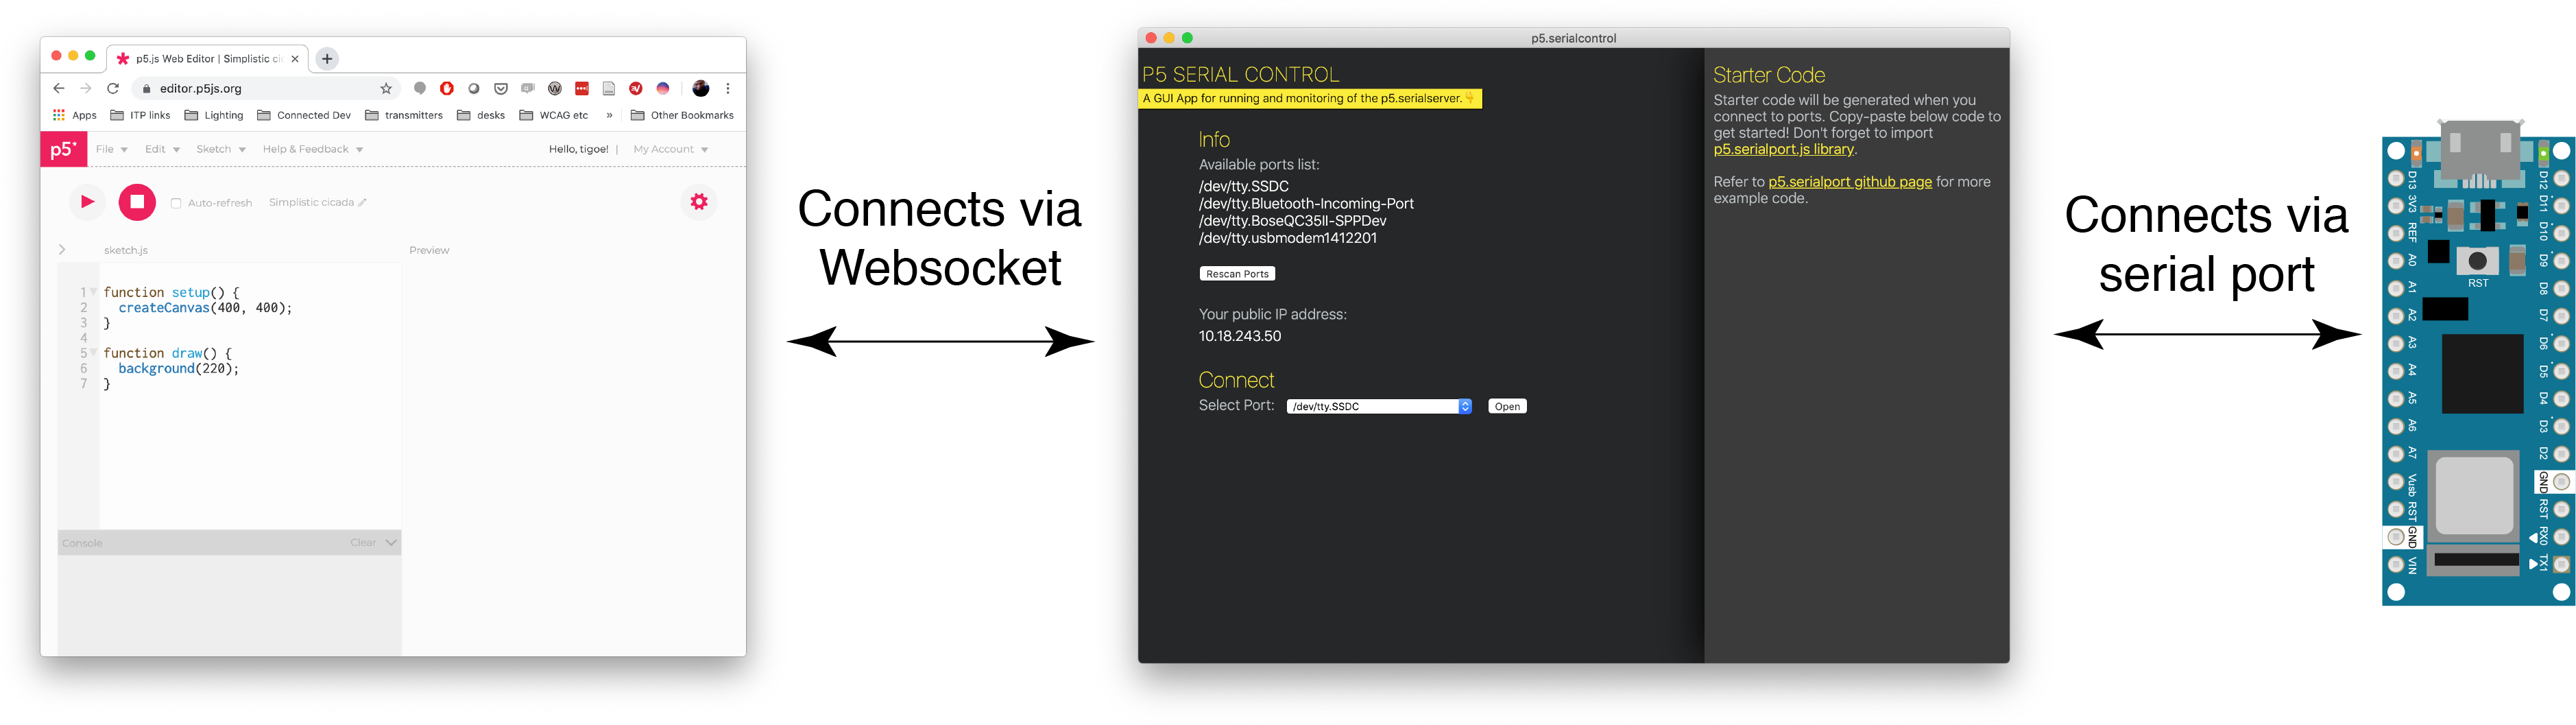
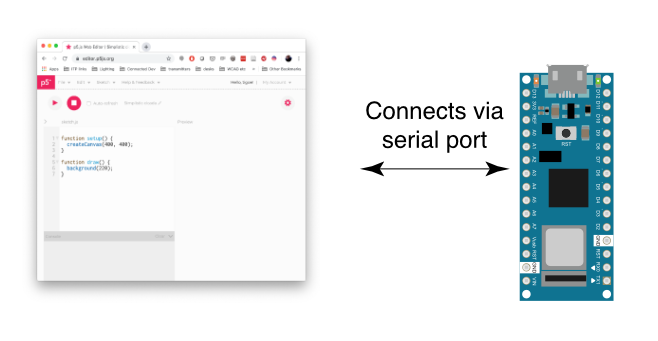
Asynchronous serial communication is not part of the core of p5.js, nor is it part of the core for web browsers. To read serial in a p5.js sketch, or in a web page in general, you need some help. One approach is to open a separate application that connects to the serial port and offers a webSocket connection to the browser. This is the approach that the p5.serialport library and the p5.serialcontrol app take. Another approach is to use the browser API called WebSerial. This is the approach that the p5.webserial library takes.
The difference between them is best illustrated by Figures 1 and 2 below. With p5.seriaport, you must open another application on your computer, p5.serialcontrol, to communicate with the serial port. It is this application that handles serial communication, not the p5.js sketch in the browser. This can be more complicated for beginning users.
| p5.serialport/p5.serialcontrol: | p5.webserial: |
|---|---|
| advantages: * works in all browsers. * Allows your browser to connect to the serial port of a remote computer, if that computer is running a web server program. * Supports opening multiple serial ports at the same time | advantages: * connection is direct to the browser, making it easier for beginners to learn |
| disadvantages: * requires a third application (p5.serialcontrol), making it more difficult for beginners to learn | disadvantages: * only works in Chrome and Edge browsers * No connection to remote computers * Not sure if it supports a second serial port. |
The APIs of p5.serialport and p5.webserial are similar, so it’s pretty straightforward to convert between them.
The code below is a typical p5.serialport setup. You make an instance of the p5.serialport library with the port name, then you make callback functions for the primary tasks:
let serial;          // variable to hold an instance of the serialport library
let portName = '/dev/cu.usbmodem1421';  // fill in your serial port name here

function setup() {
  serial = new p5.SerialPort();       // make a new instance of the serialport library
  serial.on('list', printList);  // set a callback function for the serialport list event
  serial.on('connected', serverConnected); // callback for connecting to the server
  serial.on('open', portOpen);        // callback for the port opening
  serial.on('data', serialEvent);     // callback for when new data arrives
  serial.on('error', serialError);    // callback for errors
  serial.on('close', portClose);      // callback for the port closing

  serial.list();                      // list the serial ports
  serial.open(portName);              // open a serial port
}
The code below is a typical p5.webserial setup. You check t see if WebSerial is available, and then you make an instance of the p5.webserial library, then you look for ports using getPorts():
// variable to hold an instance of the p5.webserial library:
const serial = new p5.WebSerial();
 // port chooser button:
let portButton;
// variable for incoming serial data:
let inData;

function setup() {
   // check to see if serial is available:
   if (!navigator.serial) {
    alert("WebSerial is not supported in this browser. Try Chrome or MS Edge.");
  }
  // check for any ports that are available:
  serial.getPorts();
  // setup function continues below:
Unlike with p5.serialport, you don’t pass in the port name. Instead, the user chooses the port with a pop-up menu:
  // if there's no port chosen, choose one:
  serial.on("noport", makePortButton);
  // open whatever port is available:
  serial.on("portavailable", openPort);
  // setup function continues below:
Then you make callback functions for the primary tasks. These are similar to p5.serialport’s callbacks:
   // handle serial errors:
  serial.on("requesterror", portError);
  // handle any incoming serial data:
  serial.on("data", serialEvent);
  serial.on("close", makePortButton)
  // setup function continues below:
You also add listeners for when the USB serial port enumerates or de-enumerates. This way, if you unplug your serial device or reset it, your program automatically reopens it when it’s available:
  // add serial connect/disconnect listeners from WebSerial API:
  navigator.serial.addEventListener("connect", portConnect);
  navigator.serial.addEventListener("disconnect", portDisconnect);
} // end of setup function
The functions in each API are similar too:
| p5.serialport functions (from the library’s guide) | p5.webserial functions (from the library’s guide) |
|---|---|
read() returns a single byte of data (first in the buffer) | read() — reads a single byte from the queue (returns a number) |
readChar() returns a single char, e,g, ‘A’, ‘a’ | readChar() — reads a single byte from the queue as a character (returns a string) |
readBytes() returns all of the data available as an array of bytes | readBytes() — reads all data currently available in the queue as a Uint8Array. |
readBytesUntil(charToFind) returns all of the data available until | readBytesUntil(charToFind) — reads bytes until a character is found (returns a Uint8Array) |
readString() returns all of the data available as a string | |
readStringUntil(charToFind) returns all of the data available as a string until | readStringUntil(stringToFind) — reads out a string until a certain substring is found (returns a string) |
last() returns the last byte of data from the buffer | |
lastChar() returns the last byte of data from the buffer as a char | |
readLine() — read a string until a line ending is found (returns a string) | |
write() – sends most any JS data type out the port. | write() – sends most any JS data type out the port. |
print()– sends string data out the serial port | |
println() – sends string data out the serial port, along with a newline character. |
Both p5.serialport and p5.webserial will do the job of getting bytes from a serial device like an Arduino or other microcontroller to p5.js and vice versa. Which you use depends on what you need. p5.webserial is great if you’re connected directly to the browser’s computer via USB. For most serial applications, this is the way to go. Alternately, p5.serialport offers the advantage that you can run p5.serialcontrol app on your browser’s computer or on another computer on the same network. That way, a browser on your phone or tablet can communicate to the serial device via the computer running p5.serialcontrol.
This site contains lab examples for both p5.serialport and p5.webserial for your convenience.