Parts And Tools Guide

You’ll use various tools, electronic components, and construction materials in Intro to Physical Computing. This guide will to how to shop for them.

You will need a modern laptop (4 years old or younger is a good rule of thumb).  Limited numbers are available for checkout from the department.  The primary software needed for class, namely the Arduino IDE, is freely downloadable. You are encouraged to download NYU’s free Adobe license as well: https://www.nyu.edu/life/information-technology/computing-support/software/software/adobe.html

Parts Available At ITP

Students in Intro to Physical Computing and IMA Creative Computing will receive a kit of parts the following parts in class from their instructors:

  • Arduino Nano 33 IoT
  • 830-point solderless breadboard
  • Jumper wire kit
  • USB micro cable
  • Force sensing resistors (FSRs), Qty. 3
  • 4-paks of multicolor buttons (tactile switches), Qty. 2
  • 10 -kilohm potentiometers, Qty. 3
  • Rotary encoders, Qty. 2
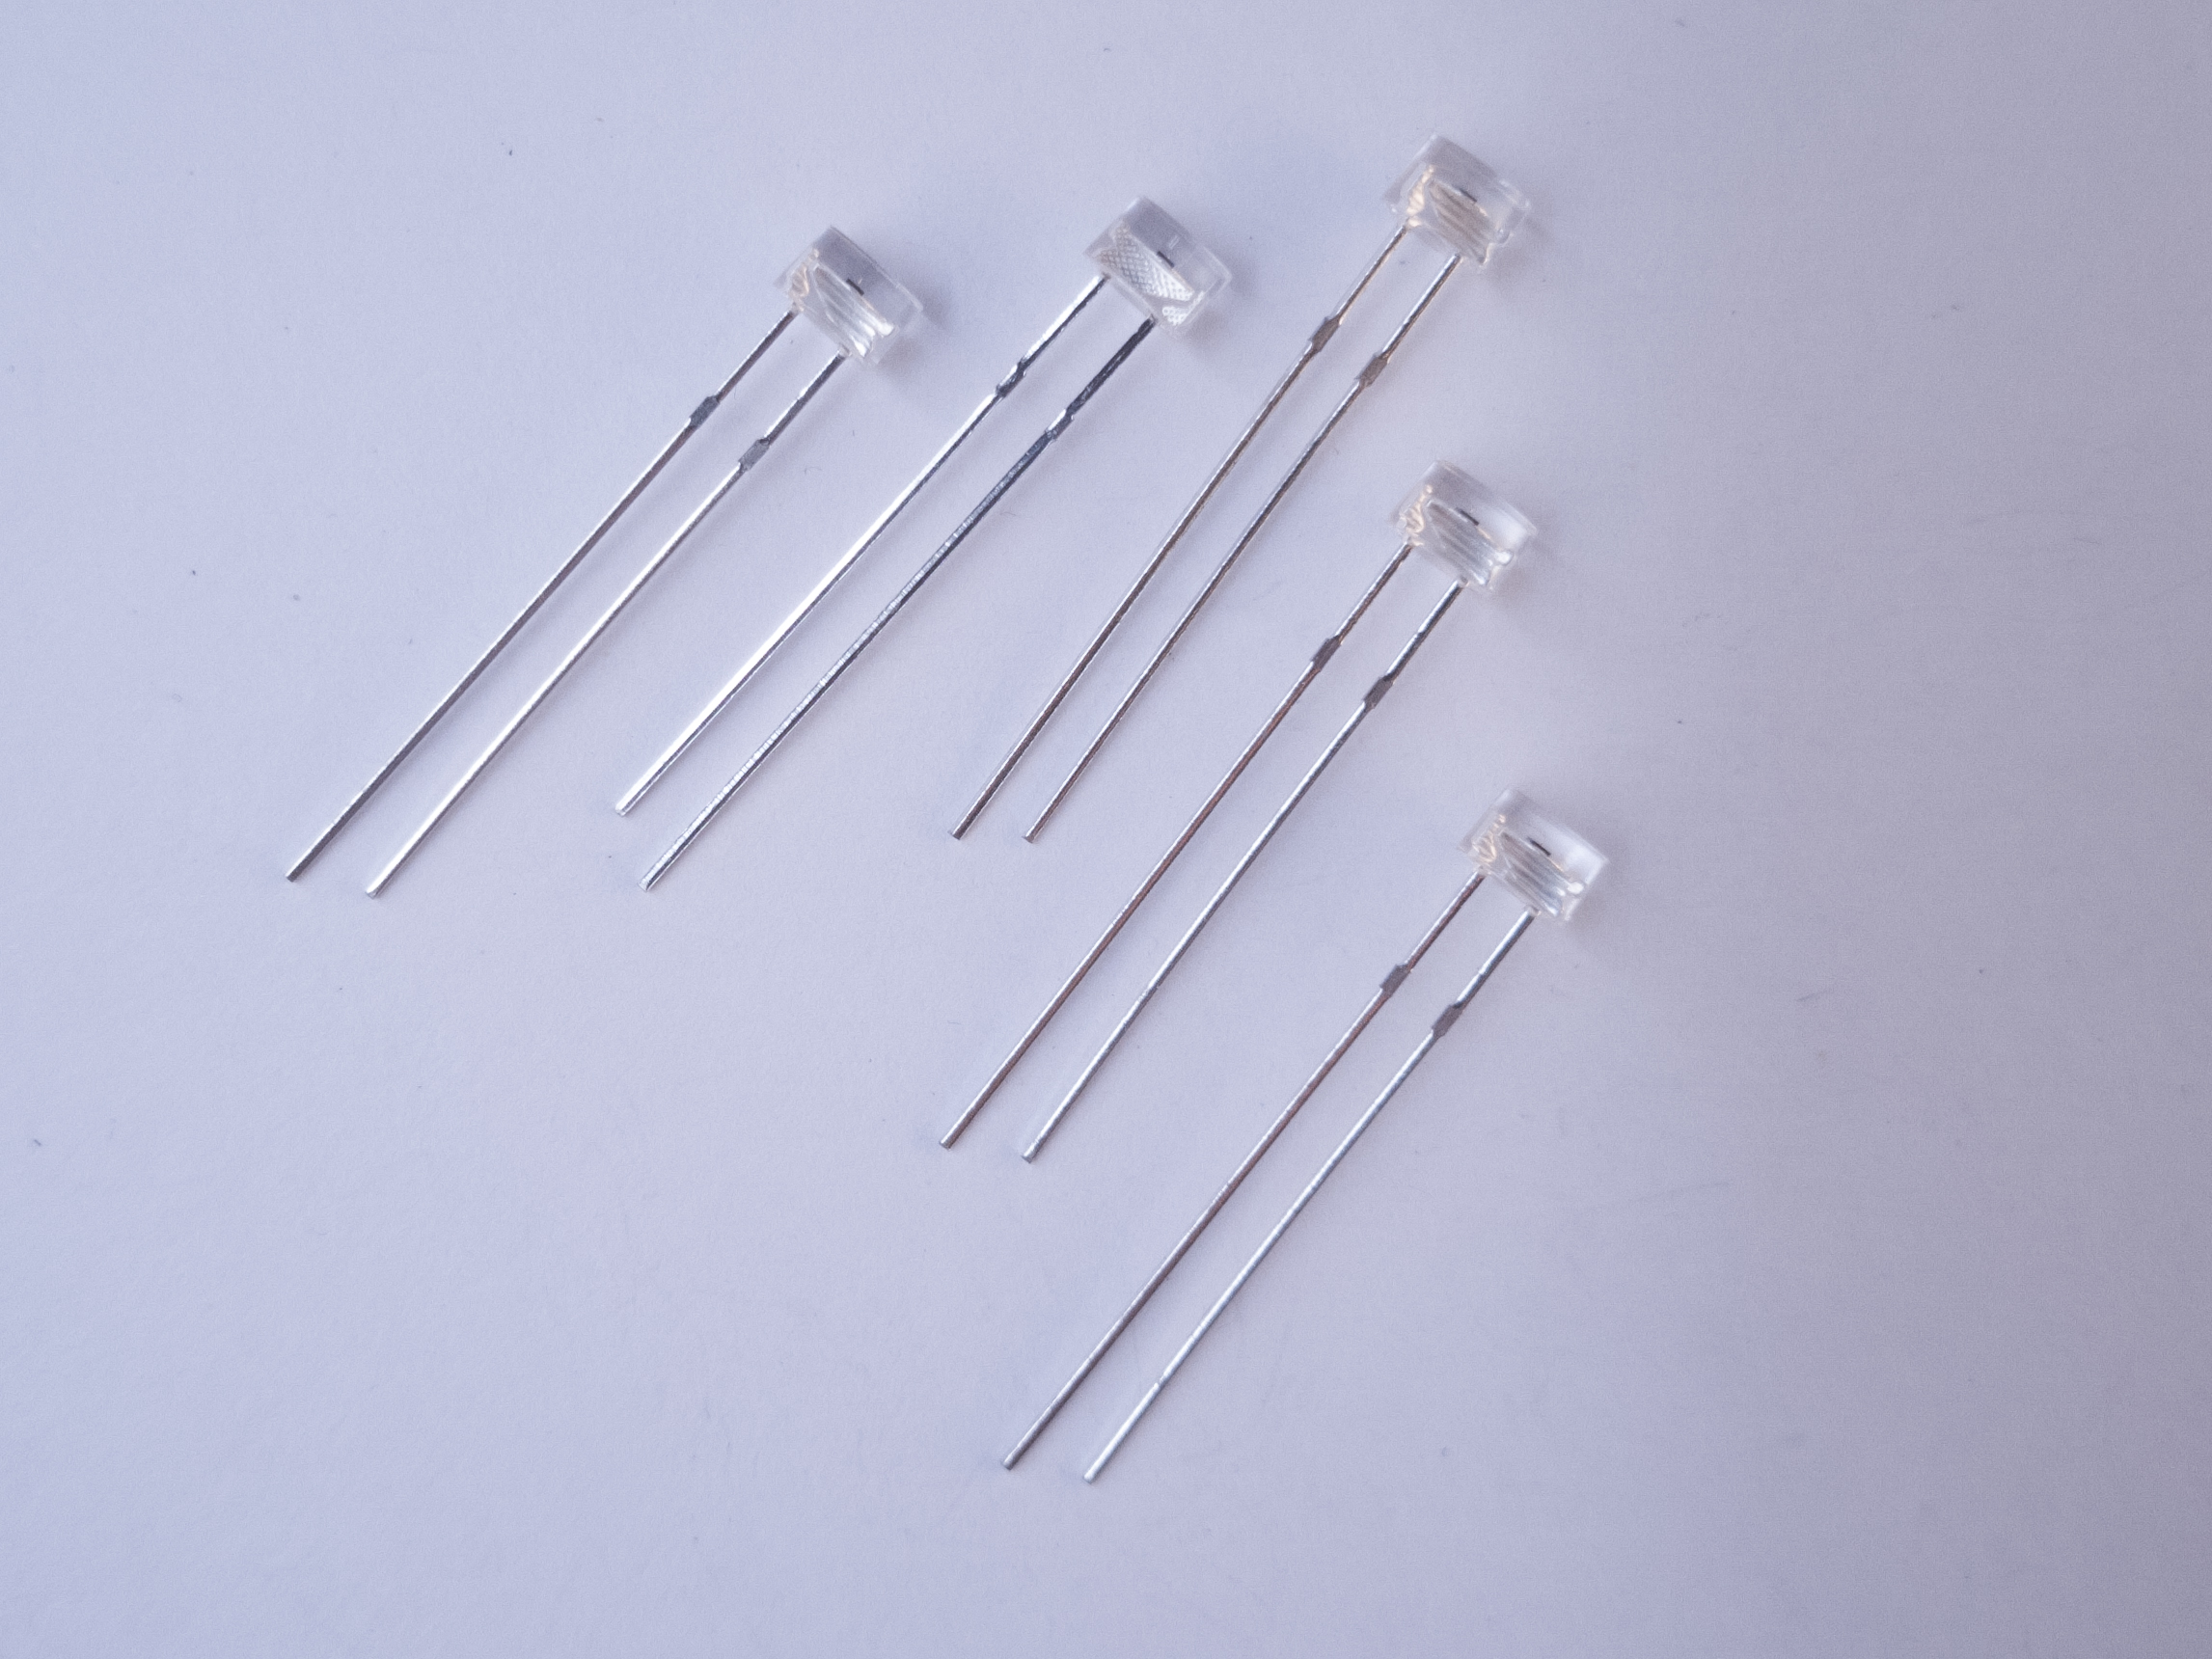
  • phototransistors, Qty. 6
  • RC servo motor and mounting components
  • right angle gear motor
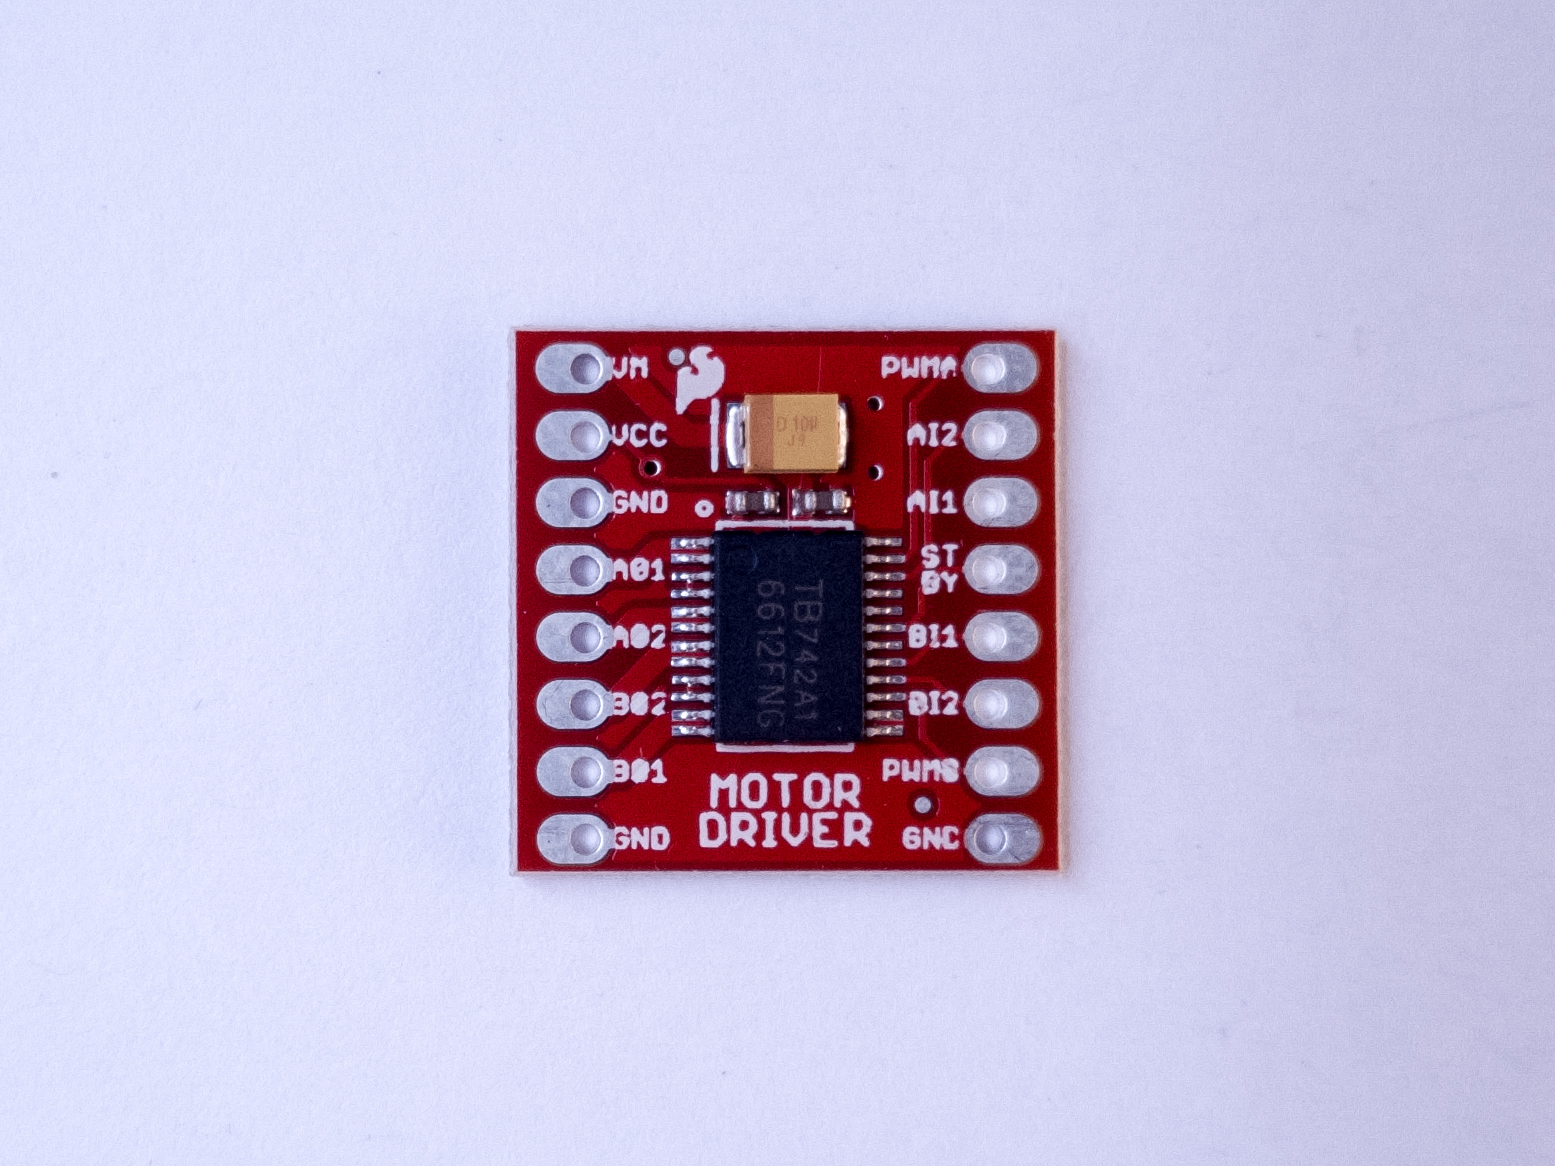
  • TB6612FNG motor driver board
  • 3″ diameter speaker, 4 ohm, 3W
  • VL53L0X time of flight distance sensor

The parts in the kit are your major components for the lab exercises in class. You will also need some components which you can find in the shop’s component stock, including resistors, LEDs, transistors, voltage regulators, capacitors, wire, and more. You can also find tools in the shop which you can use on the floor.

When you begin to work on your larger projects, such as the midterm and final, you will likely need to buy parts for yourself, depending on what you decide to build.

Shop Component Stock

The ITP/IMA shop stocks a number of consumable electronics components. This includes potentiometers, pushbuttons, phototransistors, resistors, capacitors, voltage regulators. These are kept in the bin racks in the shop, and are available for students to take as needed. Please take only what you need for a given class exercise, as stock re-supply is not fast, and we want to make sure everyone has the parts they need. Please inform shop staff if a given part is out of stock. It is possible to do all of the lab exercises in the intro classes with parts we have in in your kit, in shop stock, or in checkout.

Beyond this, students are expected to supply electronics parts for their projects. It’s not possible to anticipate every possible component that every project might need. However, we try to stock items to help you try things before you buy. Always consult with your instructors, shop staff, and research residents on how to choose the most appropriate and economical parts for your projects.

Check-out Components

The shop also has parts available for check-out with an NYU ID, just like the equipment room. These include microcontrollers, advanced sensors, and items which may be specific to various advanced classes. These must be returned after use, just like equipment room stock. You can check out components for up to two weeks at a time.

For other parts, talk to your instructors and the resident researchers. If you’re considering a part for your project, they can advise whether it’s the right part for the job, and if there’s one available for loan on the floor, they can procure it.

When You’re Done with Components

Many students at ITP/IMA don’t continue with electronics beyond the intro classes. If you have components in good condition that you’re no longer going to use, feel free to give them to shop staff or your instructors. We’ll do our best to keep components in use and out of landfills.

Shopping for Electronic Components

The intro kits and shop component stock can supply what you will need to complete the assigned lab exercises. For your project assignments, however, you may need a wider range of sensors and/or actuators.

Learning to shop for parts is a useful electronics skill, so we’ve assembled a number of Bills of Materials on Octopart to get you started. Octopart is a site that collects part data from multiple distributors around the world. They list several vendors from our suppliers list for each part. You may find this video about online electronics vendors and this video on how to use Octopart helpful as well.

We realize students will be shopping in many different regions of the world, and Octopart lists alternative vendors that supply as many regions as possible. Mouser, Digikey, and Arrow, all on Octopart, all have outlets in China, for example; Newark, Farnell all cover Europe and the Americas well; RS Components covers the Americas, Europe, and multiple countries in Africa. We have also put together a list of similar parts on Taobao as well. With these lists, you should be able to assemble the parts you need for the labs at the best price possible. Check each vendor to see what they charge to ship to where they are. If you know of a local vendor, feel free to use them instead.

There are a few lists on Octopart that you should pay attention to. The basic parts list and the tool list will get you through most of the labs in the class. For the last two labs in the semester, and probably for your last two project assignments, you’ll need to pick from the Sensor list and the Motor or Lighting lists.

  • ITP Pcomp Basic Parts – includes the parts you’ll need for the labs in most of the semester, including the breadboard and processor and components available in the shop component stock. This list is generally 100% in stock on Digikey, one of our most used vendors, as well.
  • ITP Tool List 2020 – The shop has hand tools available for students’ use, but if you want your own tools, this list includes basic hand tools you’ll need if you don’t already have them. Lists several options for each.

Advanced lists for later in the semester:

  • ITP Pcomp Sensor List – includes more advanced sensors. These are the kinds of sensors covered in the synchronous serial labs. This list will also be handy in later project assignments, when you’re looking for sensors specific to your project’s needs.
  • ITP Pcomp Motor List – includes parts for motor and mechanical projects, used in the motors and high current lab later in the semester. May be useful in some of your project assignments as well.
  • ITP Pcomp Lighting List – includes parts for LED lighting control, used in the motors and high current lab later in the semester. May be useful in some of your project assignments as well.

Can I Get a Starter Kit?

There are many Arduino starter kits on the market, but at the moment, none of them contain all the parts we recommend for this class. In particular, there is no kit for the Nano 33 IoT microcontroller yet. You can get a kit if you prefer, but you will likely have to shop for additional parts as well.

Components in Detail

The various types of parts you’ll find in the lists, and that you’ll need for the class, are detailed below.

Microcontroller

Used in most every week’s lab.

Photo of an Arduino Nano 33 IoT module. The USB connector is at the top of the image, and the physical pins are numbered in a U-shape from top left to bottom left, then from bottom right to top right.
Figure 1. Arduino Nano 33 IoT

We’ll be working with the Arduino microcontroller platform. Recently we have switched to the Nano 33 IoT as our standard model. Most of the lab exercises are also compatible with the Arduino Uno, but the Nano 33 IoT offers some useful features that the Uno lacks, such as:

We have a guide to picking a microcontroller that may be helpful for more information. You can use any Arduino-compatible variant that you choose, and we’ll do our best to support you, but we can’t promise to know every variant on the market, there are several of dubious quality.

USB Cable

Used in most every week’s lab.

You’ll need a USB cable to connect your computer to your microcontroller as well. You can probably use one that you already have. The Nano 33 IoT has a USB Micro-B connector.

Resistors

Used in most every week’s lab.

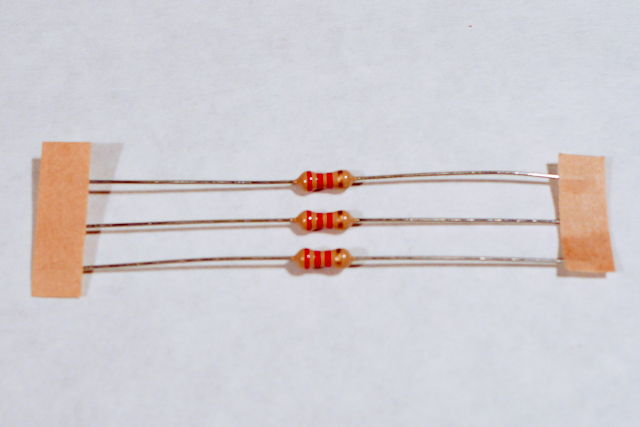
You’ll use resistors for many projects. The most common type you’ll need are 1/4 watt through-hole resistors in the values 220 ohm, 1 kilohm, and 10 kilohm. Occasionally, you might need other values as well, but most projects in this class can be done with combinations of those values. Resistors are usually bought in bulk, but there are also some handy resistor kits that contain samples of many different resistance values. A kit like this one from Sparkfun can last for a couple years of projects for the average electronics hobbyist

Breadboards

Used in most every week’s lab.

Photo of a solderless breadboard
Figure 5. a solderless breadboard.

Most of your projects will be built on a solderless breadboard. There’s a lab to get you familiar with how they work. There are a few different models of these. The most common for this class are 16 x 54mm with 830 tie points and two vertical bus rows on either side. The smaller 84 x 54mm version with 400 tie points is also popular.

There are well-made breadboards, and there are cheap ones. Cheap ones seem like a good deal, but they can be difficult to use and easy to break components on. This chart compares different models of breadboards. Our favorites are from Jameco ValuePro, Twin Industries, and Bud Industries.

Breadboards can be reused for each lab, but sometimes it’s handy to have a spare.

For more permanent projects, you can use a printed circuit board to hold your components together. This requires you to solder each wire and component to the board, and cannot be disassembled, so it’s really only used for finished devices. There are some perma-proto boards with the same layout as a standard solderless breadboard that make transferring your circuit easy.

Wires

Used in most every week’s lab.

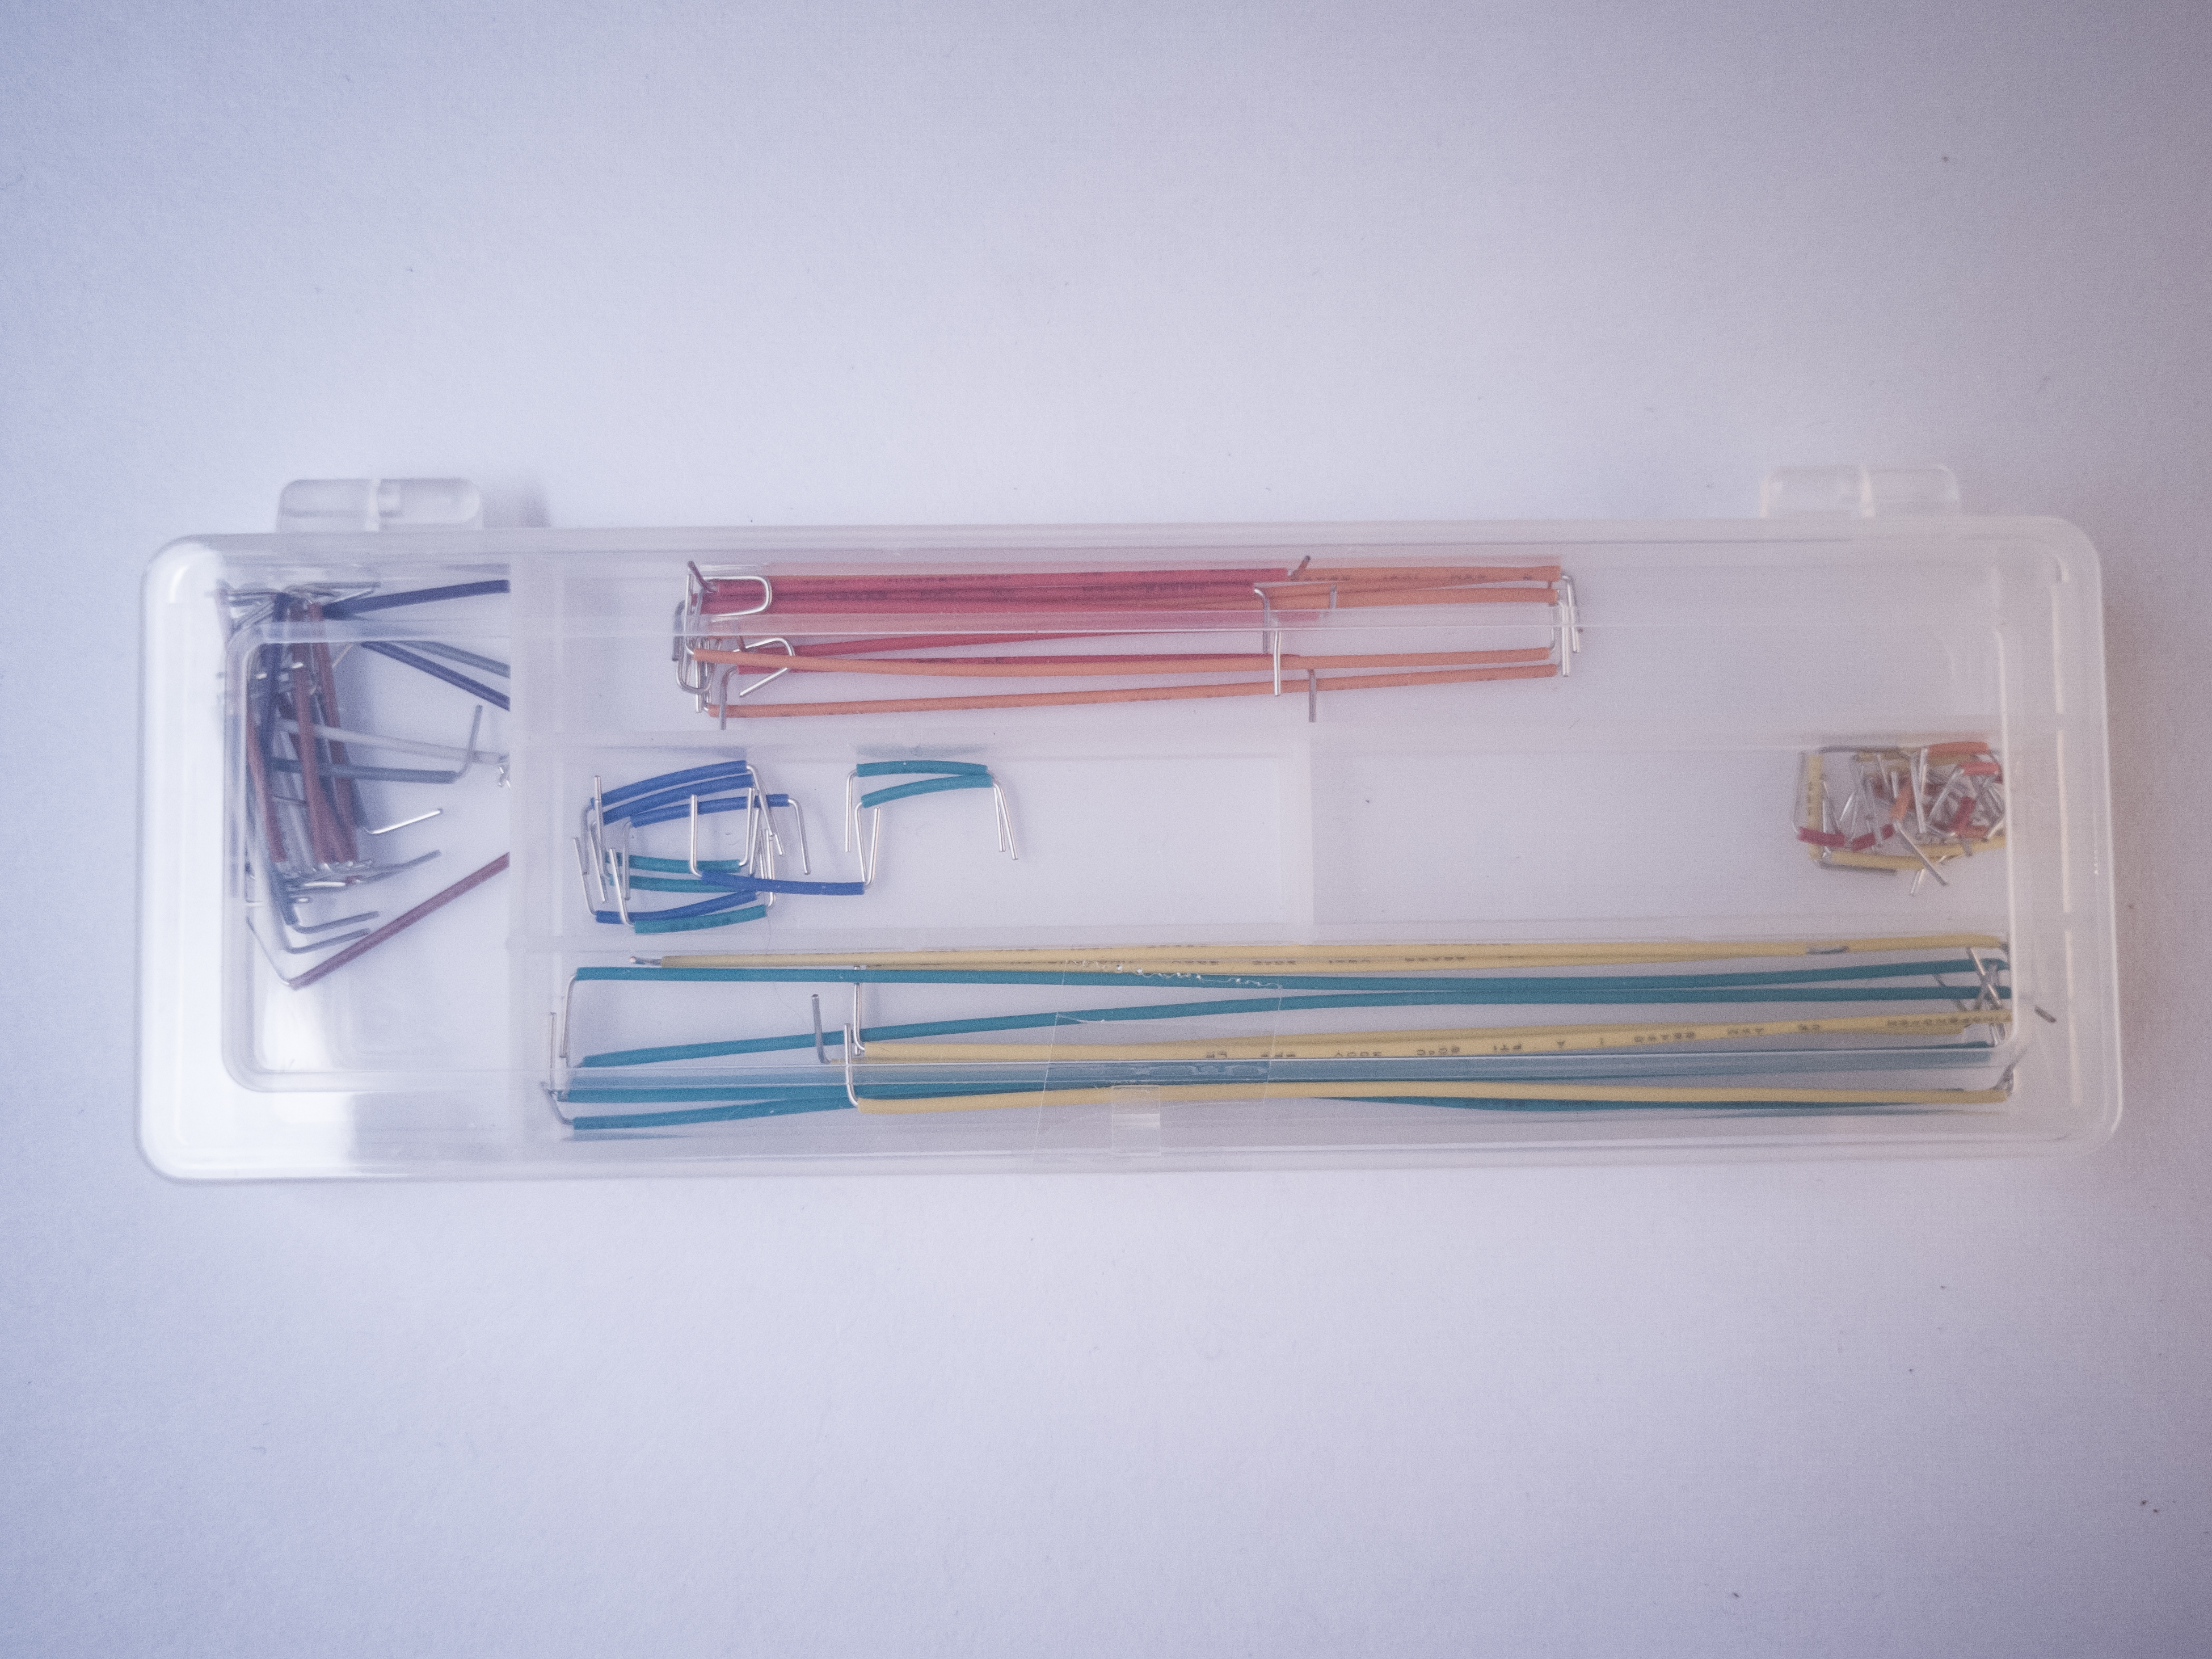
You’ll use a lot of wires to connect components on your breadboards. The breadboards support 22 AWG thickness wires. Some people prefer pre-cut solid core jumper wires, because they can lay flat on the breadboard and they insert into the board firmly. Others prefer flexible jumper wires because they’re easier to add and remove, so you can be spontaneous, but they make for a messier project, and are easy to accidentally pull out.

Another option is to order rolls of 22AWG solid core wire and custom cut your own jumper wires for each project. This is more time-consuming, but makes for a tidy and manageable board. Sometimes you can find multi-pack rolls of this wire in different colors like this one or this one. Here’s a wire options comparison list.

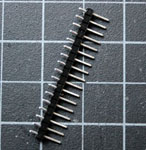
You might need some header pins as well, to solder on to wires and components. These are metal pins, spaced 0.1″ (2.54mm) apart, held together with plastic spacers.

Basic Input And Output Components

Used in most every week’s lab.

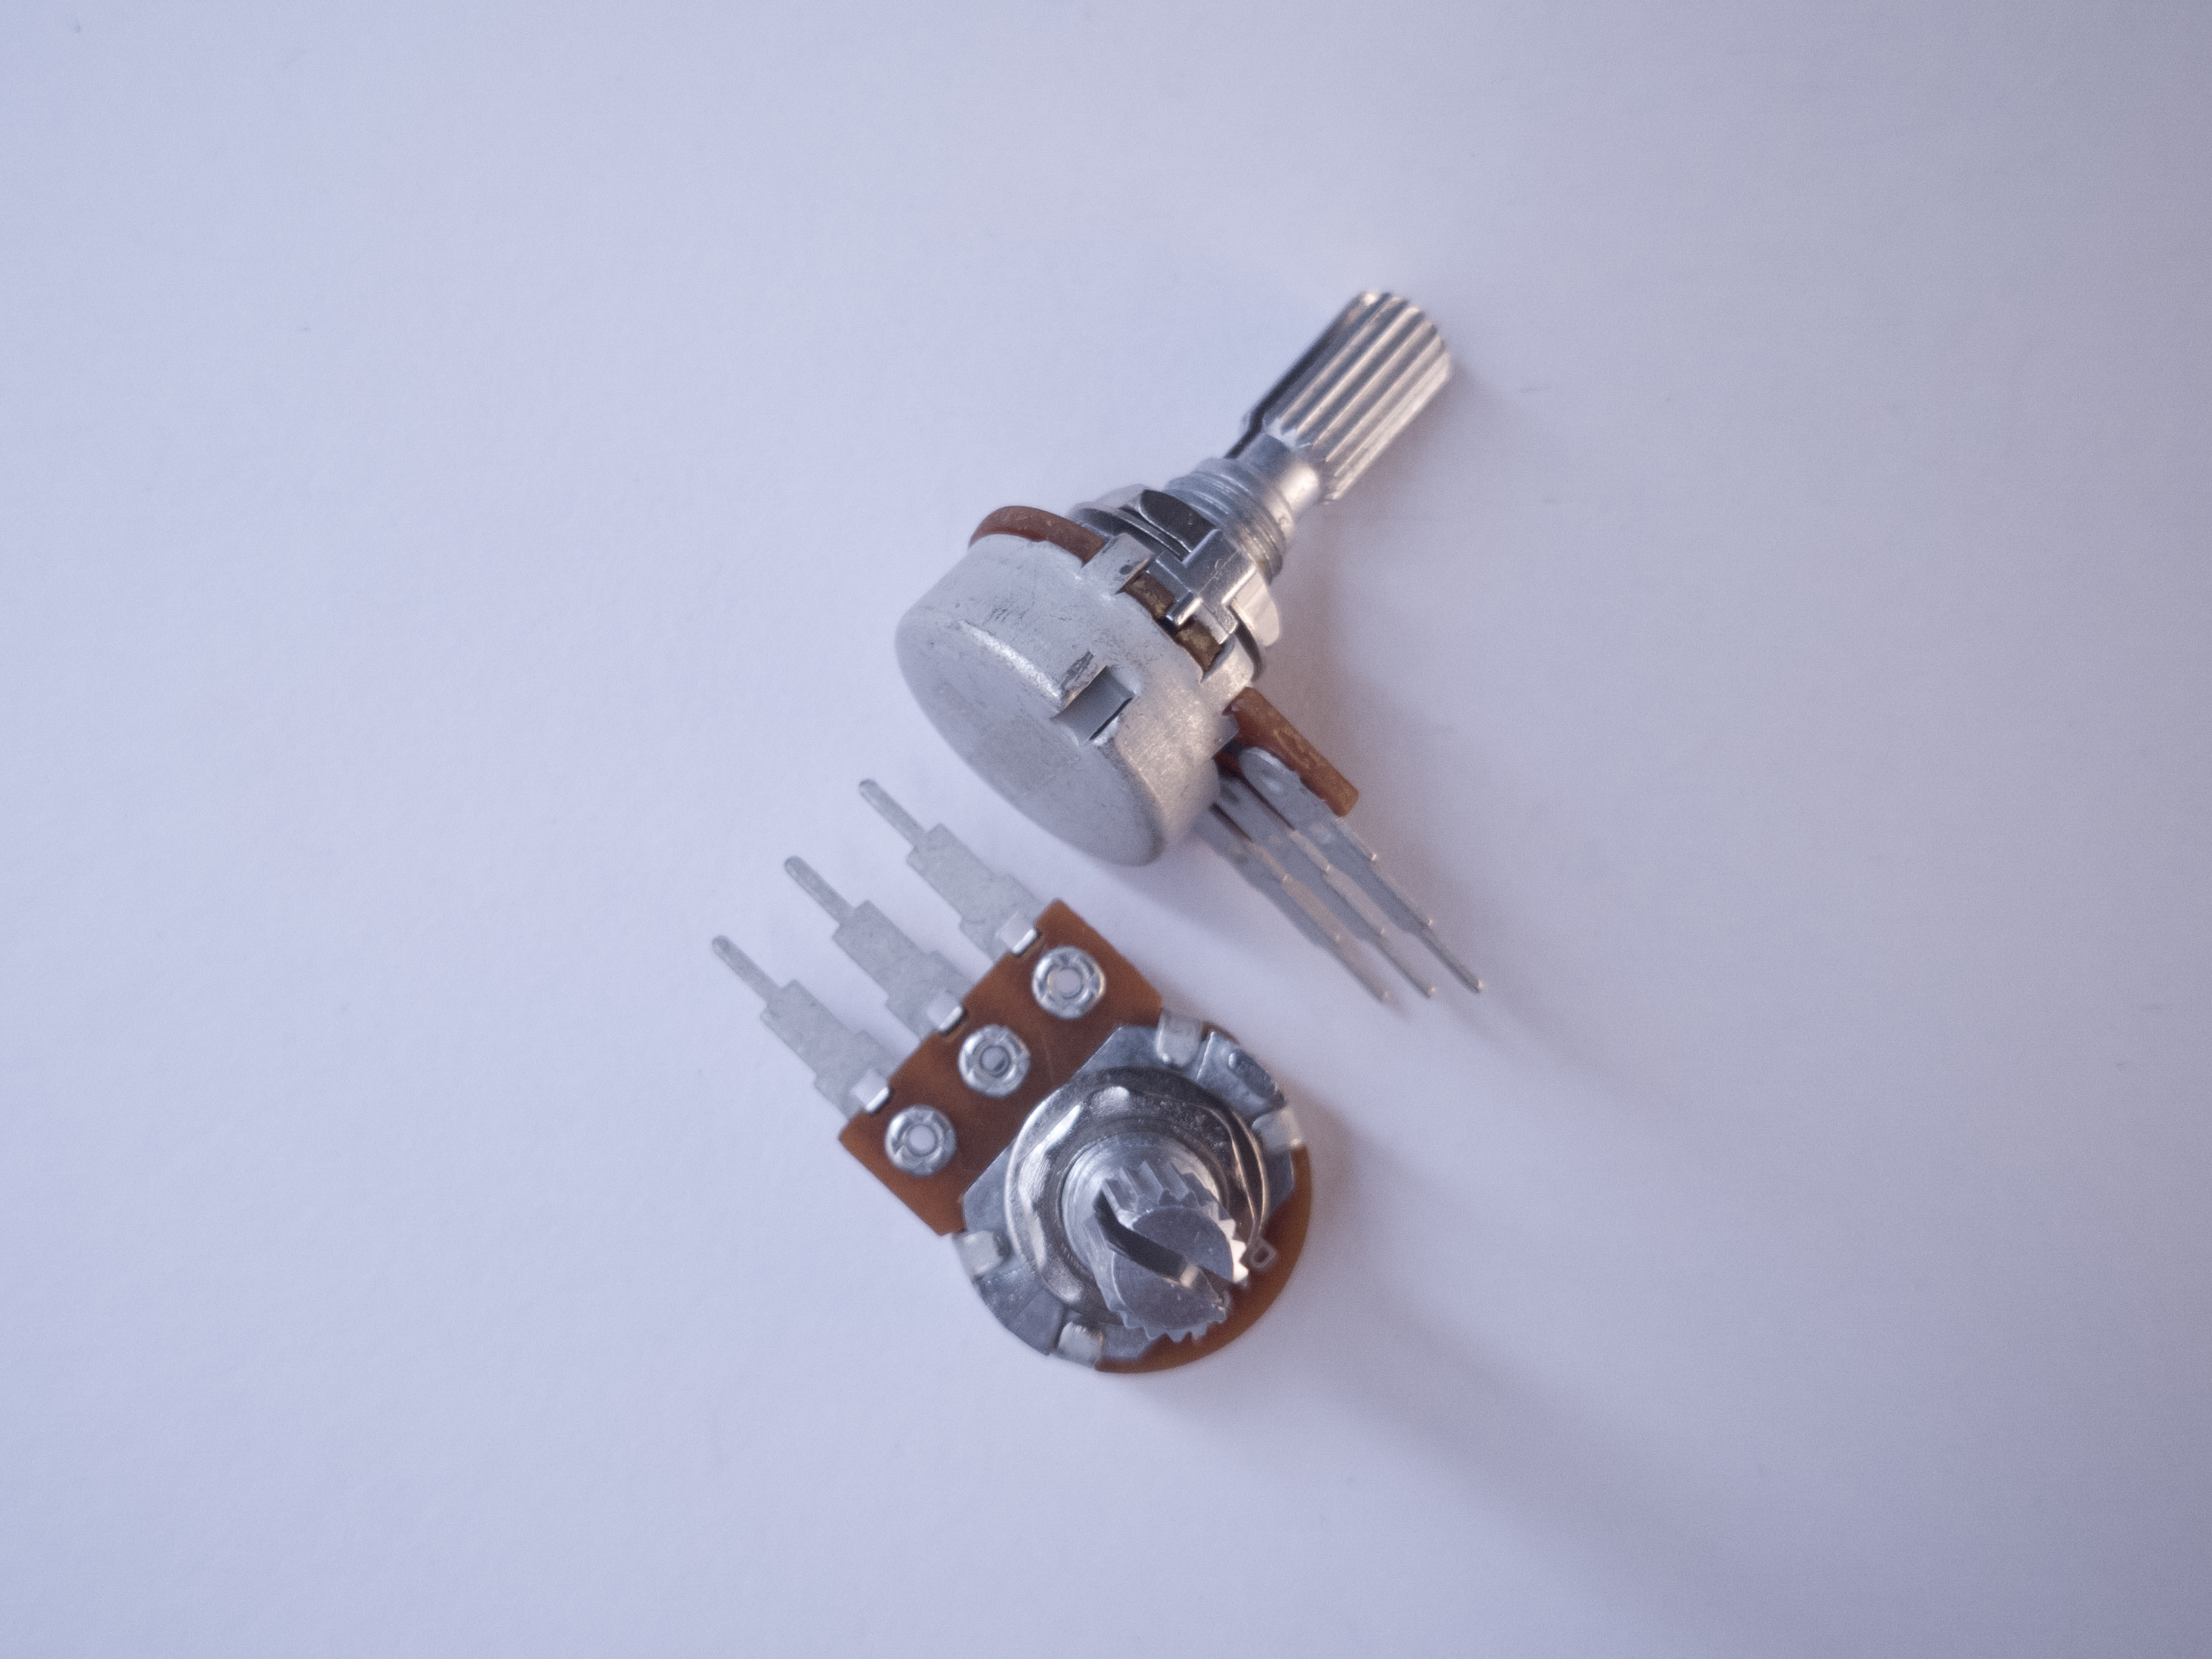
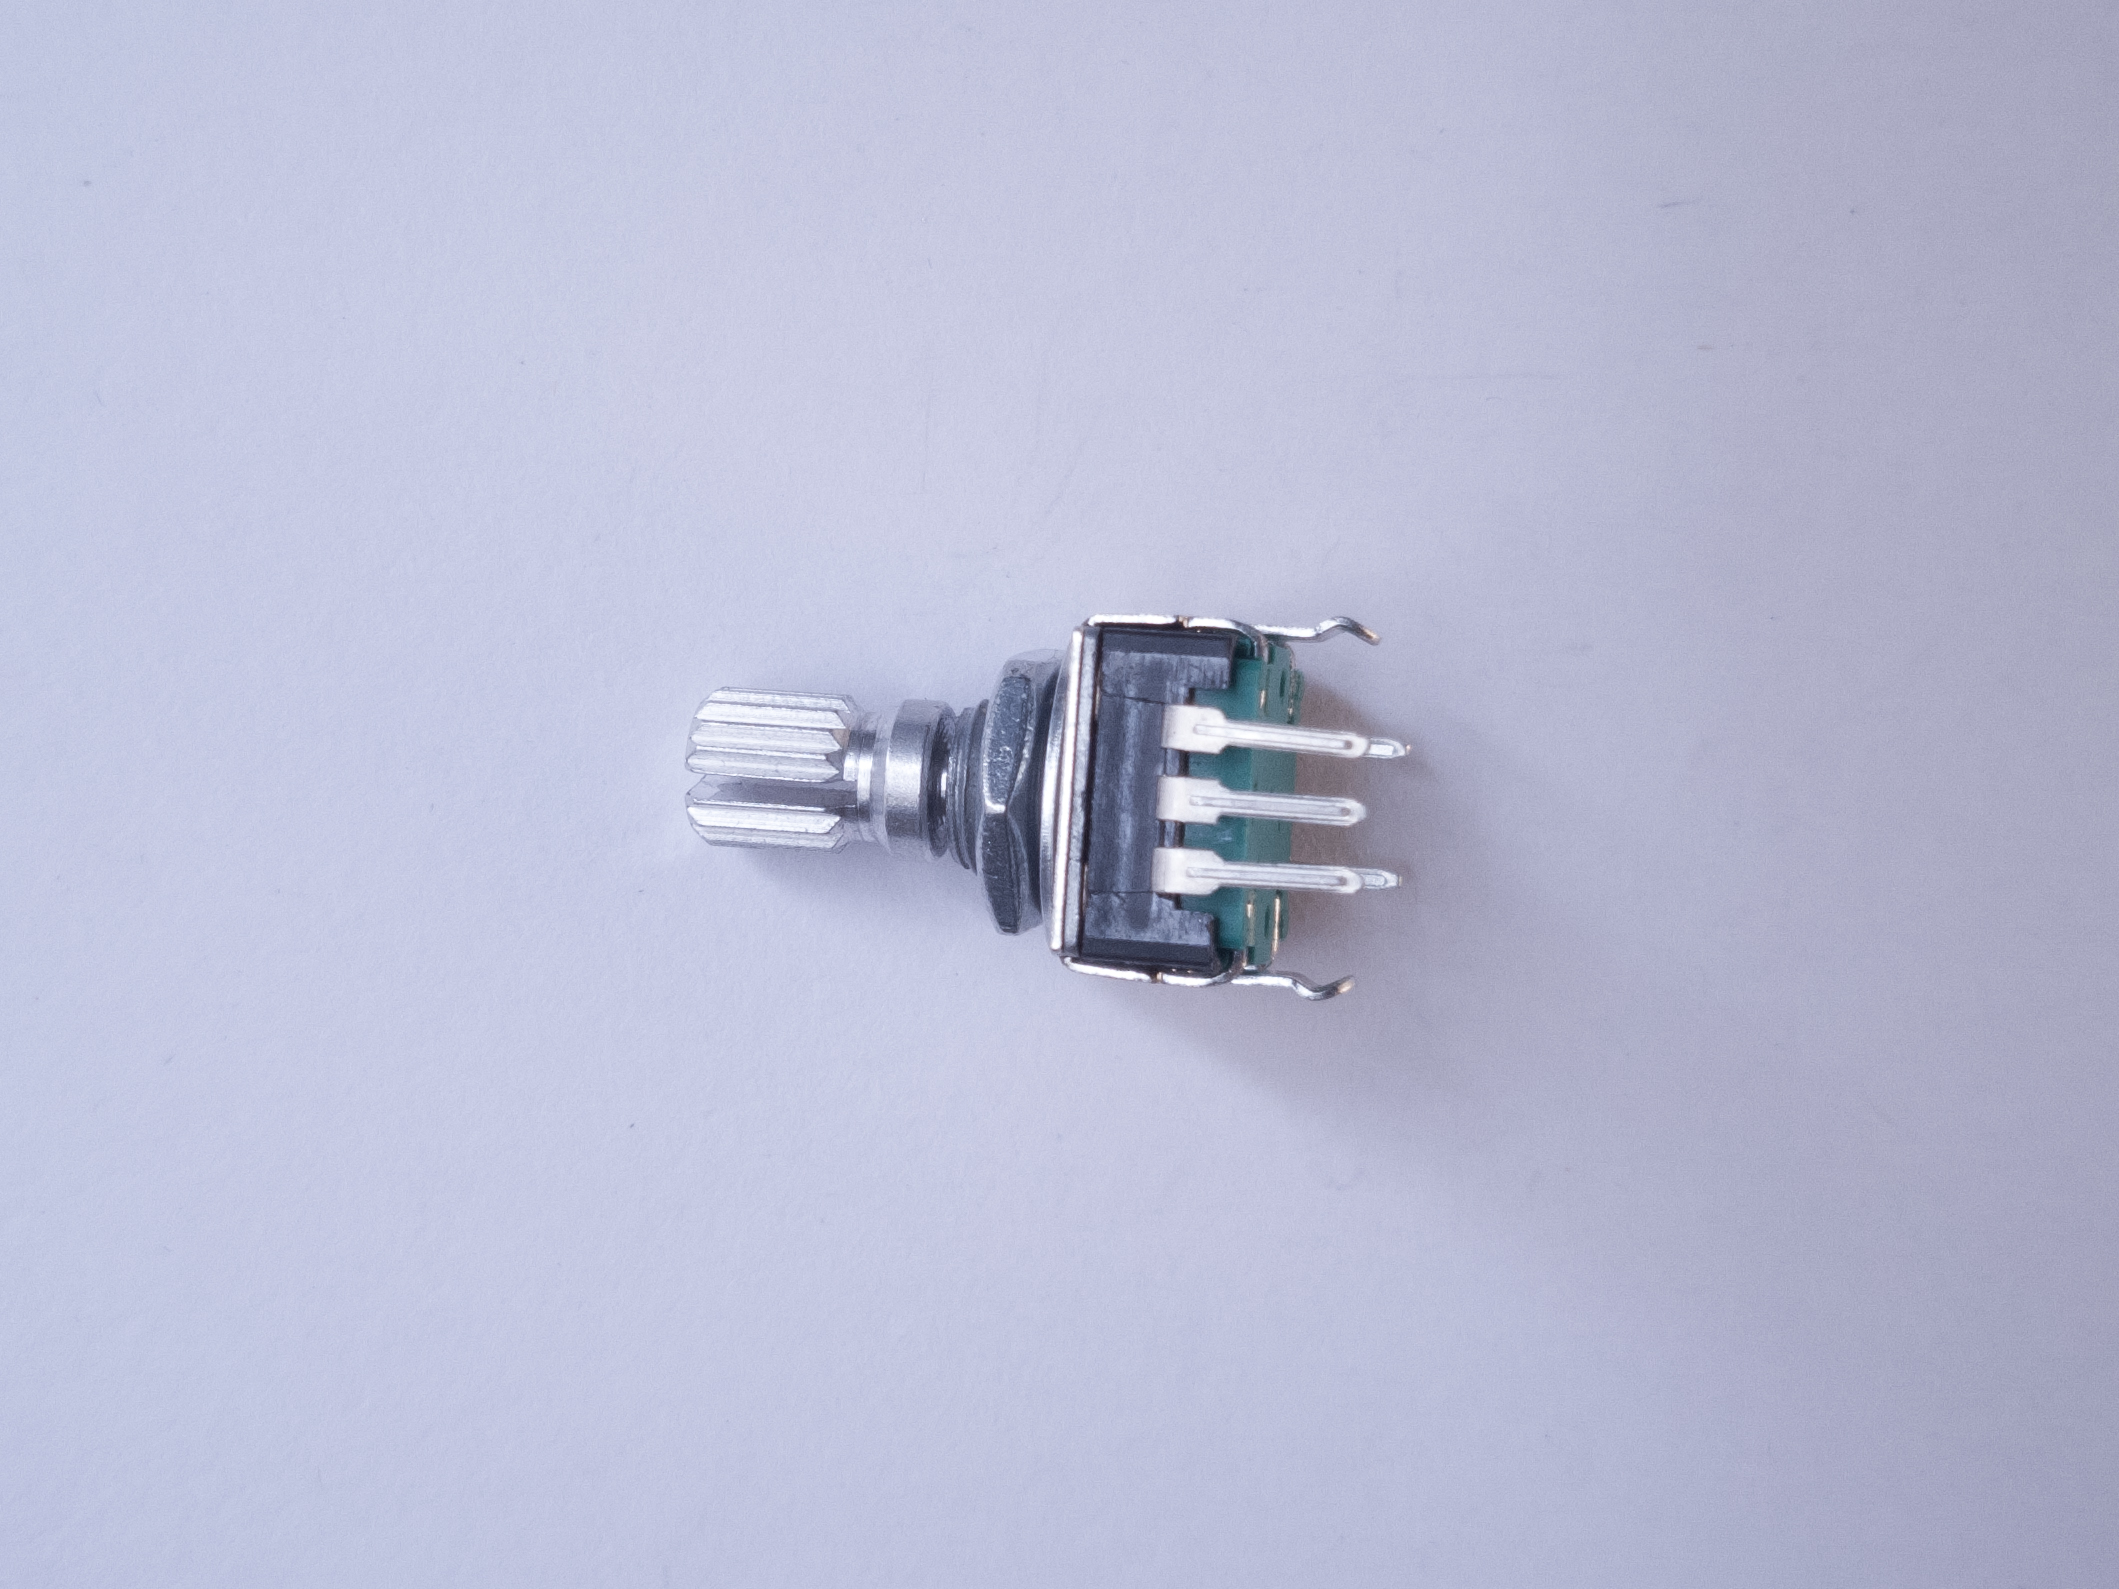
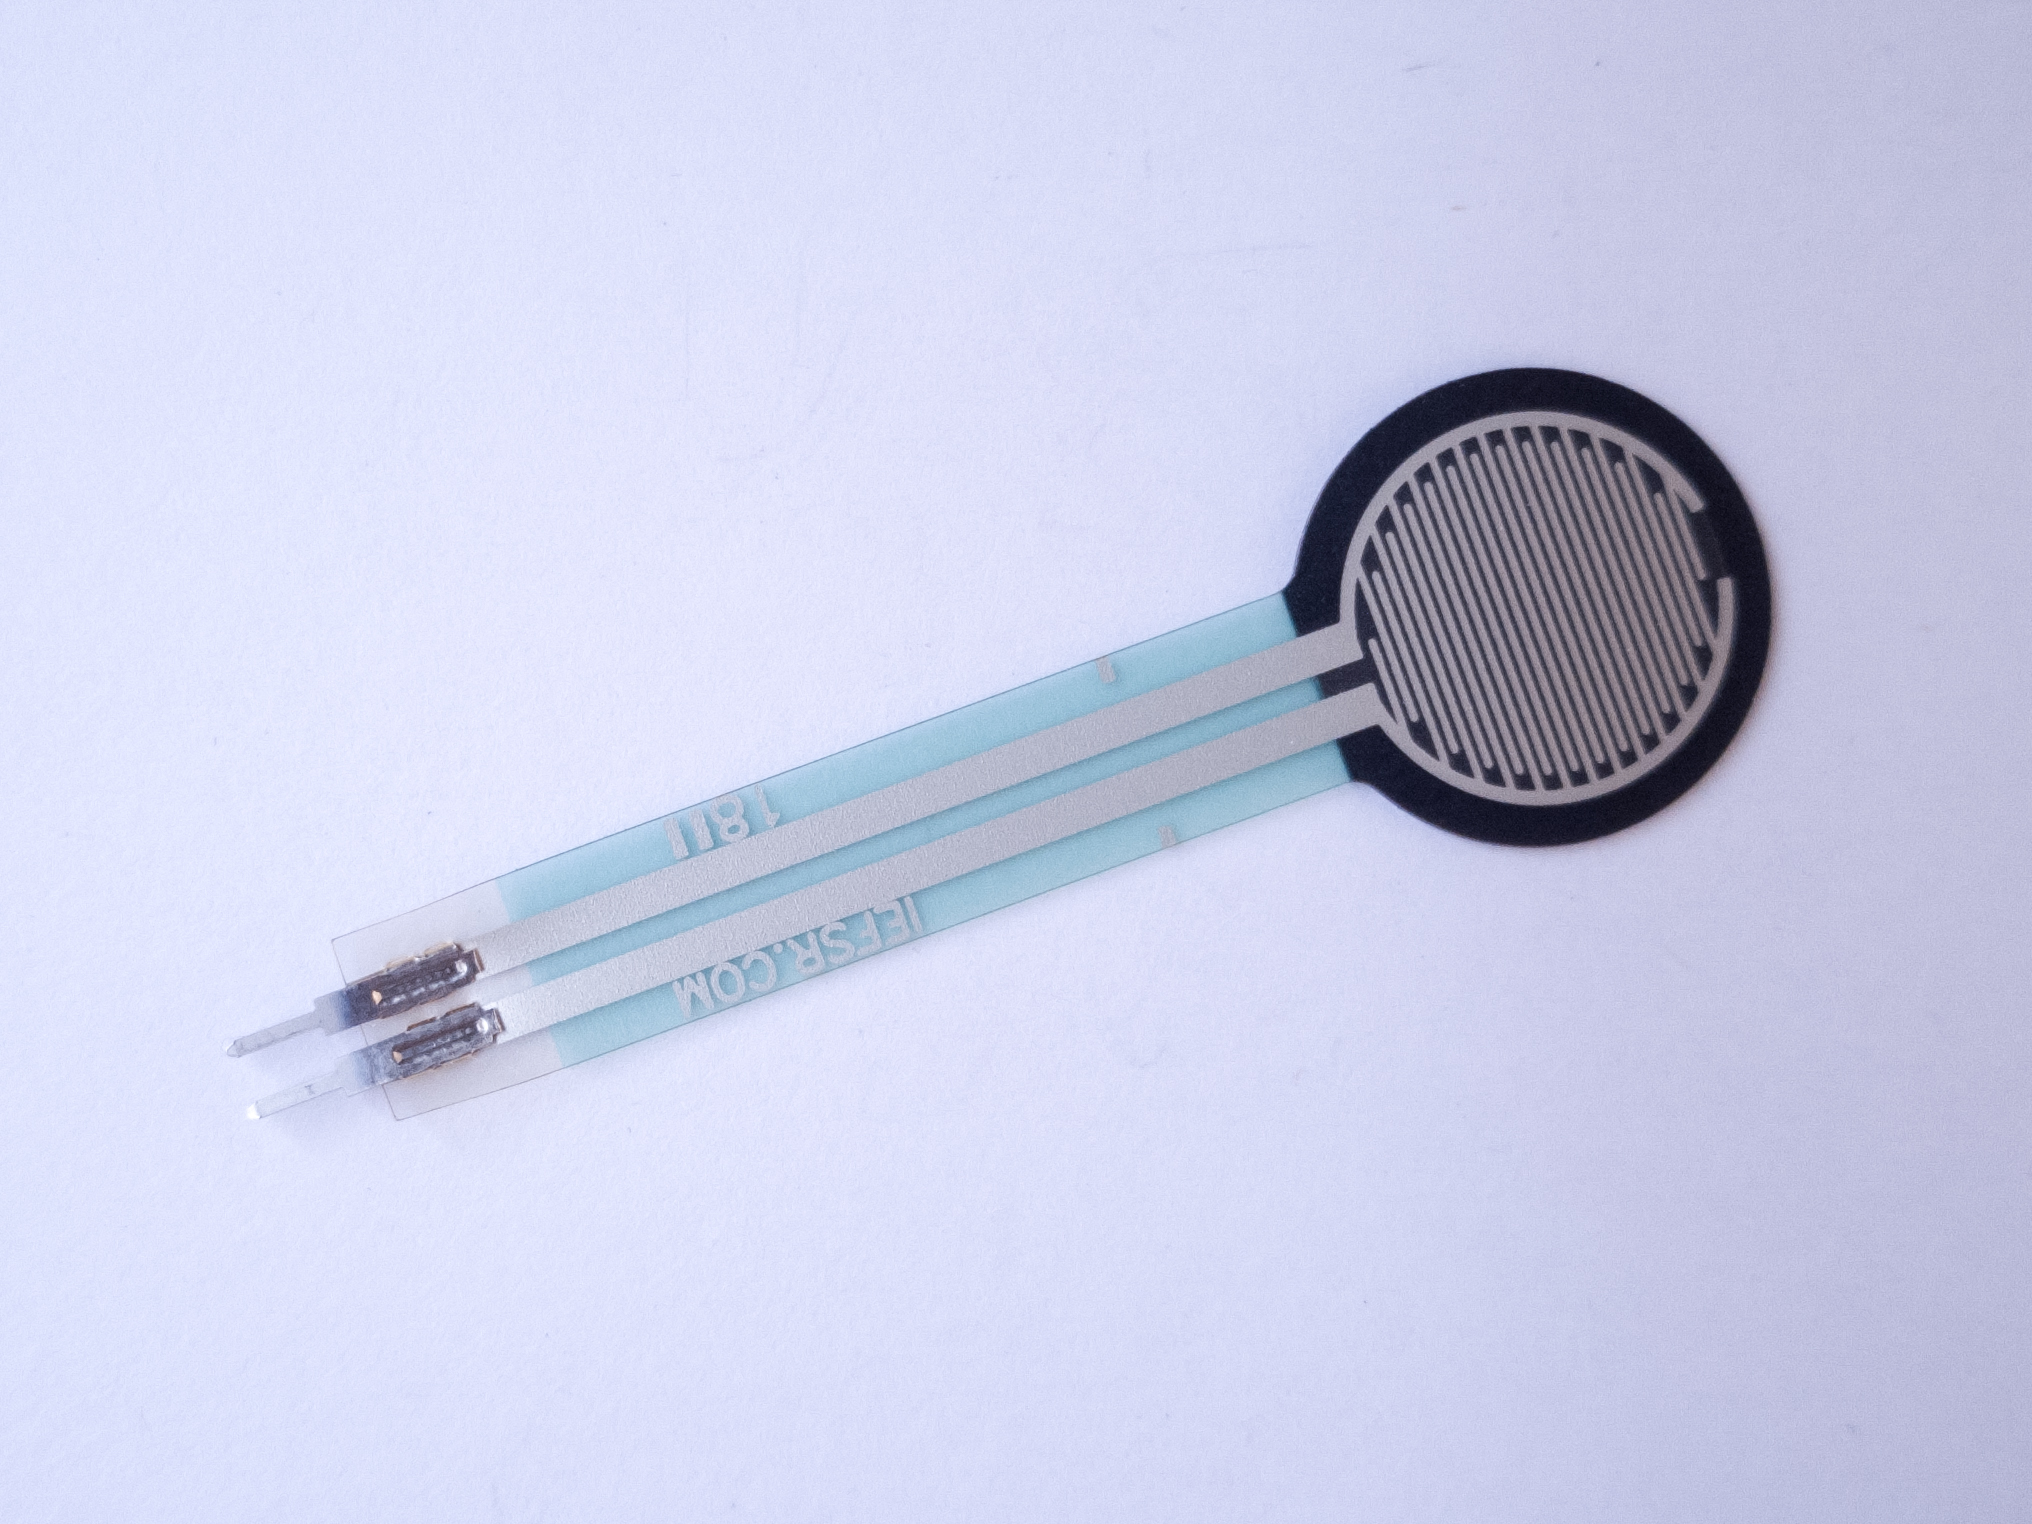
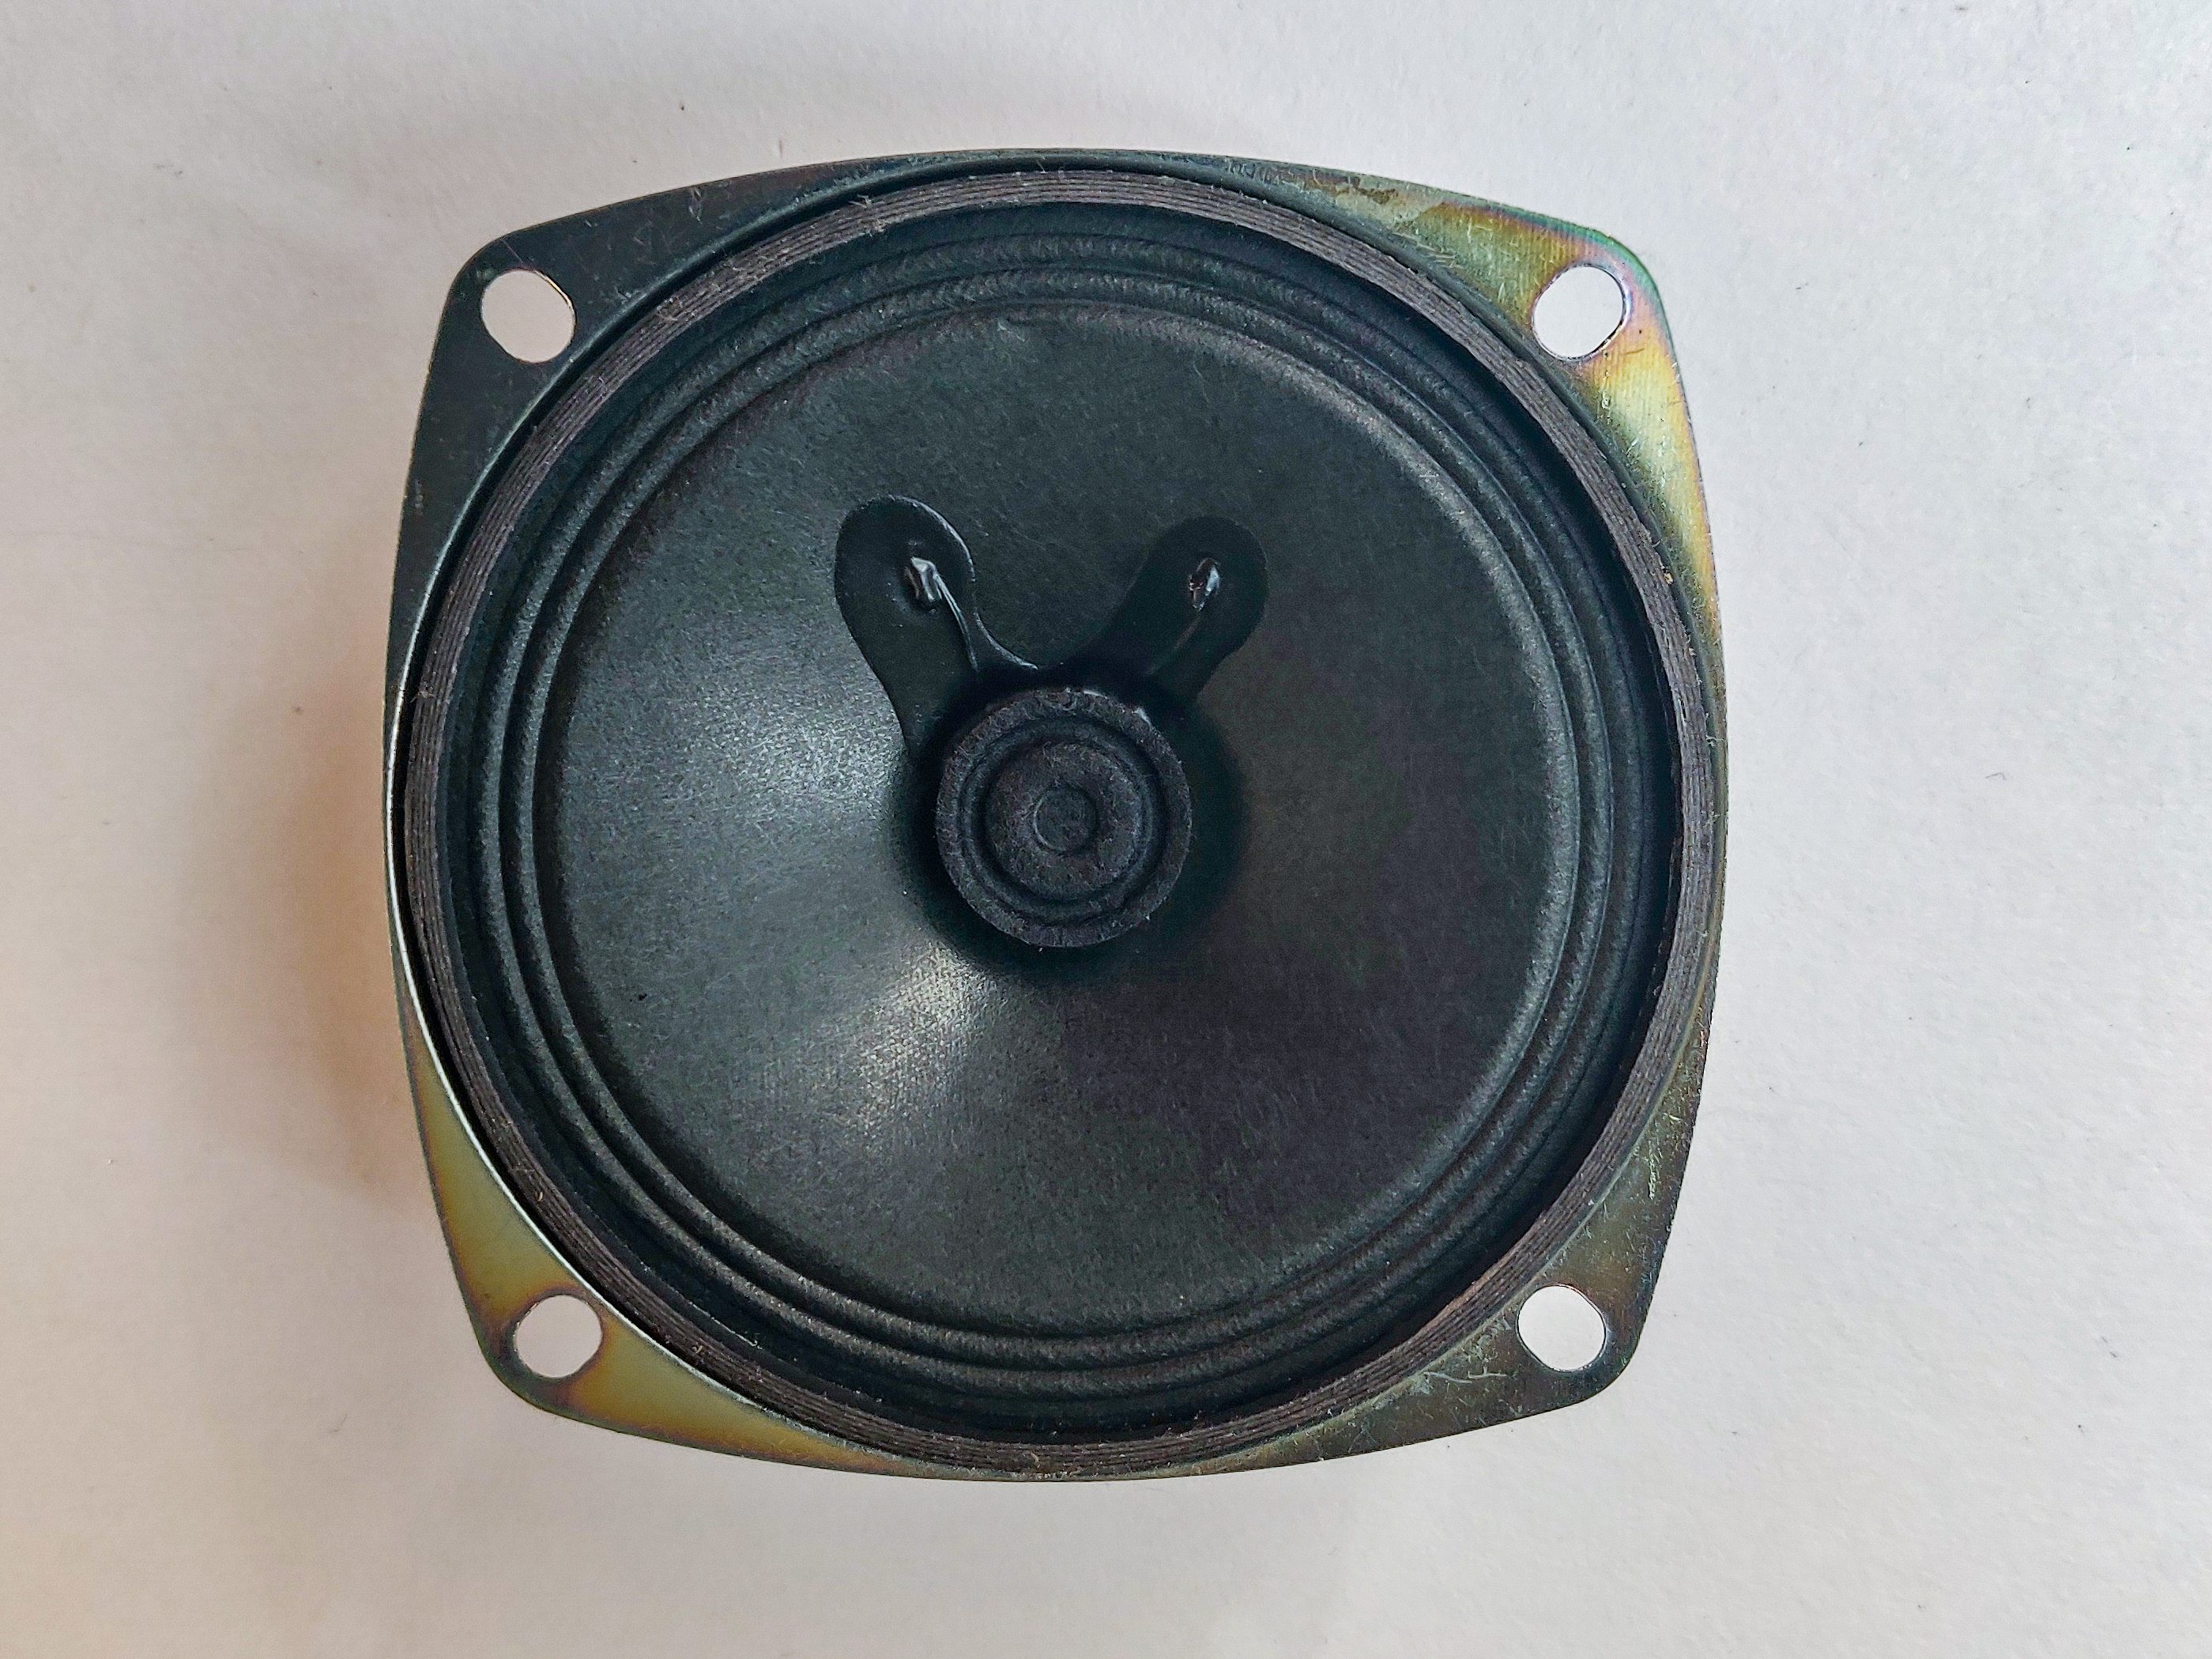
For most of the labs and many projects, you’ll use pushbuttons, switches, variable resistors called potentiometers, light emitting diodes (LEDs), speakers and/or piezo buzzers, and perhaps some variable resistors like force-sensing resistors (FSRs) or force-sensing potentiometers (FSPs). These are common and inexpensive components available from most electronic vendors. Make sure that the parts you get can be inserted into a solderless breadboard, or you will have to solder wires onto them.

Advanced Sensors

Used in labs around mid-semester; probably in later projects as well. Check shop check-out components for a variety of sensors.

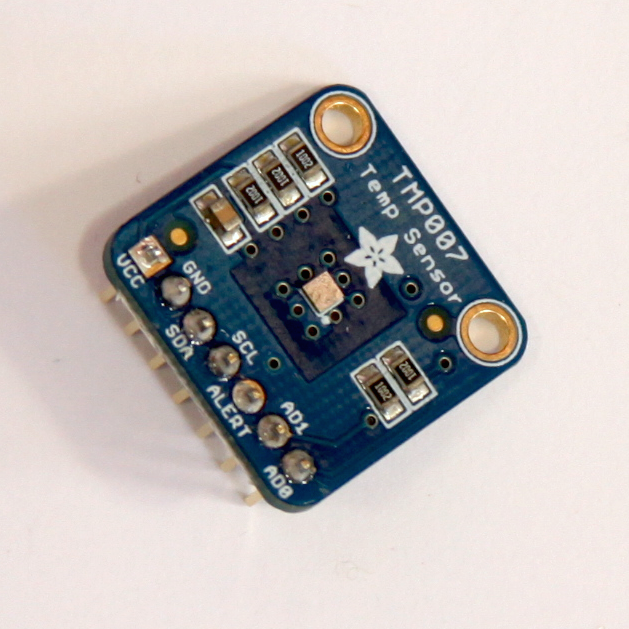
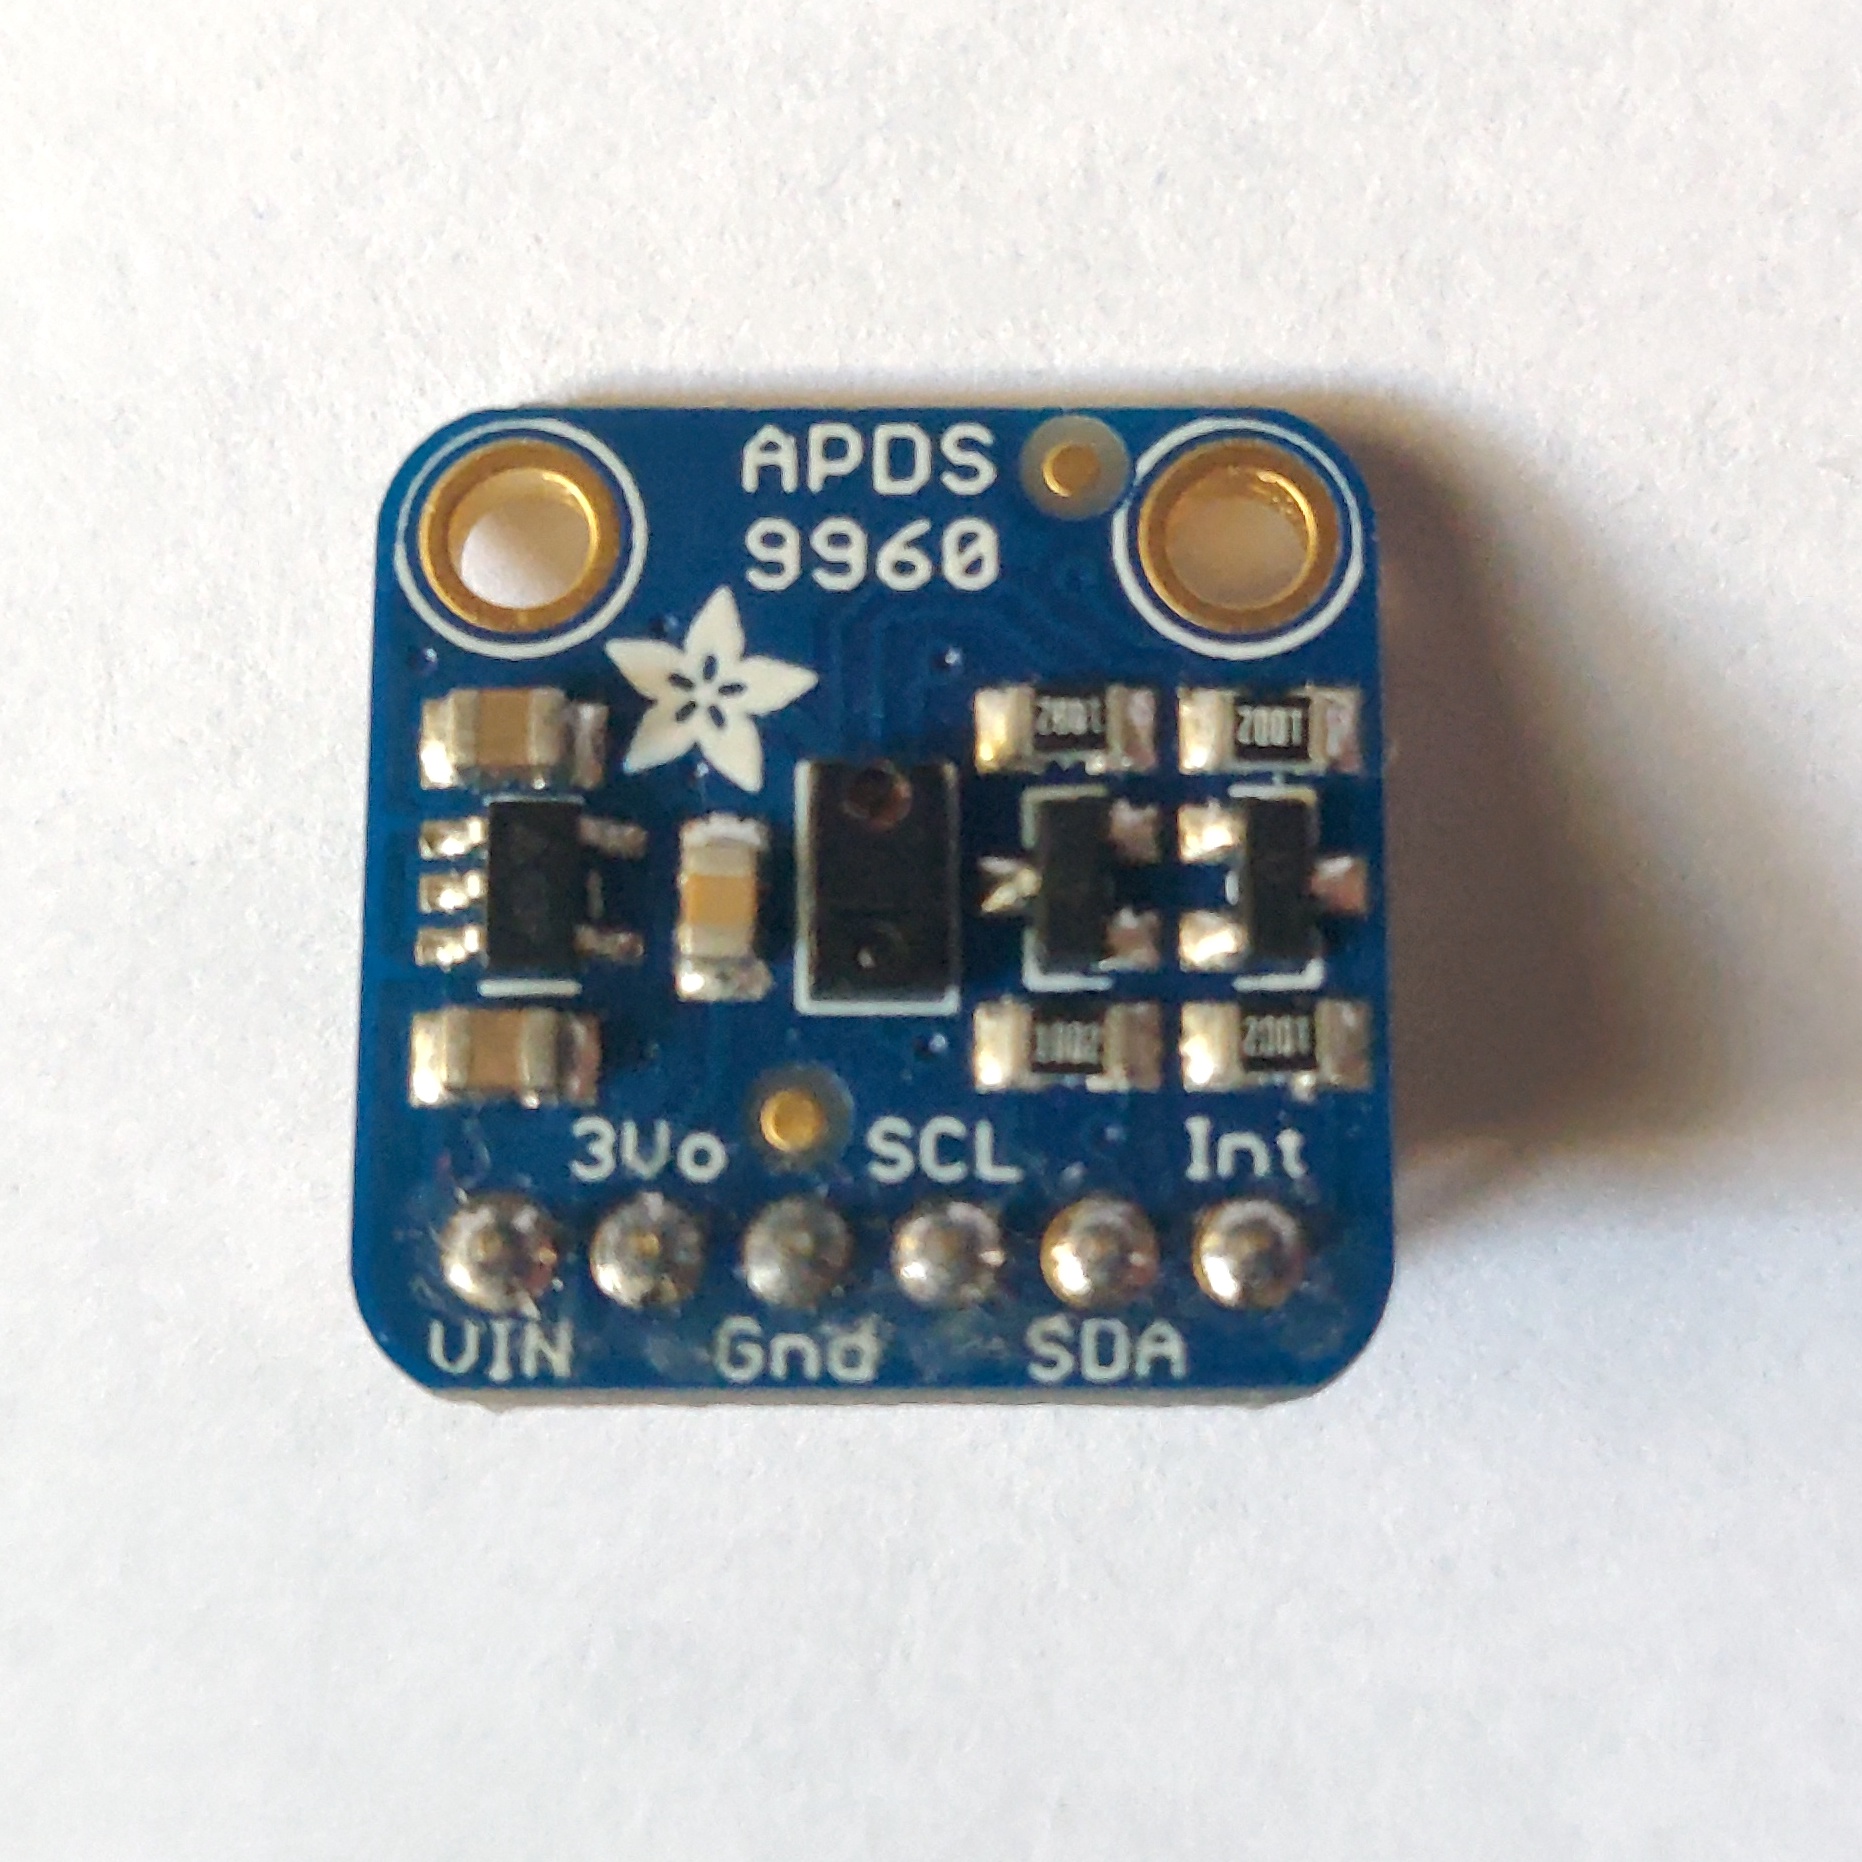
There are many advanced sensors that are very useful in this class. The Nano 33 IoT has one built-in, an inertial measurement unit (IMU) that can measure tilt and rotation. There are light sensors, distance sensors, rotation sensors, environmental sensors, air pressure sensors, and many more. Most of these are sold on breakout boards that have holes for pins that can be fitted to a solderless breadboard. You’ll need to solder on header pins for most of them, and you’ll need to learn their communications protocols. You’ll learn about these in labs in the middle of the semester. There’s an Octopart Bill of Materials that lists several of these. You’ll need to pick one for the synchronous serial lab and by then you’ll have an idea which one might also work well for you in a project. Hold off on getting these until mid-semester.

Motors and Motor Accessories

Used in labs later in semester; possibly in later projects as well.

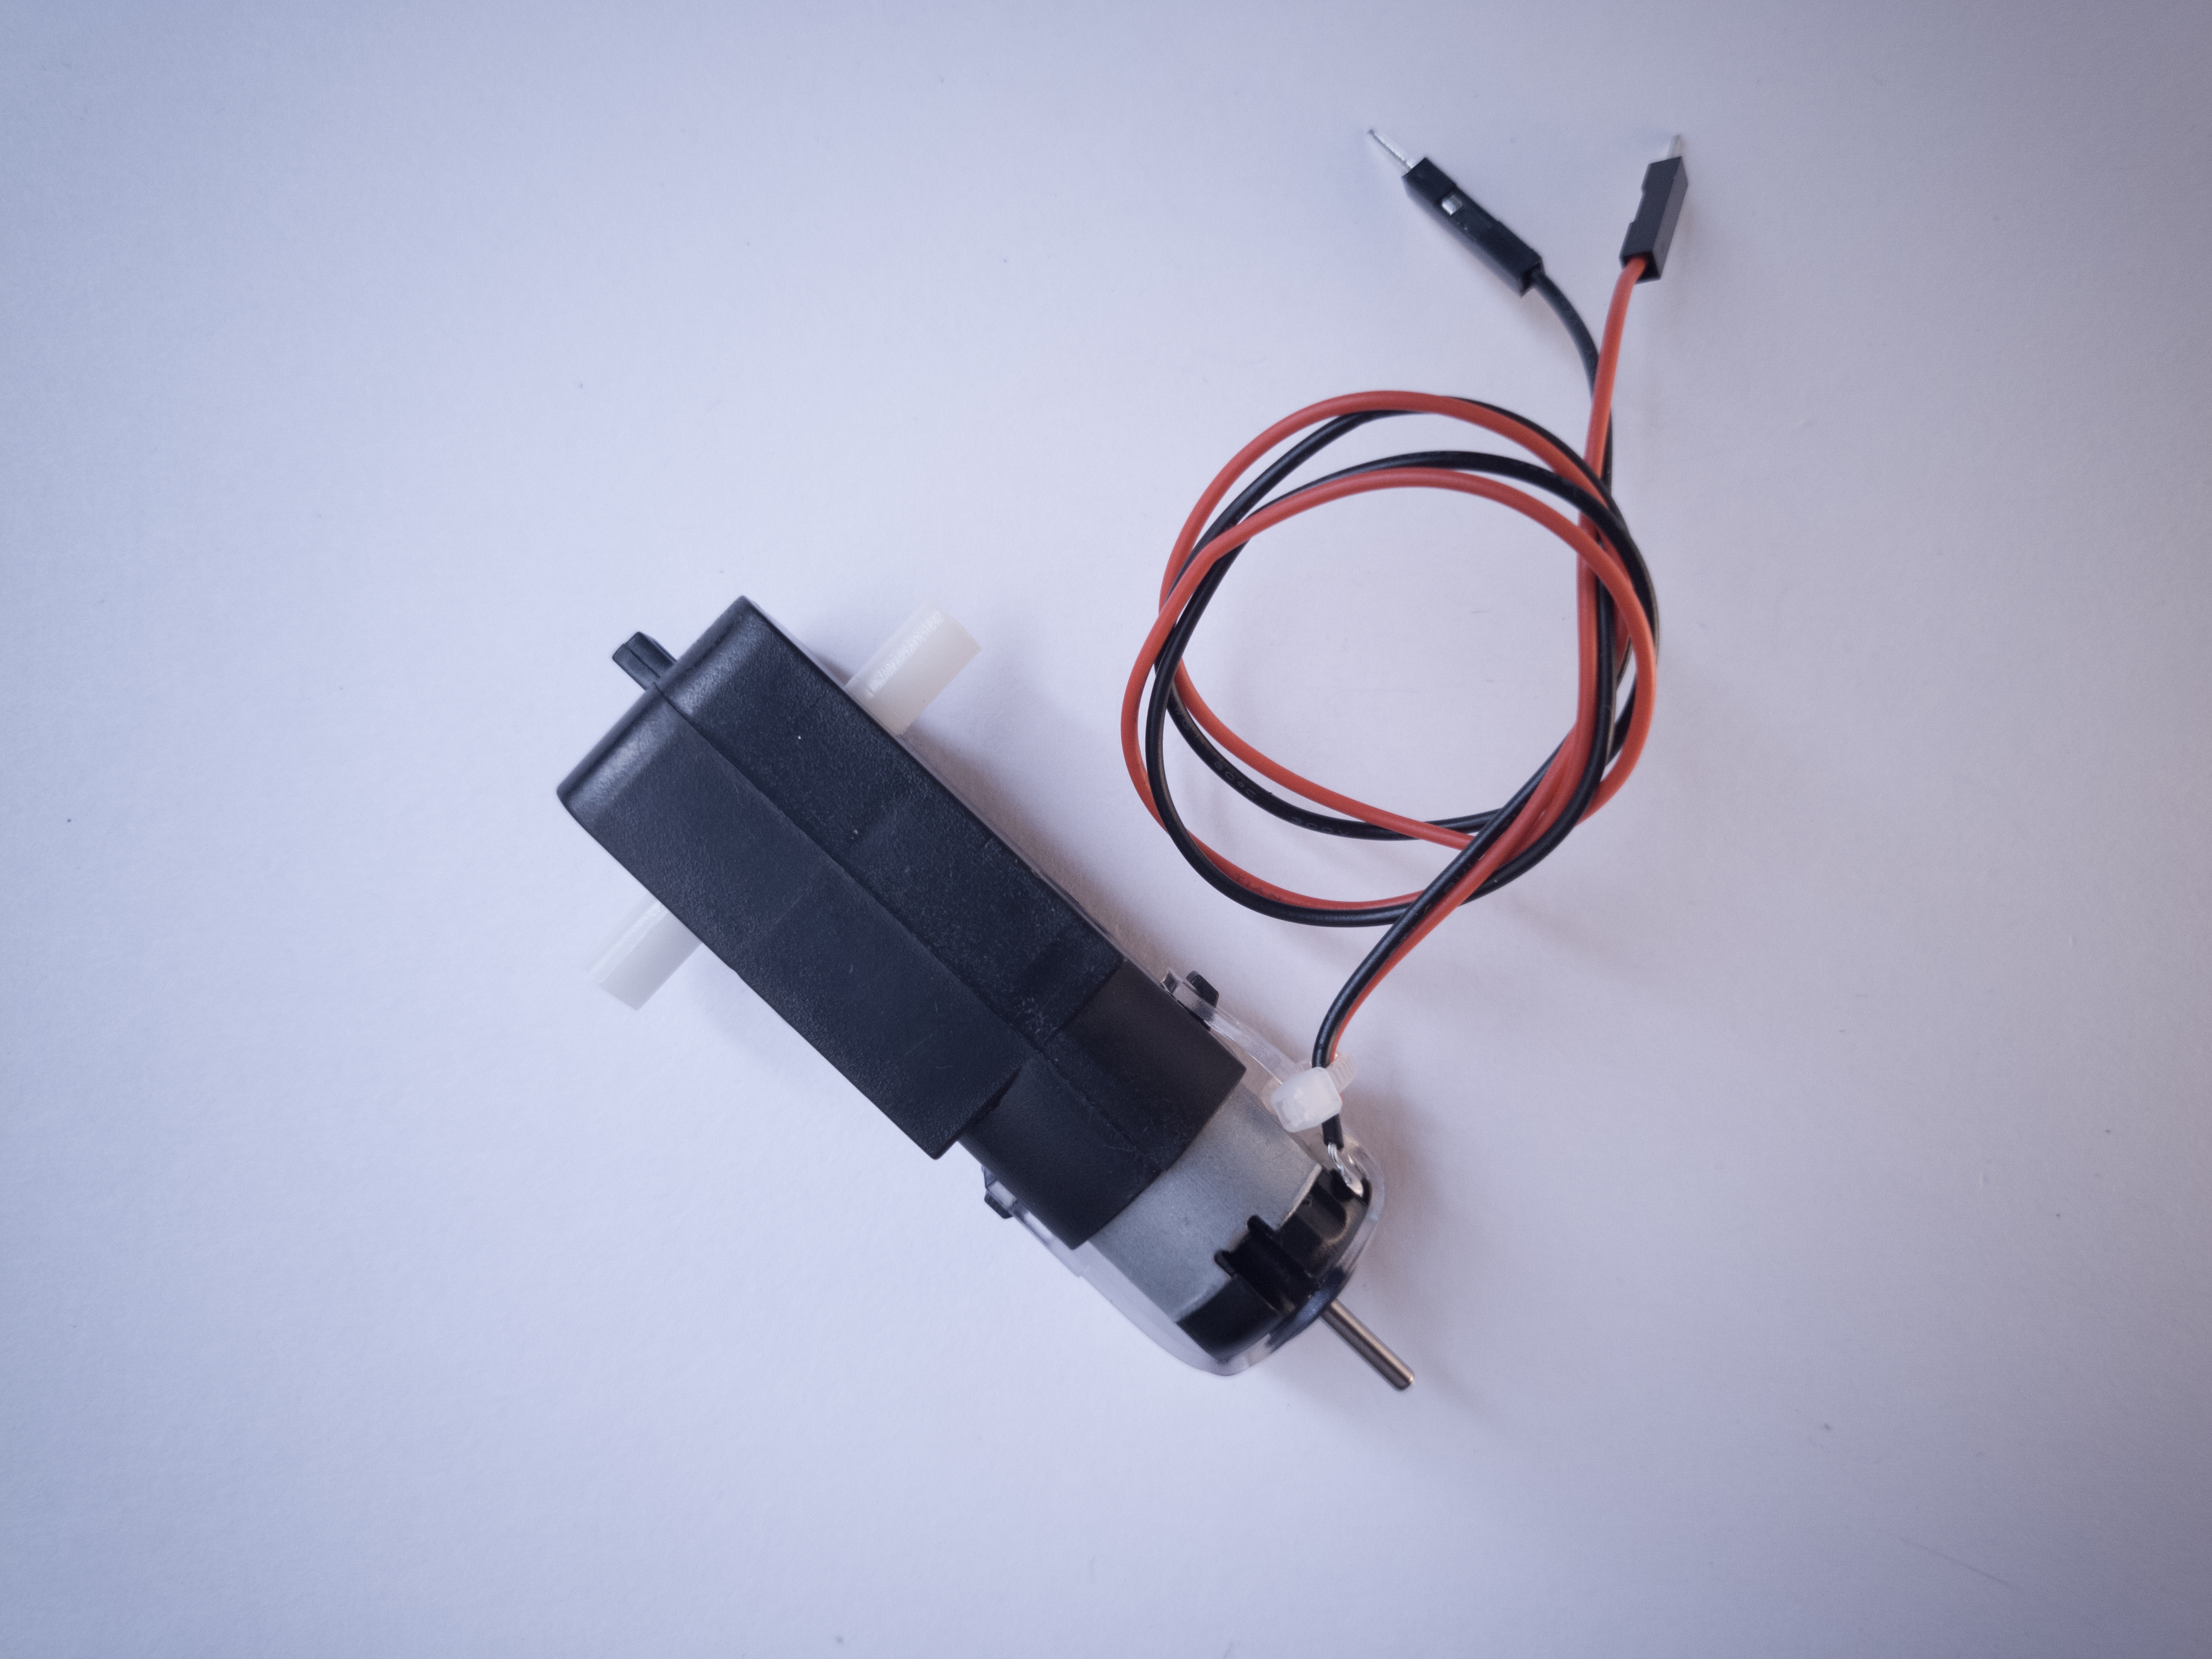
There are labs on controlling servomotors, DC motors, and stepper motors in this class, and the parts BOM lists a few we recommend. However, there is not a mechanics module to this class and the motor lab is later in the semester, so if you’re not interested in mechanical motion, you may not need motor parts. Hold off on getting these until mid-semester.

Power Supply and Regulation

Used in many projects. Regulators and jacks available in the shop component stock.
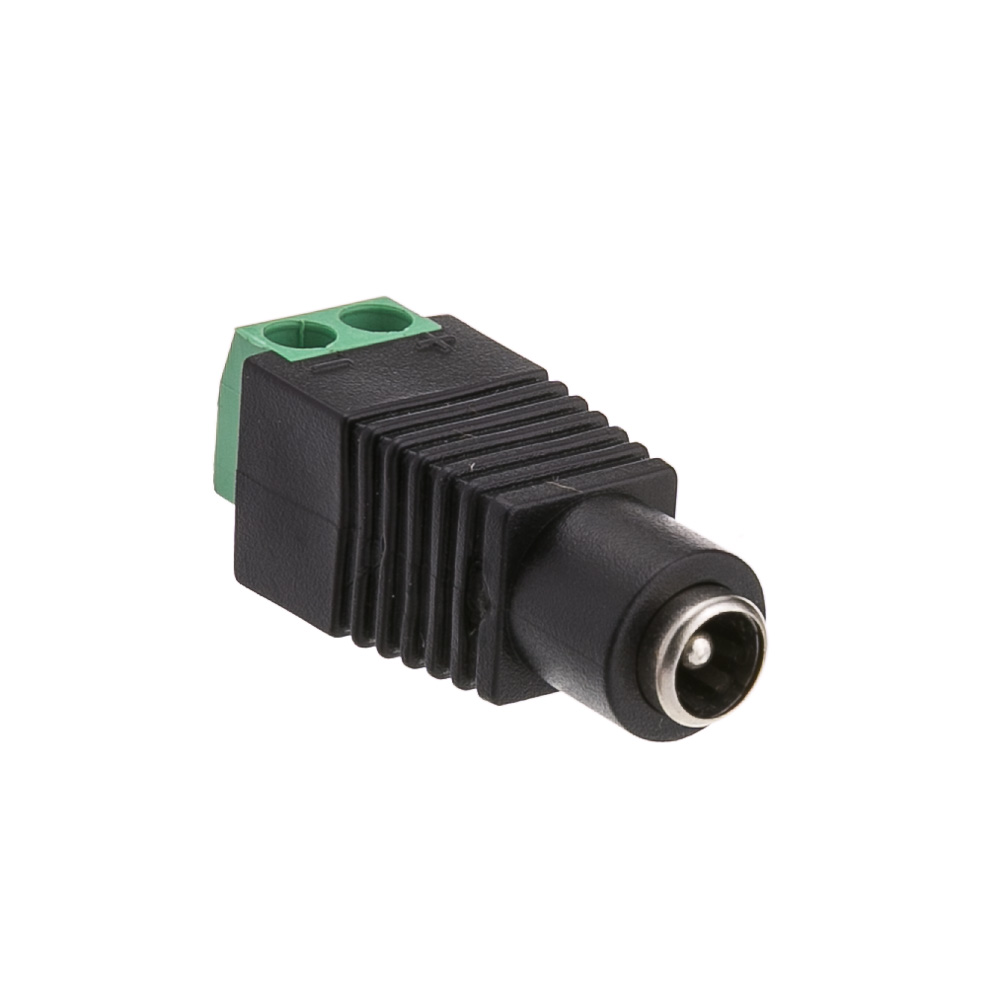
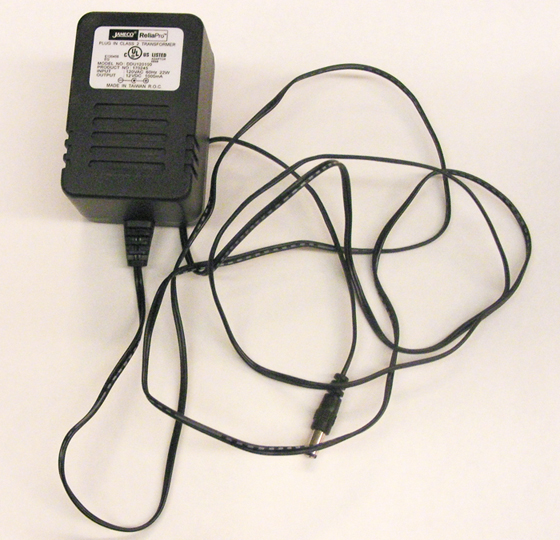
Though you can power most Arduino sensor projects from the USB port of your computer, you may want to make a project that doesn’t attach to your computer. For this you’ll need a power supply. You may have one at home already. If you don’t have one, you can wait until you are working on a project that needs it. You probably won’t need one in the first couple of weeks of the semester.

If your device can run on less than 500 milliamps and 5 or 3.3 volts, you can power it from a USB cable via your Arduino, and a USB AC to DC power adapter like the ones that you use to charge your phone can run the project .

For some projects, you may need more than a v-volt supply. A 12-Volt AC to DC converter that can supply 1000 or more milliamps is a good general supply. Many will already have a 2.1mm x 5.5mm DC barrel jack connector. There are DC barrel jack and plug adapters in the parts BOM that can connect to this type of connector.

Electronics Tool Kit

Used every week.

The shop stocks a full set of electronics tools which you can use. If you plan to do more electronics on your own, there are a few tools you should pick up for yourself, so you’ve always got a reliable set handy. These are common tools, and you can find them at any electronics retailer or hardware store. The ITP Tool List 2020 includes basic hand tools you’ll need if you don’t already have them. It lists several options for each, for comparison.

The electrical tools and hand tools below are ones you’ll use most every week and every project. You probably won’t need a soldering iron and soldering hardware right away, but you’ll use it frequently, from about week 2 or 3. The rest of the tools are less critical, or optional.

Related video: Basic Tools

Electrical Tools

Used every week. Available for use in the shop.

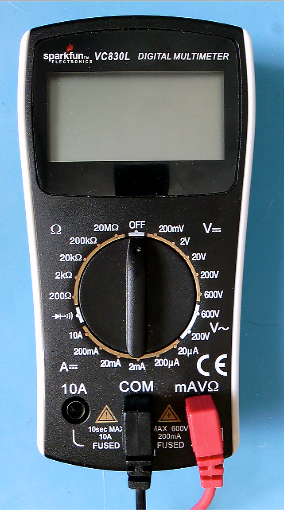
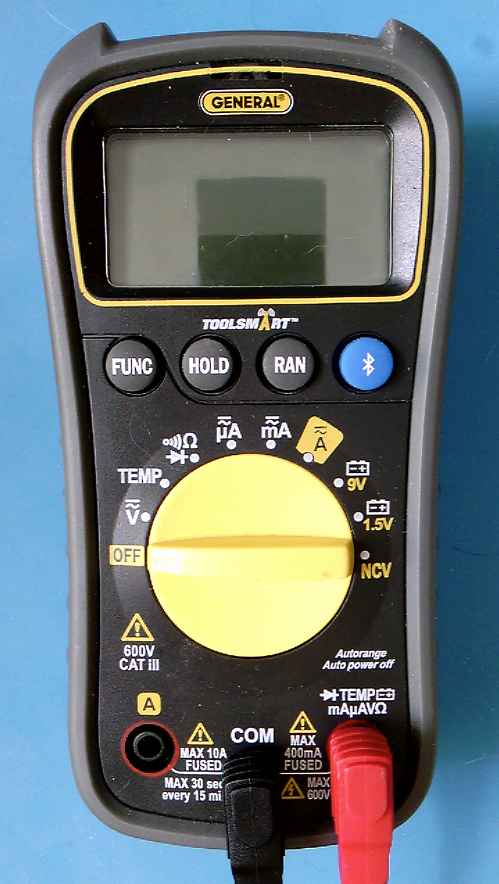
  • Digital Multimeter – You don’t need a fancy multimeter. One that measures voltage, current, continuity, and resistance will do the job.
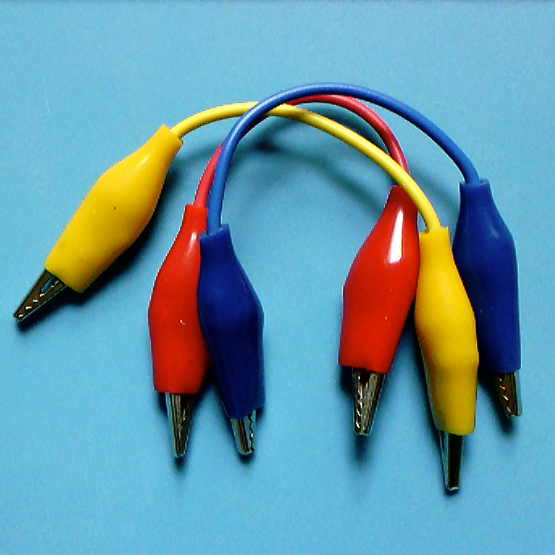
  • Alligator Test Leads – these are wires with clips on the end, handy for when you’ve got components to test that can’t fit in a breadboard and that you don’t want to solder yet.

Hand Tools

Used every week. Available for use in the shop.

You’ll use hand tools frequently in this class. You may have some of these already.

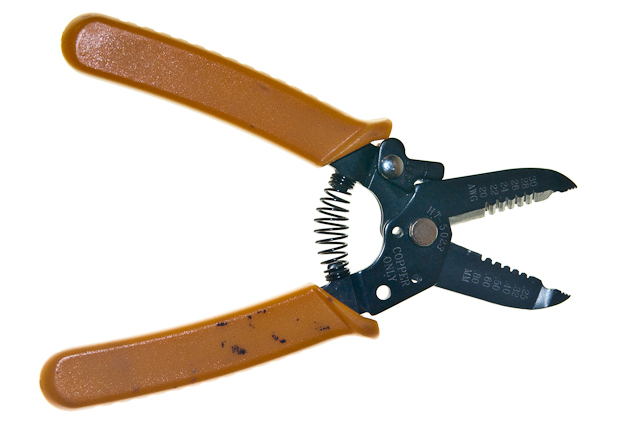
  • Wire Strippers, 20-30AWG – These allow you to strip the insulation from wires. The most common wire you’ll use is 22AWG thickness, so use a stripper that can strip wires in that range.
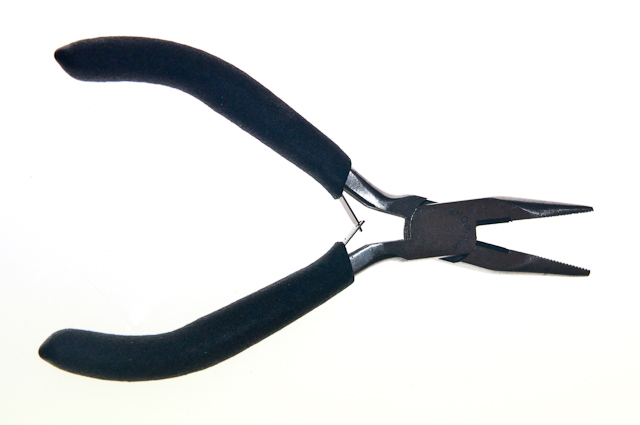
  • Needle Nose Pliers – These are essential, you’ll use them a lot for pulling wires, bending wires, and picking up components.
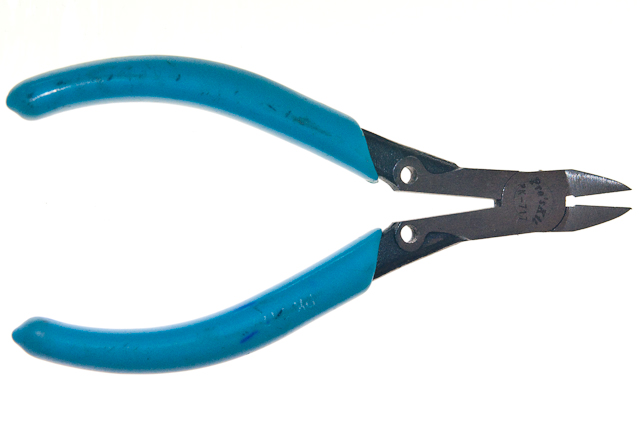
  • Diagonal cutters – These are used for cutting wires and small bits of metal.
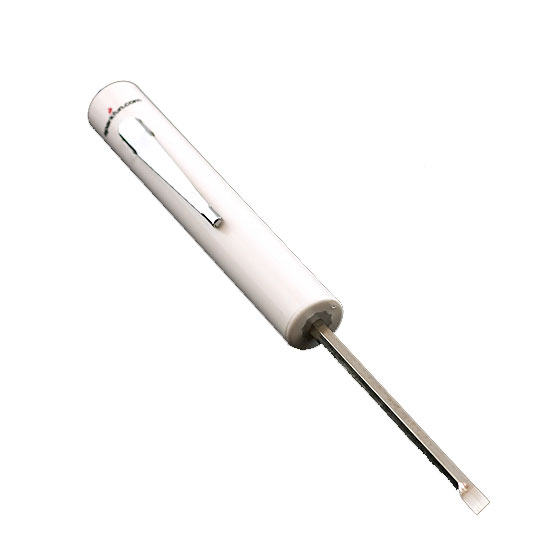
  • Mini Screwdriver – Get a mini screwdriver that has both flat and Philips heads. Many devices have small screws that you need to take out.
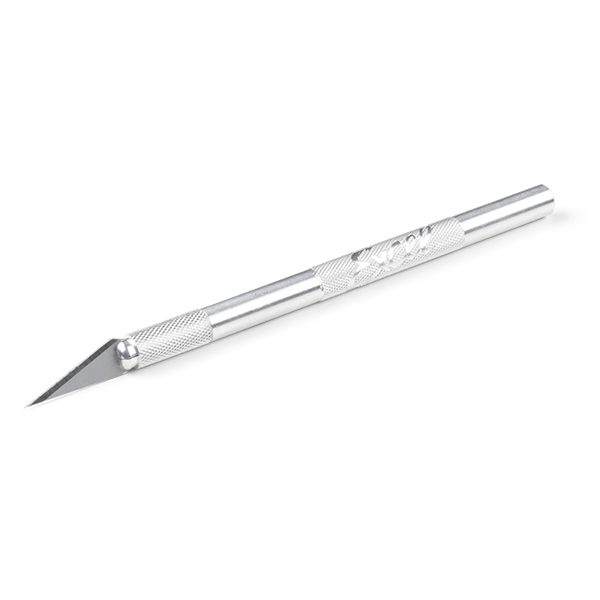
  • Hobby knife -Many people have something like this at home already, but if not, consider getting one. They are effective for cutting cardboard, mat board, and other soft materials.

Personal Protective Equipment (PPE)

Used occasionally. Available for use in the shop.

  • Safety Glasses – You should wear safety glasses when soldering or working with power tools.
  • Fume Extractor – for soldering, it’s a good idea to get a fume extractor, which is a fan and a charcoal filter that pulls the solder smoke away so you don’t breathe it in. They can be expensive, however. The one in the BOM is less expensive and aimed at hobbyists.

Soldering Hardware

Used occasionally. Available for use in the shop.

If you don’t have access to the shop, you might need a set of soldering tools., mostly for soldering header pins on breakout boards.

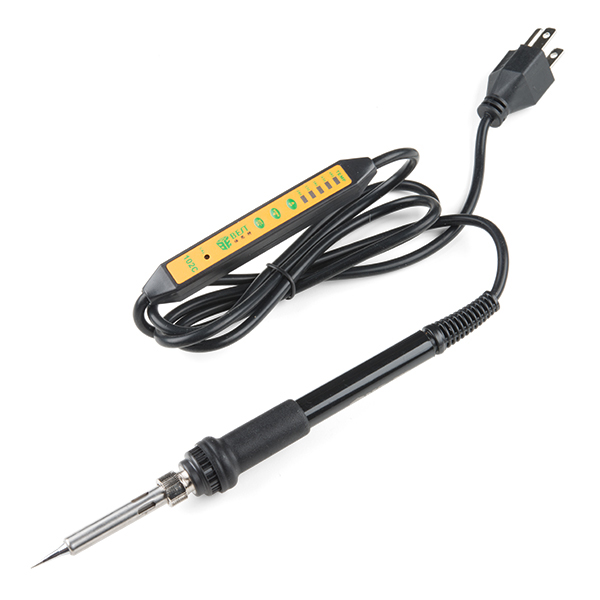
  • Soldering Iron – The most common soldering you’ll do is breakout boards and some connectors. You don’t need a fancy iron, but a relatively fine tip is useful.
  • Extra soldering tip – make sure you get one that matches your iron
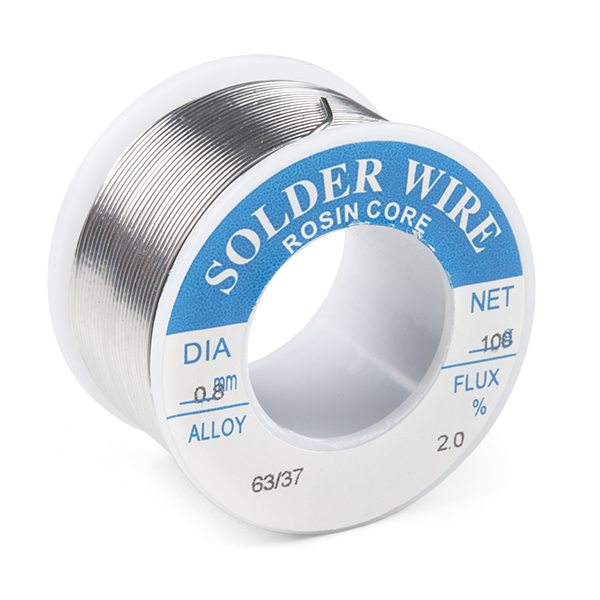
  • Solder – 18-22 AWG lead-free is the recommended choice for this class.
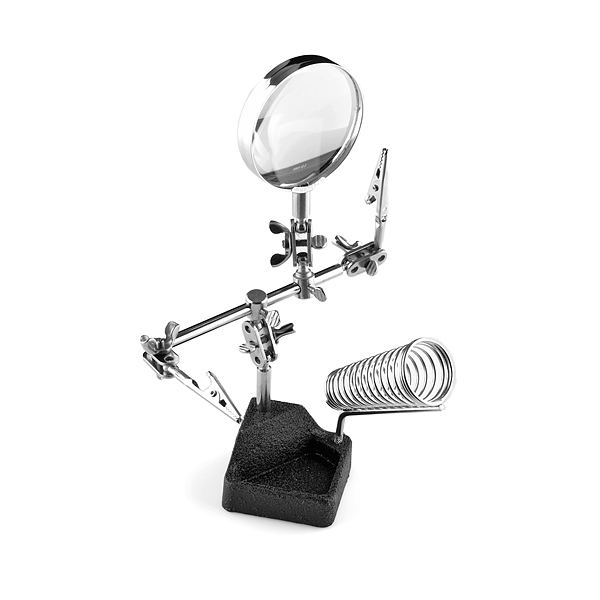
  • Third Hand – You’ll need something to hold the parts that you want to solder while you’re soldering, and this is the most basic tool for the job.
  • Solder Wick. – braided copper that you can use to wick solder away when you make a mistake. Solder and solder wick are expendable, you can only use them once, so you may need more if you solder frequently.
  • Solder Vacuum or Desoldering tool – A desoldering tool is another way to remove solder. You probably don’t need both this and solder wick as a beginner. Nice to have, but not essential.
  • Insulated Silicone Soldering Mat – This keeps your tabletop clean, and it’s also a good insulation so you avoid static discharge on the parts you’re working with. Nice to have, but not essential.
  • Brass Sponge – A tool for cleaning the tip of the iron. Don’t use a wet sponge, as it can rust your tip. Nice to have, but not essential.

Expendables

Optional

These are some materials you might find convenient in some projects.

  • Heat shrink tube – Shrinks down on a wire to make an insulator. Useful to tidy up projects.
  • Electrical tape – a quick insulating material
  • Copper tape – can be handy for making your own switches

Construction Materials

You’ll go through a lot of construction materials in this class. To save money and save the environment, consider reusing materials. Cardboard boxes and used plastic food containers can make great housings for electronic prototypes.  Paper mat board and cardboard can make great housings and control surfaces as well. You will save yourself some money in the process if you do this.  You’re not expected to make polished, production-ready devices in this class, so don’t waste time and money on high-end plastics and metals when you don’t have to.

For more information on parts, see the Suppliers page.

Alumni Physical Computing Blogs

Looking for inspiration for your PComp final? Want to see how previous students documented their projects? If you’re an alum and want your blog removed, let us know and we’ll take it off. If so, have a look at the below links to the Physical Computing blogs of ITP alumni. If you find a dead link please let us know about it.

2019

Jeff FeddersenTom IgoeYeseul SongDavid RiosDanny Rozin
Abby Lee
Ben Moll
Christina Dacanay
Chun Song
Daniel Otero Sendas
Lizzy (Elizabeth) Chiappini
Elizabeth Perez
Hanyi Zhang
Julian Mathews
Melissa Powers
Rae (Ruilin) Huang
Sam Krystal
Schuyler DeVos
Shannel Doshi
Simone Salvo
Tianxu Zhou
Caren (Wenqing) Ye
Yiting Liu
Abigail Faelnar
Cezar Mocan
Dan Qi Qian
Erkin Salmorbekov
Gil Sperling
Hanwen Zhang
Jiaxin Xu
Ji Park
Keunjung Bae
Mark Matamoros
Nakamol Jangkamolkulchai
Ruixuan Li
Roi Ye
Samuel Sords
Sylvan Zheng
Youngmin Choi
Noah Kernis
Kevin Lee
Cy Statham
Yongkun Li
Fanyi Pan
Douglas Goldstein
Cy Kim
Sarah Liriano
Ashwita Palekar
Hyunseo Lee
Helen Zegarra
Pippa Kelmenson
Sohaila Mosbeh
Russell Ladson
Filmon Abraham
Karen Benben Fan
Nicole Ginelli
Nick Grant
Zachariah Kobrinsky
Alvaro Lacouture
Martin
Sydney Meyers
Rita Tavares
Monni Xinyue Qian
Tito Rachman
Paulami Roychoudhary
Erik Van Zummeren
Patrick Warren
Mingxi Xu
Emily Zhao
Kuan-Wen Chen
Nailah Davis
Zoe Ziyu Gao
Elena Glazkova
Emma Grimm
KJ Ha
Dina Khalil
Zack Lee
Julie Lizardo
Lu Lyu
Beste Saylar
Jake Sherwood
Stacy Yuan
Siyuan Zan
Lanni Zhou
Bomani,Neta
Cabalquinto,Nicole D
Catto,Fernando Gregório
Chen,Na
Chestnut Vanessa
Fowler,Aidan L
Fries,Daniel W
Jain,Aditya
Kang,Wei
Kumar,Nikhil
Li,Zeyao
Liu,Xiaoyun
Ouyang,Leo
Politan,Will
Wang,Tianjun 
Costas,Rachel C
Donsrichan,Suphitcha (Jan)
Garcia Cadiz,Themis A
Han,Katie
Heinrich,Suzanne (Tundi)
Jattuporn,Atchareeya (Name)
Roh,Sue
Rungsawang,Tina
Sheng,Zhoujian
Sinkowski,Dawn M
Sun,Pei Yu (Michelle)
Truxillo,Marcel Oliver-Rose
Wang,Haoyu (Henry)
Shirley Wu
Zhang,Tingyu
Zhou,Jingyi (Rebecca) 

2018

Jeff FeddersenTom IgoeDavid RiosDanny Rozin
Aaron Ilai Sebastian Moreno Ayala
Cameron Partee
Chenhe Zhang
Chenshan Gao
Fenfen Chen
Hannah Tardie
Lillian Ritchie
Lydia Jessup
Marcela Mancino von der Osten
Nicholas Gregg
Qice Sun
Rui An
Sachiko Nakajima
Shijie Zhang
Winnie Yoe
Arnab Chakravarty
Atharva Patil
Bilal Sehgol
David Azar Serur
Gilad Dor
Jordan Rickman
Joseph Baker
Louise Lessel
Nuntinee Tan
Shu-Ju Lin
Su He
Suzanne Li
Tsimafei Lobiak
Tushar Goyal
Billy Bennett
Yuanyuan Wang
Idith Barak
Carol (Jingjie) Chen
Chunhan Chen
Jacky Chen
Sid Chou
Anna Gudnason
Clareese Hill
Ada Jiang
Mark Lam
Mingna Li
Emily Lin
Jackie Liu
Anna Oh
Noah Pivnick
Shivani Prasad
Chenyu Sun
Alizarin Waissberg
Raaziq Brown
Aditya Dahiya
Gabriella Garcia
Antonio Guimaraes
Muneesh Jain
Ashley Lewis
Xinyue Li
Rachel Lim
Ellie Lin
Abi Muñoz
Emma Norton
Mary Notari
Madison Rosner
Aileen Stanziola
Jingyi Wen
Yuguang Zhang
Bora Aydintug
Casey Conchinha
Dylan Dawkins
Jenny Woan-Chin Lin
Khensu-Ra Love El
Morgan Mueller
Cara Neel
Elvin Ou
Eva Philips
Yves Pokakunkanon
Maya Pruitt
Yunze Shi
Zhe Wang
Christopher Blair
Defne Onen
Joy Antwi
Karina Hyland Hernandez
Luming Hao
Ming Pu Shao
Olivia Kung
Rui Wang
Ryan Grippi
Stefan Skripak
Tanic Nakpresha
Tianyi Xie
Veronica Alfaro
Wenjing Liu
Shiyu Chen
Adrian Bautista
Brent Bailey
Dana Elkis
Hayk Mikayelyan
Jaekook Han
Jiwon Shin
Julia Rich
Matthew Ross
Nianqi Zhang
Rashida Kamal
Becca Moore
Son Luu
Sukanya Aneja
Tawania Reggler
Xiaotong Ma
Helen Tang

2017

Tom Igoe
Ayodamola OkunseindeJeff FeddersenDanny Rozin
Vidia Anindhita
Martin Calvino
Stephanie Chambers
Erin Cooney
Terrick Gutierrez
Sam Hains
Tong Li
Camilla Padgitt-Coles
Lauren Race
Jim Schmitz
Nick Wallace
Ahmad Arshad
Yen-An Chen
Beverly Chou
Alden Jones
Brandon Kader
April Liu
Ridwan Madon
Kellee Massey
Brandon Newberg
Wei-Luen (Alan) Peng
Oren Shoham
Jesse Simpson
Carrie Wang
Marco Wylie
Chengchao Zhu
Meicheng Jia
Vincent Kim
Phil Yoo
Jillian Zhong
Katya Rozanova
Yang Yang
Ellen Nickles
Elizabeth Ferguson
Jenna Xu
Dominick Paul Chang
Nicolas Sanin
Ilana Pecis Bonder
Anita Mbabazi
Anthony Bui
Arnav Wagh
Jiyao Zhang
Krizia Fernando
Marcha Johnson
Max Horwich
Michael Fuller
MH Rahmani
Andrew Lee
Asha Veeraswamy
Assel Dmitriyeva
Ayal Rosenberg
Chelsea Chen
Hadar Ben-Tzur
Itay Niv
Lu Wang
Rebecca Skurnik
Sofia Suazo
Shawn Ma
Ella Chung
Yu-Hao Ko
Dan Oved
Rumex Fanni Fazakas
Maria Hye Ryeong Shin
Jason Yung Katherine Wu
Luna Olavarria Gallegos
Mengzhen Xiao
Mohammad Rizqi Hafiyyandi
Xiran Yang Zahra Khosravi Alexandra Lopez-Duarte Danxiaomeng Huang
Gabriel Goncalves
Natier Fernandez
Rachel Huiyi Chen
Isabella Vento
James Huang
Kimberly Lin
Lucas Chung
Nicolás Peña-Escarpentier
Eva Yipeng Chen

2016

Tom Igoe
Benedetta PiantellaJeff FeddersenDanny Rozin
Alex Fast
Anne-Michelle Gallero
Jennifer Lim
Sharif Al-hadidi
Stephanie Koltun
Woraya Boonyapanachoti
Hayeon (Hayley) Hwang
Or Fleisher
Ran (Teresa) Tian
Roxanne Kim
Zach Coble
Dominic Barrett
Lindsey Daniels
Nanou Dimachki
Jasmine Soltani
Michael Kripchak
Rita Cheng
Dorothy Lam
Melissa Parker
Kar Rosen
Tuyliyev, Akmyrat Germanidis, Anastasios Melenciano, Ari
Guarino, Marco
Wakalkar, Nitish McCausland, Andrew
Qiu, Ping ‘Erenyx’
Kim, Dong Chan Gomez Ruiz, Maria Del Pilar
Neidecker, Oriana
Leonvendagar, Paula
Reitherman, Scott
Song, Yeseul
Lai, Yuan Ling, Li
Cantu De Alba, Regina
Lev, Roi
Lu, Ye
Lee, Younho Wang, Yueping

2015

Tom IgoeBenedetta PiantellaJeff FeddersenDanny Rozin
Angela Perrone
Dhruv Damle
Muqing (Sabrina) Niu
Osama Sehgol
Viniyata Pany
Chino Kim
Eve Weinberg
Jesse Horwitz
Jonathan Gallagher
Nicole He
Peiyu (Perry) Luo
Rebecca M Leopold
Dhruv Mehrotra
Jed Watson
Jarrett Slavin
Jamie Ruddy
Aaron Parsekian Gal Nissim
Ruta Kruliauskaite
Lisa Jamhoury
Ian Gibson
Paula Ceballos Delgado
Lindsey Johnson
Zoe Bachman
Renata De Carvalho Gaui
Michelle Alves
Jamie Charry
Wangshu Sun
Ella Dagan Peled
Doo Yon Kim
Naoki Ishizuka
Friedman, Jared D
Jess Scott-Dutcher
Ricks, Rebecca
Wang, Xinyao
Narula, Avika
Ordel, Corbin Y
Zhu, Fengyi
Zhu, Fengyuan
Takacs, Katherine A
Huggins, Nikita R Kennelly, William
Cai, Yuli

2014

Tom IgoeBenedetta PiantellaJeff FeddersenArlene Ducao
Yingjie Bei
Gladys Chan
Jerllin Cheng
Ross Goodwin
Matthew Kaney
Andrew LeVine
Chanwook Min
Songee Hahn
Dalit Shalom
David Belkin
Thea Rae
Sweta Mohapatra
Gabriel Andrade
Sisa Holguin
Cole Orloff
Jiashan Wu
Roy Livne
Ainsley O’Connell
Isabel Paez
Kathleen (Kat) Sullivan Danara Sarioglu
David Cihelna
Hubert Uy
Ava (I-Wen) Huang
Teresa Lamb
Diego Cruz
Catherine Rehwinkel
Hugo Lucena
Jaclyn Wickam
Natalia Cabrera
Caroline Chiu
Jordan Backhus

Assignments

Lab Assignments

Technical material will be demonstrated in class. Each week your instructor will explain a given topic, and demonstrate it by building circuits, code or fabrication techniques in class. You’ll follow along, stopping to ask questions or clarify what’s happening as we go. Then you’ll go home and try it yourself.

Once you’ve done a lab, make a project with the new techniques you learned.  It doesn’t need to be large or complex, just something simple that shows what you learned and how it can be used in everyday life. We’ll look at a few of these in each class. You’ll be expected to show at least one finished lab project in the first half of the semester in class. Your instructor will pick the lab presenters at random each week. If you make something and aren’t called upon in class, write it up on your blog, with pictures and video as appropriate.

Midterm Project

The goal of this assignment is to show that you can make a simple interactive system with physical controls, and that you can keep a user engaged with your system. This will be due in week 7.

This year, since the midterm falls near Halloween, the midterm project can have a Halloween theme. You could make a media controller that controls spooky projections, or a music player that controls the sound in a haunted house, or a tangible interface for things that go bump in the night.  You could also make a musical instrument that makes spooky music like you’d hear in a horror film. If you have another idea, discuss it with your instructor to see if it’s appropriate.

Work in pairs on this assignment. Your instructor will assign the pairs.

You don’t have to have a halloween theme if you don’t want to. On a technical level, though, your project should show that you understand digital input and output, analog input and output, serial communication, and good physical interaction design principles. On a conceptual level, your project should help people to enjoy whatever setting it is designed for. If it is a Halloween party, it would have just enough surprises to make it fun, with no chance for injury or psychic trauma.

Consider the  behavior of the thing that the user will see, hear, or feel, and choose sensors that let you create that kind of behavior. For example, if your system featured a bouncing ball that moved with a “squishy” feeling, make sure the physical control has a similar feel. You might get this by embedding force sensors in foam, or attaching pressure sensors to a balloon. If your animation has a sharp feeling to it, you might need sensors that have a precise, sharp feel, such as pushbuttons with a good solid “click”.

If there is more than one parameter to be controlled, you will need to send data from multiple sensors to control each parameter. For example, if you’re controlling an object that moves in three dimensions on the screen, you’ll need sensors that give you control over all three dimensions. You might use a 3-axis accelerometer, or three photosensors, or some other combination.

If you or your partner on this exercise are waiving Intro to Computational Media, that means you’re good enough programmers to create this project in a desktop programming environment on your own. Good for you! You’ll be expected to show your ability to do this.

Final Assignment

The goal of this assignment is to show that you can make a more fully detailed interactive system with physical controls, and that you can keep a user engaged with your system.

This will be due in the final week of class, but you will show progress on the project in each week from week 11 onward. Work in groups or alone, though groups are highly recommended.

Your final project will depend on you already having learned the skills from the whole semester. It should also demonstrate some of the following skills:

  • Microcontroller-to-PC communication, through one of the following:
  • Physical interaction design principles
    • Is the interface understandable to the participant with minimal instruction? Do they know what to do by looking at, listening to, or touching the interface?
    • Can someone besides you use it?
    • Can it be started, stopped, and reset without your intervention
    • Make the interaction iterative. In other words, it’s not just one action by the participant, but they read the interface, take action, read the device’s response, and take another action, in a continued loop.
  • Construction principles
    • Does it have a housing so that the controls, not the electronics, are exposed?

You can improve on one of your previous projects for this project, or you can start a new project. Don’t make the project larger in scope than the midterm, though, as you won’t have time to complete it if it’s too large or complex a project.

Document your work thoroughly online as you go. Include details of all phases of the project. Include a project summary as well, explaining what the system you built is, what it does, and what purpose it’s intended to serve. Your summary should introduce the project.

Project Suggestions

Many students struggle with project ideas for midterm or final. Here are a few ideas to consider:

Combination Lock

A combination lock responds after the user performs a specific sequence of actions, like pressing buttons in a sequence, or turning a knob to a series of pre-determined positions in a sequence. For example, think about the typical hotel room safe. When it’s open, you close the door, enter a code, press the enter button, and the safe locks. When you enter the code a second time, the safe unlocks. Closing the door and entering a new code resets the lock. On some safes, you can simply press enter again to use the same code.

This is a good project for the midterm.

The simplest of combination locks typically use a sequence of four or five buttons. To make it work, you have to detect when the button changes its state from pressed to released, or vice versa.

Your combination lock doesn’t have to open a lock. It could turn on a light when the sequence is entered successfully, or play a tune on a speaker. It should be possible to reset the device once it’s done its task, however, like the example above. Your device doesn’t have to just use buttons, either. You can use any sequence of physical actions that you know know how to sense in order to activate your lock.

Musical Instrument (Tone)

Make a simple musical instrument. Your instrument should be able to control pitch and to start and stop a pitch. It does not have to control more than one pitch at a time.

This is a good project for the midterm.

Consider a few things in designing your instrument:

  • Do you want to play discrete notes (like a piano), or sliding pitches (like a theremin)? How do you program to achieve these effects?
  • Do you want to control the tempo and duration of a note?
  • Do you want the same physical action to set both the pitch and the velocity (volume) of a note?
  • Do you want to be able to play more than one note at a time (e.g. chords)?

All of these questions, and many more, will affect what sensors you use, how you read them, and how you design both the physical interface and the software.

Media Controller (Serial)

Make a music or video playback controller. Your controller should be able to start, stop, and pause the playback of a media file, to fast-forward, to rewind, and to control the volume.

You can make this controller and the media player in p5.js and control it using asynchronous serial communication, or you can control it using Keyboard and Mouse controls.

This is a good project to get comfortable with asynchronous serial communication.

Game Controller (Serial)

Make a game controller. The most minimal controllers have very few controls. Consider WASD controllers, for example, in which the keys W, A S, and D control 2-dimensional movement on a screen. Or joystick controllers, where a 2-axis joystick and a pushbutton support all the action onscreen. The fun of a good controller is when you can perform complex behaviors with a limited amount of control.

Make a game in p5.js. or use an existing game like Pong.

Your controls should be arranged so that the player can watch the screen, not concentrate on the controls.

Game Controller (USB HID)

Make a game controller. The most minimal controllers have very few controls. Consider WASD controllers, for example, in which the keys W, A S, and D control 2-dimensional movement on a screen. Or joystick controllers, where a 2-axis joystick and a pushbutton support all the action onscreen. The fun of a good controller is when you can perform complex behaviors with a limited amount of control.

You do not have to make the game. You can use any pre-existing game that can be controlled by Mouse or Keyboard, since your microcontroller (Nano 33 IoT) can be programmed to operate as a mouse or keyboard. Consider browser-based games, like Lunar Lander. Here’s a different version of Lunar Lander. Consider controlling Zoom.

Your controls should be arranged so that the player can watch the screen, not concentrate on the controls.

This project will most likely rely on USB HID communication using the Keyboard or Mouse libraries. Take a look at the USB HID labs for ways to do it.

Musical Instrument (MIDI)

Make a MIDI musical instrument. Your instrument should be able to control pitch and volume and to start and stop a pitch. It should also be able to play chords; that is, to play multiple notes at the same time.

This project requires some understanding of music, and MIDI. Take a look at the MIDI labs for ways to do it.

Sensor Datalogger and Visualizer (SPI, I2C SD Card)

Capture a time lapse with sensors and create a visualization or sonification that represents the changes over time.

There are many changes that are too slow for us to observe without lots of patience, but which give us good insights when we see their patterns played back in a time-lapse. For example, a graph of changes in the light in a space can tell us about the seasonal changes, or the human activity. Temperature changes can tell us how crowded a place is at different times of days. Air quality sensor readings over time can give us a picture of when production activities happen in a shop. Motion sensors graphed over time can show us traffic patterns of a space over the course of a day.

Pick a sensor that can measure changes in an environment and write a program that will take readings on a set interval and record them. Then find a way to present the readings in order to show the patterns of change over time. That might be as simple as a graph of the change over time generated by a spreadsheet, or it might be a sound program that converts the changes to pitches and plays the changes musically over time. Pick a way to represent the data that lets the viewer read and understand the changes that they can’t see in real-time.

You could capture the data by :

  • Sending sensor data from an Arduino to your laptop over a few hours, and leaving the laptop alone (but secured).
  • Sending the sensor data as USB keystrokes to your laptop over time and saving them to a file (command-S is also a keystroke)
  • Recording data to a file on an SD card from an Arduino, then reading that data in p5.js

This project is a good project to combine asynchronous serial communication and data visualization in p5.js. Alternatively, it can be a good way to learn about reading and writing from files on an Arduino and in p5.js.

Gesture Controller (Bluetooth LE)

Make a controller that is controlled by large physical gestures. Examples:

  • a media control device that responds to swiping your hand left and right.
  • a game controller that responds to swordplay movements of your arm.
  • a musical controller that responds to particular hand signals.

Your controller should be able to start and stop a particular output repeatably and reliably. For example, if you’re making the media controller mentioned above, it should be able to play, pause, fast forward, rewind, and stop with distinct gestures.

Since you’re using large physical gestures, this project is most likely best done using Bluetooth LE communication to the personal computer, to avoid wires.

This is a more advanced version of the media controller or musical instrument projects, in that it requires you to read sensor data, understand the patterns of the changes in that data, and write a program to send control messages when those patterns are detected.

Journals & Documentation

You are expected to keep an online journal of your progress.  Your instructors read your journals regularly to see how you are progressing, so you should update your journal regularly throughout the semester. At a minimum, we expect  you to summarize any insights you have in each week’s lab assignments, to discuss to the readings, and to document your production projects and technical research thoroughly.

Please make sure your blog assignments are online the night before class (by 8 PM EDT, GMT-4) so that your instructors and classmates can read them before class.

Good documentation habits

Document your projects thoroughly as you go; don’t put it off until the end.

Documentation Platform

You may document your major projects in a separate individual or group site if you choose, but you will be expected to link your site to the your class page on this site. Please avoid formats that are not text-searchable, as they won’t show up on search engines for others to use.

Blogs are great for documenting your process, as they’re usually organized in reverse chronological order. However, they’re not a succinct way to showcase the way once it’s done. When you finish a project set up a separate page or pages on your site to summarize the project, so you can use this as a link in your portfolio.

Documenting Process

Good documentation should include a description and illustration of your project. Use pictures, drawings, and videos liberally to explain your work, although images alone usually don’t tell the whole story. Hence, you should include what it looks like, what it does, what the user or participant does in response. When it’s interactive, mention and show what the user does. Your explanation should give enough information that someone who’s never seen the project can  understand it.

You should also include a section describing how the project works, aimed at a more informed reader (your instructor, or next year’s classmates). Include a system diagram to make clear what the major components of the system are and how they communicate.

Another important part is to include what didn’t work and what you struggled with. Describe in words your questions and things you don’t understand so you can bring up during class meetings or office hours.

Documenting Code

Make sure any code that you post is well-commented, so you and others can understand what it does. Don’t overload your notes with code.  Code repositories like gitHub are best for sharing code, rather than blogs, so post your code to a repository and link to it from your blog.

If you are posting snippets of your code on your blog for quoting them in your post, refrain yourself rom adding screenshots of the IDE since it is not searchable and has a bad readability. Instead, cut and paste the code snippet or serial output on the IDE that you are referring to. Many blog platforms have features for posting code.

Documenting Circuits

Good documentation of circuits can help you communicate your circuit issues during class times and office hours efficiently. It’ll also become a useful reference for other classmates and yourself in the future. Uploading a picture of video of the breadboard itself does not guarantee a good readability of your circuits. Try drawing a diagram of your circuits either with your hands or on screen. The drawing process will help you understand your circuit better while producing a better documentation. You can also consider use circuit drawing software such as Fritzing.

Crediting Your Sources

Make sure to cite sources from which you get your ideas, code, circuits, and construction techniques. When you base your work on someone else’s, cite the original author and link to their work, just as you would when quoting another author in a paper. If you only changed one part of an existing program, post only the part you changed, and link to the original. Copying code or techniques without attribution is plagiarism.  Few ideas come out of the blue, and your readers can learn a lot from the sources from which you learned and by which you were were inspired. So be generous in sharing your sources.

NYU offers access to and information on Zotero, which is a great tool for managing citation. Here’s an intro video. Zotero has a browser plugin that lets you save links to your account easily. You can generate collections of links like this from the app. You can even automatically generate citations for any source from the app. You can download the app and the browser plugin from this link.

This also applies to AI tools such as Chat GPT. Read Use of AI Policy for this class.

Some good project summary sites

A few good journals on process

Different forms to consider

Previous Years’ Classes


Fall 2022

Fall 2021

Fall 2020

Fall 2019

Fall 2018

Fall 2017

Fall 2016

Fall 2015

Fall 2014

Pcomp @ ITP

Here you’ll find the content specific to the class.

Current Sections

Alumni Physical Computing Blogs (requires NYU login)

Physical Computing Workshops by Residents

If you’re skeptical about this whole pcomp thing, not sure where that wire goes, or why your code isn’t uploading … PComp workshops are the answer! At these workshops you can work on labs, build and develop projects, ask questions, get feedback, and everything else related to pcomp. Plus, meet your classmates and see what everyone’s working on!

Haven’t done this week’s lab / homework? 
Do it at the workshop and get your questions answered at the same
time!!

P.Comp Help Sessions are hosted by the residents and happen on Mondays (12:30-2pm) and Thursdays (1:30-3pm) at the white tables by the Hyper Lab.

Flyer for the P.Comp help sessions hosted by the residents. Times are listed above in this page.

Can’t make it to a workshop? Book some office hours! Visit → itp.nyu.edu/help/office-hours or talk to one of the physcomp residents.

P.S. Coding Lab is another option for help with your Arduino code

Components at the ER

A list of components available for checkout from the ITP equipment room. Unlike the components in the shop, these are not expendable, and should be returned. But if you wanthttps://itp.nyu.edu/physcomp/itp/checkout-components-at-itp/ to get a feel for how they’ll work in your project before you buy one of your own, then check them out from the equipment room.

Pcomp Accessories in Equipment Room

Name Quantity
Arduino 101 62
Micro 1
Uno 6
MKR1000 18
MKRZERO 14
ZERO 15
Starter Kit 2
Raspberry Pi 3
Raspberry Pi Camera 1
Feather Huzzah ESP8266 28
Feather Basic Proto 47
Flora 5
XBee Radio Module 15
USB Adapter 26
Breakout Board 5
9 V battery holder 3
5.25V 2.4A Power Supply 4
DC adaper jack 2
RF ID Reader specifications 2
IR sensor datasheet 1
Bluefruit EZlink vendor page 1
Little Bits Arduino vendor page 4
Accelerometer vendor page
datasheet
16
Range Finder datasheet
tutorial
1
FSR (Large) Sensor 2
FSR (Small) Sensor 33
Flex Sensor
tutorial
24
Ultrasonic Sensor 2
Stretch Sensor 1
Door Sensor vendor page 0
Sensor Tag wiki 22
Ethernet Shield 2
Proto Shield 1
Beagle Board 1
Bone 2
Polar Heart Reference
Datasheet
 1
AVR(?) 2
Heatit 2
DSO Nano 6
Super Bright LED Yellow 16
Blue 9
Red 20
Neopixel datasheet 34+
Stepper Motor Servo 0
6 wire Stepper (general guide) 8
Power tail  4
Wire Switch very similar to this in principle 9
Micro 10
Vernier Temperature Probe vendor page
datasheet
Solar Panel Grade B 1
Joystick  2 Axis 1
Ble nano 1
Ble nano kit 19
RFduino w/ adapter 6
w/o adapter 3
Bluetooth modules 0

What Is Physical Computing?

If you’re taking Intro to Physical Computing and you’re not sure where to go, start with the syllabus menu above and follow the links associated with each week.

All computing is physical. We work with computational systems by taking action with our bodies, on devices. The construction of computing devices, and their use, consumes raw materials and energy as well. Computing, even when we call it “virtual”, “cloud”, or other names, always has physical consequences. This course is about how to design physical devices that we interact with using our bodies.

To realize this goal, you’ll learn how a computer converts the changes in energy given off by our bodies (in the form of sound, light, motion, and other forms) into changing electronic signals that it can read and interpret. You’ll learn about the sensors that do this, and about simple computers called microcontrollers that read sensors and convert their output into data. You’ll also, you’ll learn how microcontrollers communicate with other computers.

In this class, you’ll watch people and build devices. You will spend a lot of time building circuits, soldering, writing programs, building structures to hold sensors and controls, and figuring out how best to make all of these things relate to a person’s body.

Computer interface design instruction often takes the computer hardware for given — namely, that there is a keyboard, a screen, speakers, and a mouse or trackpad or touchscreen — and concentrates on teaching the software necessary to design within those boundaries. In physical computing, we take the human body and its capabilities as the starting point, and attempt to design interfaces, both software and hardware, that can sense and respond to what humans can physically do.

Starting with a person’s capabilities requires an understanding of how a computer can sense physical action. When we act, we cause changes in various forms of energy. Speech generates the air pressure waves that are sound. Gestures change the flow of light and heat in a space. Electronic sensors can convert these energy changes into changing electronic signals that can be read and interpreted by computers. In physical computing, we learn how to connect sensors to the simplest of computers, called microcontrollers, in order to read these changes and interpret them as actions. Finally, we learn how microcontrollers communicate with other computers in order to connect physical action with multimedia displays.

Physical computing takes a hands-on approach, which means that you spend a lot of time building circuits, soldering, writing programs, building structures to hold sensors and controls, and figuring out how best to make all of these things relate to a person’s expression.

Cool. So we’ll build all kinds of robots?

Not quite. While the hardware skills used in physical computing are similar to those used in robotics, the concepts are a bit different. When you build robots, you’re usually focused on making devices that are autonomous, capable of navigating through the world on its own. Physical computing systems, in contrast, focus on interaction with the human. Rather than automation, we focus on using digital technologies to extend human capabilities, creating systems that are driven by a person’s intentions, decisions and actions. Where a robotics course might focus on the mechanics, drive and sensing systems of a robot, a physical computing course might concentrate more on the interface, both hardware and software, necessary for a human to direct that robot.

What will I learn in this class, and what should I know in advance?

There are three broad areas you’ll learn about in this course:

  • you’ll get an introduction of microcontroller electronics, in order to understand how sensors and actuators work and how they are controlled by computers;
  • you’ll learn the rudiments of programming microcontrollers, and how to interface them to other computers via serial communication;
  • you’ll learn how to think about physical interaction design starting with observation of what the user physically does and then planning the best ways to sense and respond to that action.

This course assumes no prior knowledge of any of these subjects, but it does require a lot of out-of-class time and effort. Most of the real work happens outside of class, both in the shop building and programming, and in the world observing people to understand how their actions reflect their intentions.

Many people take an introductory programming course in parallel with a physical computing course. If you’ve done some web-based user interface programming in JavaScript, you’re in good shape. Likewise, if you’ve learned Java, Processing, C, C++, Python, Ruby, or most any other programming language, you’ll have enough of the basics necessary to get going.

You don’t need any prior background in electronics for this course. You’ll learn just enough in this class to connect a variety of sensors and actuators to a microcontroller so that you can realize your ideas.

This isn’t primarily an electronics course or a programming course or a design course. Just as there are complementary courses that go more into depth in programming, there are also complementary classes that go more into depth in electronics. This course is a broad overview of techniques used in physical interaction design.